
Toolbars, tray, and floating controls
Tools can be moved, stacked, or hidden. When a feature is missing, check tool groups and layout settings first. Hiding a button does not remove the feature.
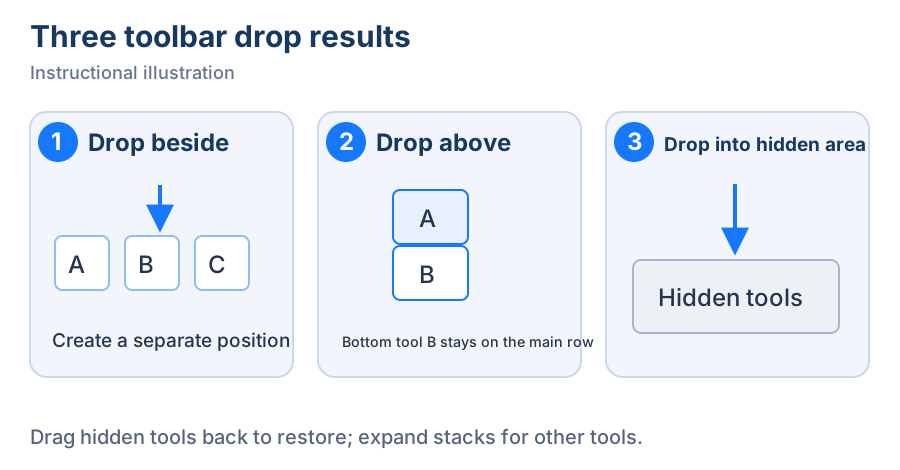
Instructional illustration. ① Side by side, ② stacked, ③ hidden. The bottom tool in a stack appears on the main row.
Find the relevant toolbar editor
Reorder, stack, hide, and restore
- Find the toolbar preview in its settings section. Drag a tool beside another tool and release at the insertion indicator. It receives its own position.
- Drag a tool above another and release to form a stack. The bottom tool remains on the main toolbar row; expand the group to choose other tools. Keep frequent actions at the bottom or in their own column for direct access.
- Drag an infrequently used action into the hidden-tools area. Its preview position changes. Drag it back into the preview to restore it.
- Reopen the actual screenshot, pinned-window, or recording toolbar. Hover over groups to inspect expanded actions and confirm frequent tools remain accessible.
Each drop commits that layout; there is no additional Save button. Drag a tool back to reverse a mistake, or use Reset for the current section. The confirmation names the section being reset; Cancel keeps the current layout. Each toolbar has its own saved layout and reset scope. Available tools still depend on the platform and features included in Full or Mini.
Separators have their own positions in annotation, pinned, and recording layouts; recording duration also occupies a separate position. These cannot be stacked like ordinary actions. To restore the full layout, use that toolbar section's reset and read the confirmation first.
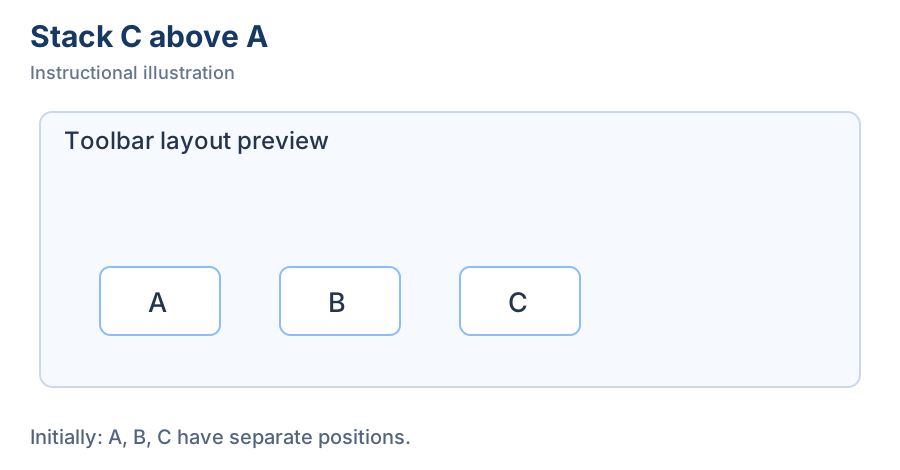
1. Choose the tool — Find tool C in the toolbar preview to place it inside a group.
- — Find tool C in the toolbar preview to place it inside a group.
- — Drop C above A. Dropping beside it creates a separate position instead.
- — A remains on the main row after release. Expand the group to choose C.
Annotation selection, remembered tools, and color presets
Open Settings → Screenshots → Annotation tools, change the settings for your drawing habits, then create a new annotation to check:
Stroke color presets and Fill color presets in the same section control quick colors in the style bar. Click a preset, choose a new color, then inspect that tool's quick colors. This does not recolor every canvas object. See annotation basics for new-object versus selected-object styles.
Tray icon and click actions
Open Settings → Tray & floating toolbar → Tray:
- Enable tray display and find the icon in the system tray or macOS menu bar. When hidden, the main window and configured shortcuts remain usable.
- Choose a bundled style under Icon. To use a PNG/ICO file, click Browse under Custom icon. A valid custom image takes precedence; an invalid file falls back to the selected bundled icon. Canceling the chooser keeps the previous path. Clear the custom path to return to the bundled icon.
- Choose a left-click action in the tray settings, including capture, copy, pinning, main window, history, pinned-window management, settings, or no action. Both Windows and macOS support this setting. Windows also has a separate middle-click action. New configurations default to capture for left click and pinning for Windows middle click; macOS does not show the same middle-click configuration.
- Select actions to include in the tray menu, then inspect the real menu's order and groups. Global-shortcut toggles, history, and window groups depend on your configuration.
Configure Dark theme icon and Dark theme custom icon separately for dark appearance. A valid dark custom image takes precedence. To return to the regular settings, clear the dark custom path and choose Use regular icon settings. Selecting a dedicated dark bundled icon stops using the regular custom image. Switch to dark appearance to check it, then back to light to check the regular settings.
On macOS, Let macOS control tray icon color uses the image's transparency as its shape and ignores its original colors. Turn this off to preserve a custom image's colors. This is separate from a custom tray-menu background skin; see appearance for background images.
Desktop floating toolbar
Enable Show toolbar in the floating-toolbar section, set Toolbar opacity, and edit its tools as described above. This opacity applies while the pointer is away. Hover over the icon or expanded toolbar to make it fully opaque, then move away to check the configured effect. Keep common capture, recognition, and pinning actions easy to reach, and avoid opacity so low that the toolbar becomes hard to find.
For a missing action, inspect stacked groups, then restore it from hidden tools. For a missing entire toolbar, check its main display switch. Screen-edge auto-hiding of the recording toolbar is separate: change it under Settings → Screen recording → Interaction, and hover over the edge control to restore it.
Continue with shortcuts and mouse actions or recording controls.