
Arrows
Use arrows to point at buttons, explain directions or connect related shapes. Snow Shot provides Straight, Curve and Elbow arrows. Start and end symbols are independently configurable.
First capture a region to show the toolbar, or open a picture in Image editing. All operations below use an editable canvas; copying or saving exports the final image including arrows.
Complete your first arrow
- Click Arrow in the screenshot toolbar. Hover to read icon names; expand its group if needed. The style toolbar changes to arrow controls.
- Choose Straight arrow, a color that contrasts with the background and an appropriate arrow width.
- Hold the left mouse button at the start and drag toward the target. Inspect the path preview and release at the endpoint to finish.
- To correct it, switch to Select elements and click the arrow. Drag the endpoint handles to move its start or end.
- Deselect and check that it does not cover text. Choose Copy to clipboard and paste into another app, or Save as file and choose a path.
Hold Shift while drawing straight or curved arrows to constrain the current segment direction, useful for horizontal, vertical and diagonal connections. Inspect the preview while dragging. Elbow arrows have orthogonal routing and do not use the same angle constraint.
1 / 5 Prepare: select Arrow in the annotation toolbar, then choose a curved arrow in its style bar.
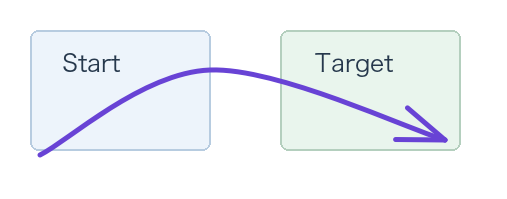
A completed curved arrow over a text example.
Choose a path type
To change an existing arrow’s type, choose Arrow, click that arrow and confirm its handles appear before changing the arrow style. Select elements shows general selection actions rather than the full arrow style toolbar. After switching back to Arrow, select the object again. With nothing selected, style settings affect subsequent arrows. See Annotation basics.
Create a multipoint path with successive clicks
Straight and curved arrows also support point-by-point creation:
- Click the start without dragging. Moving the mouse previews a connection to the pointer.
- Click the next position to fix a point. Continue moving and clicking to add more points.
- Double-click the final position, or right-click once enough points exist to form the path. Right-click keeps only points already fixed by clicks; it does not add the preview endpoint currently following the pointer.
- To discard the unfinished path while keeping other annotations, click Select elements, then return to Arrow and draw again. In screenshot capture, the default Esc cancels the whole capture. In the image editor, Esc can discard the unfinished path.
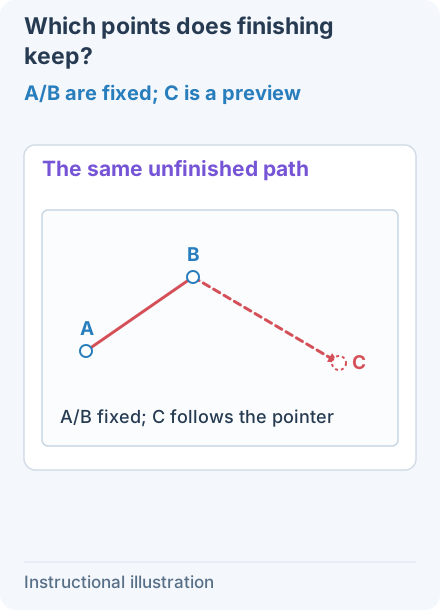
1. A/B are fixed; C is a preview — With a straight/curved arrow or Line, click A and B, then move to C without clicking. C is only the preview endpoint; dashes distinguish it in this illustration.
- — With a straight/curved arrow or Line, click A and B, then move to C without clicking. C is only the preview endpoint; dashes distinguish it in this illustration.
- — Right-click from frame 1. The result contains only A and B. C was not added; its gray mark is only a comparison reference here. In screenshot capture, right-click inside the selection.
- — Start again from the draft in frame 1 and double-click C. C is fixed before completion, so the result passes through A, B and C. Begin this comparison from frame 1 rather than the already finished path in frame 2.
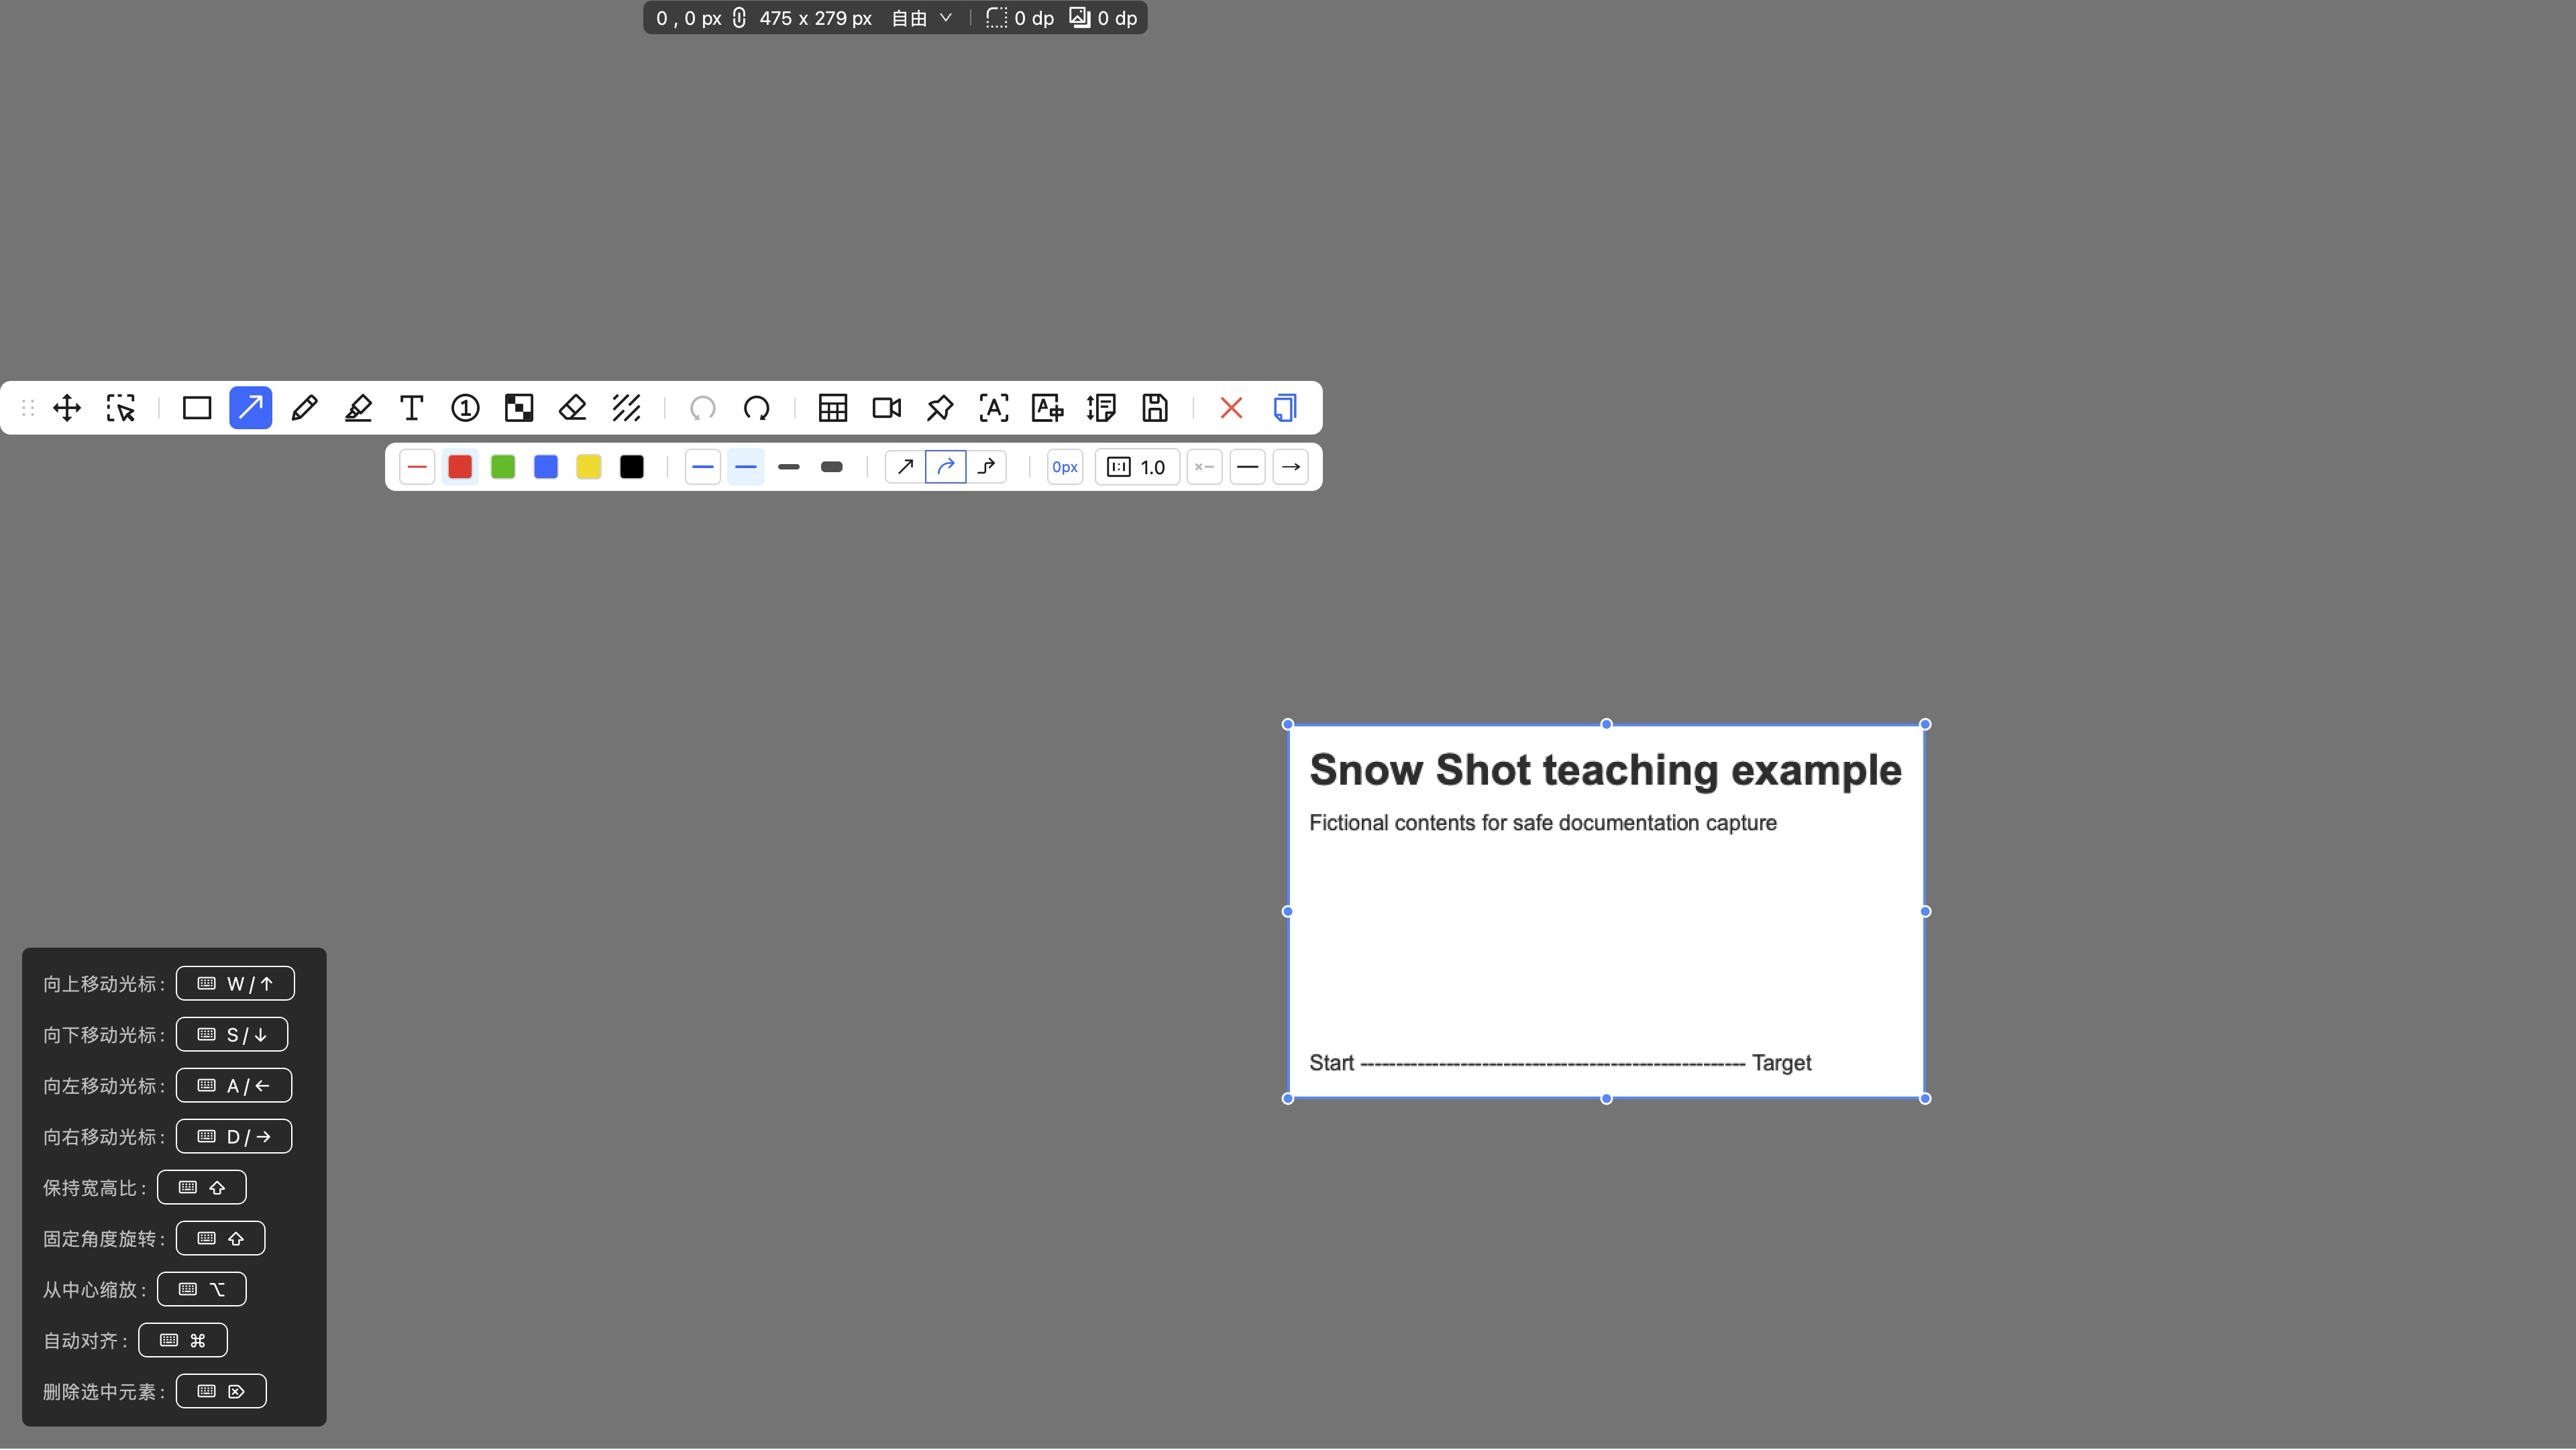
1. Prepare Curve mode — Curve arrow is selected over an example image; no new arrow has been drawn yet.
- — Curve arrow is selected over an example image; no new arrow has been drawn yet.
- — Click the start and middle position once each. The unfinished path still previews as the pointer moves.
- — Double-click the endpoint to finish. Then select the arrow with Select elements to reveal its three path controls.
The red arrow is in the white canvas at lower right. On a phone, use “Open full-size illustration” to inspect its points and path.
For an elbow arrow, click once at the start and once at the end. The second click finishes it; successive clicks do not add bends. Select the finished arrow and drag its editable segments to reroute it.
The second click finishes an elbow arrow
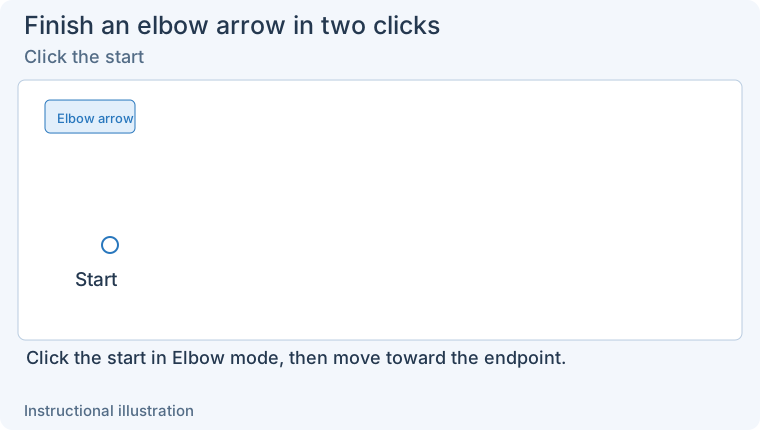
1. Click the start — In Elbow mode, click the start on empty canvas, then move the pointer toward the intended endpoint.
- — In Elbow mode, click the start on empty canvas, then move the pointer toward the intended endpoint.
- — Move without adding more bends. The orthogonal route previews toward the current endpoint.
- — Click the endpoint to finish immediately. Edit the route afterward using its segments.
Start, end and shaft
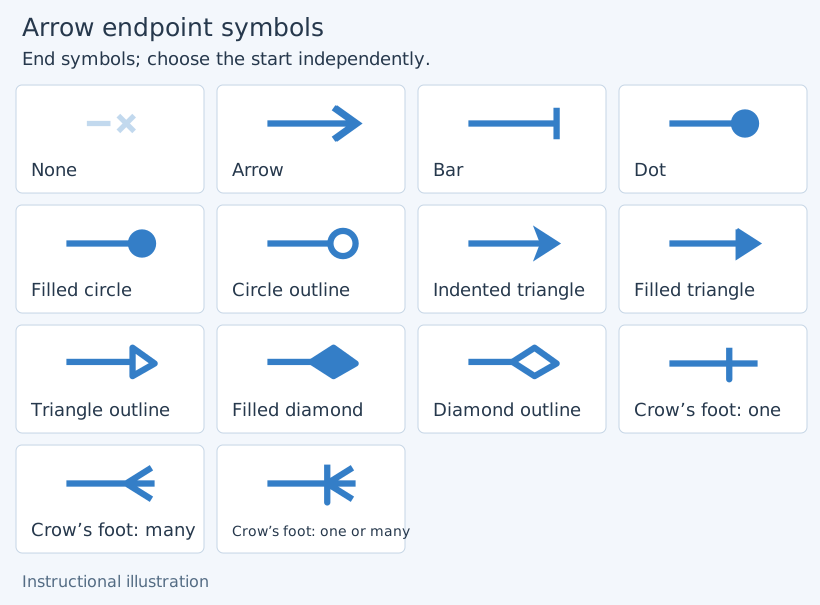
Compare the end symbols below; the start end has corresponding directions. Enlarge the endpoint reference.
Open Start arrowhead and End arrowhead independently. An arrowhead only at the end indicates one-way direction; arrowheads at both ends indicate a bidirectional relationship. Choose None to remove a symbol.
Options include a normal arrow, bar, dot, filled circle, outlined circle, indented triangle, filled/outlined triangles, filled/outlined diamonds and three crow’s-foot symbols. Use the icon and hover tooltip, then check the preview for the intended relationship.
Arrow shaft type offers Plain and Tapered. Tapered shafts work with normal, triangle, outlined-triangle and indented-triangle arrowheads. Switch to Plain before selecting other symbols. If a combination is unavailable, check shaft/endpoint compatibility.
Arrowhead scale controls symbol size relative to the shaft. Scroll its numeric control to adjust; click it to reset to 1.0. If the arrowhead covers the target, reduce this scale first. Reduce arrow width as well if the shaft is too thick.
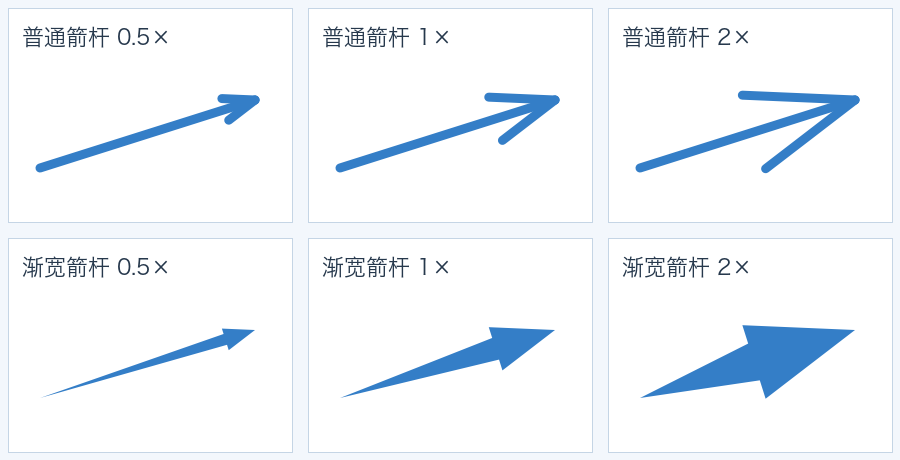
Compare Plain and Tapered shafts with endpoint scales 0.5, 1 and 2. Enlarge shaft and endpoint scales.
Color, line style and outline
- Arrow color changes shaft and endpoint color. The color popup also contains line patterns and drawing styles.
- Arrow width controls main thickness. Thin strokes suit dense interfaces; thicker arrows emphasize presentation targets.
- Solid, dashed, dotted distinguish relationship types without relying only on color.
- Architect, Artist, Cartoonist change the visual drawing style. Architect suits orderly engineering diagrams; the others produce a hand-drawn appearance.
- Arrow outline width / Arrow outline color add an outer border to separate the arrow from complex backgrounds. Width 0 draws none. A dark body with a thin light outline can work on light images.
Before editing an existing arrow’s style, switch to Arrow and click it. Watch both toolbar and object. If only new arrows change, the target is usually not selected.
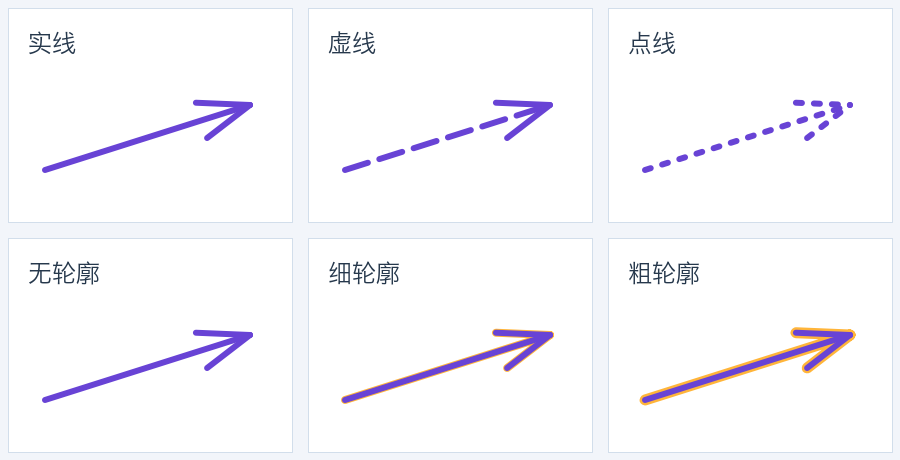
The top row compares line patterns; the bottom row compares outline widths. Enlarge the styles.
Continue editing after drawing
Choose Select elements, click the arrow, then use the appropriate control:
Drawing or moving an endpoint near a connectable shape can show snapping feedback. Confirm the connection in the preview. Once bound, moving the shape moves the arrow endpoint with it. To point precisely at image pixels, avoid shape edges that could bind accidentally.
Arrows can carry explanatory text. Choose Text, create text on the arrow, enter the content and press Esc to commit and finish input. Existing text can be re-edited. See Text for multiple lines, backgrounds and font settings.
Keep the connection and label attached
Snap an endpoint to a shape, then move that shape with Select elements. For a label, choose Text, click the shaft’s middle and type. Press Esc to commit and finish input before switching tools.
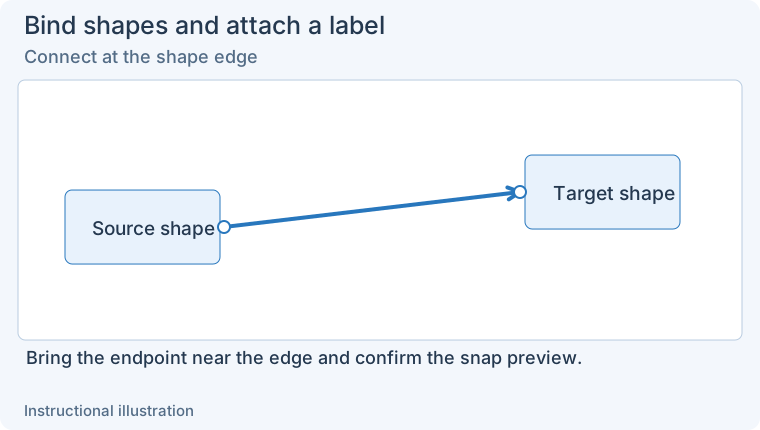
1. Connect at the shape edge — Bring the endpoint near the shape edge while drawing and confirm the snapping preview.
- — Bring the endpoint near the shape edge while drawing and confirm the snapping preview.
- — Move the right-hand shape. Its bound arrow endpoint follows, while the left connection remains.
- — Enter text for the selected arrow and type a short label. A caret represents active input here.
- — Finish input and move the shape again. The arrow and attached label update together; inspect the result before export.
Cancel, undo and export
Click Select elements to discard an unfinished path; Undo reverses an incorrect finished arrow. In screenshot capture, the default Esc cancels the whole capture, with a confirmation dialog first if enabled. In the image editor, Esc can discard the unfinished path while keeping completed annotations. Select one arrow with Select elements, then press Delete / Backspace or choose Delete selected elements. Keep other annotations rather than recapturing everything.
See Annotation basics: Undo, redo and cancel for the cancellation comparison.
Finish adjustments before export. Copy to clipboard and Save as file produce an image. Keep the editing window open to retain editable arrows. To duplicate an arrow’s style and position within the canvas, use Copy selected elements, which differs from copying the final screenshot.
Common questions
A segment keeps following the mouse after a click. Point-by-point drawing is still active. Add points and double-click to finish. To discard it, switch to Select elements, then return to Arrow and draw by dragging.
Clicks do not add bends in Elbow mode. Elbow arrows use two endpoints and orthogonal routing. Select the finished arrow and edit its segments rather than using multipoint creation.
The endpoint symbol cannot combine with the shaft. Tapered shafts support limited symbols. Switch to Plain first.
Editing a curve moves the whole arrow. Select it, then drag a control rather than the line body. Zoom in to distinguish endpoints and the middle point.
Continue with Lines, Shapes, Element editing or Saving and output.
Find the control point handles
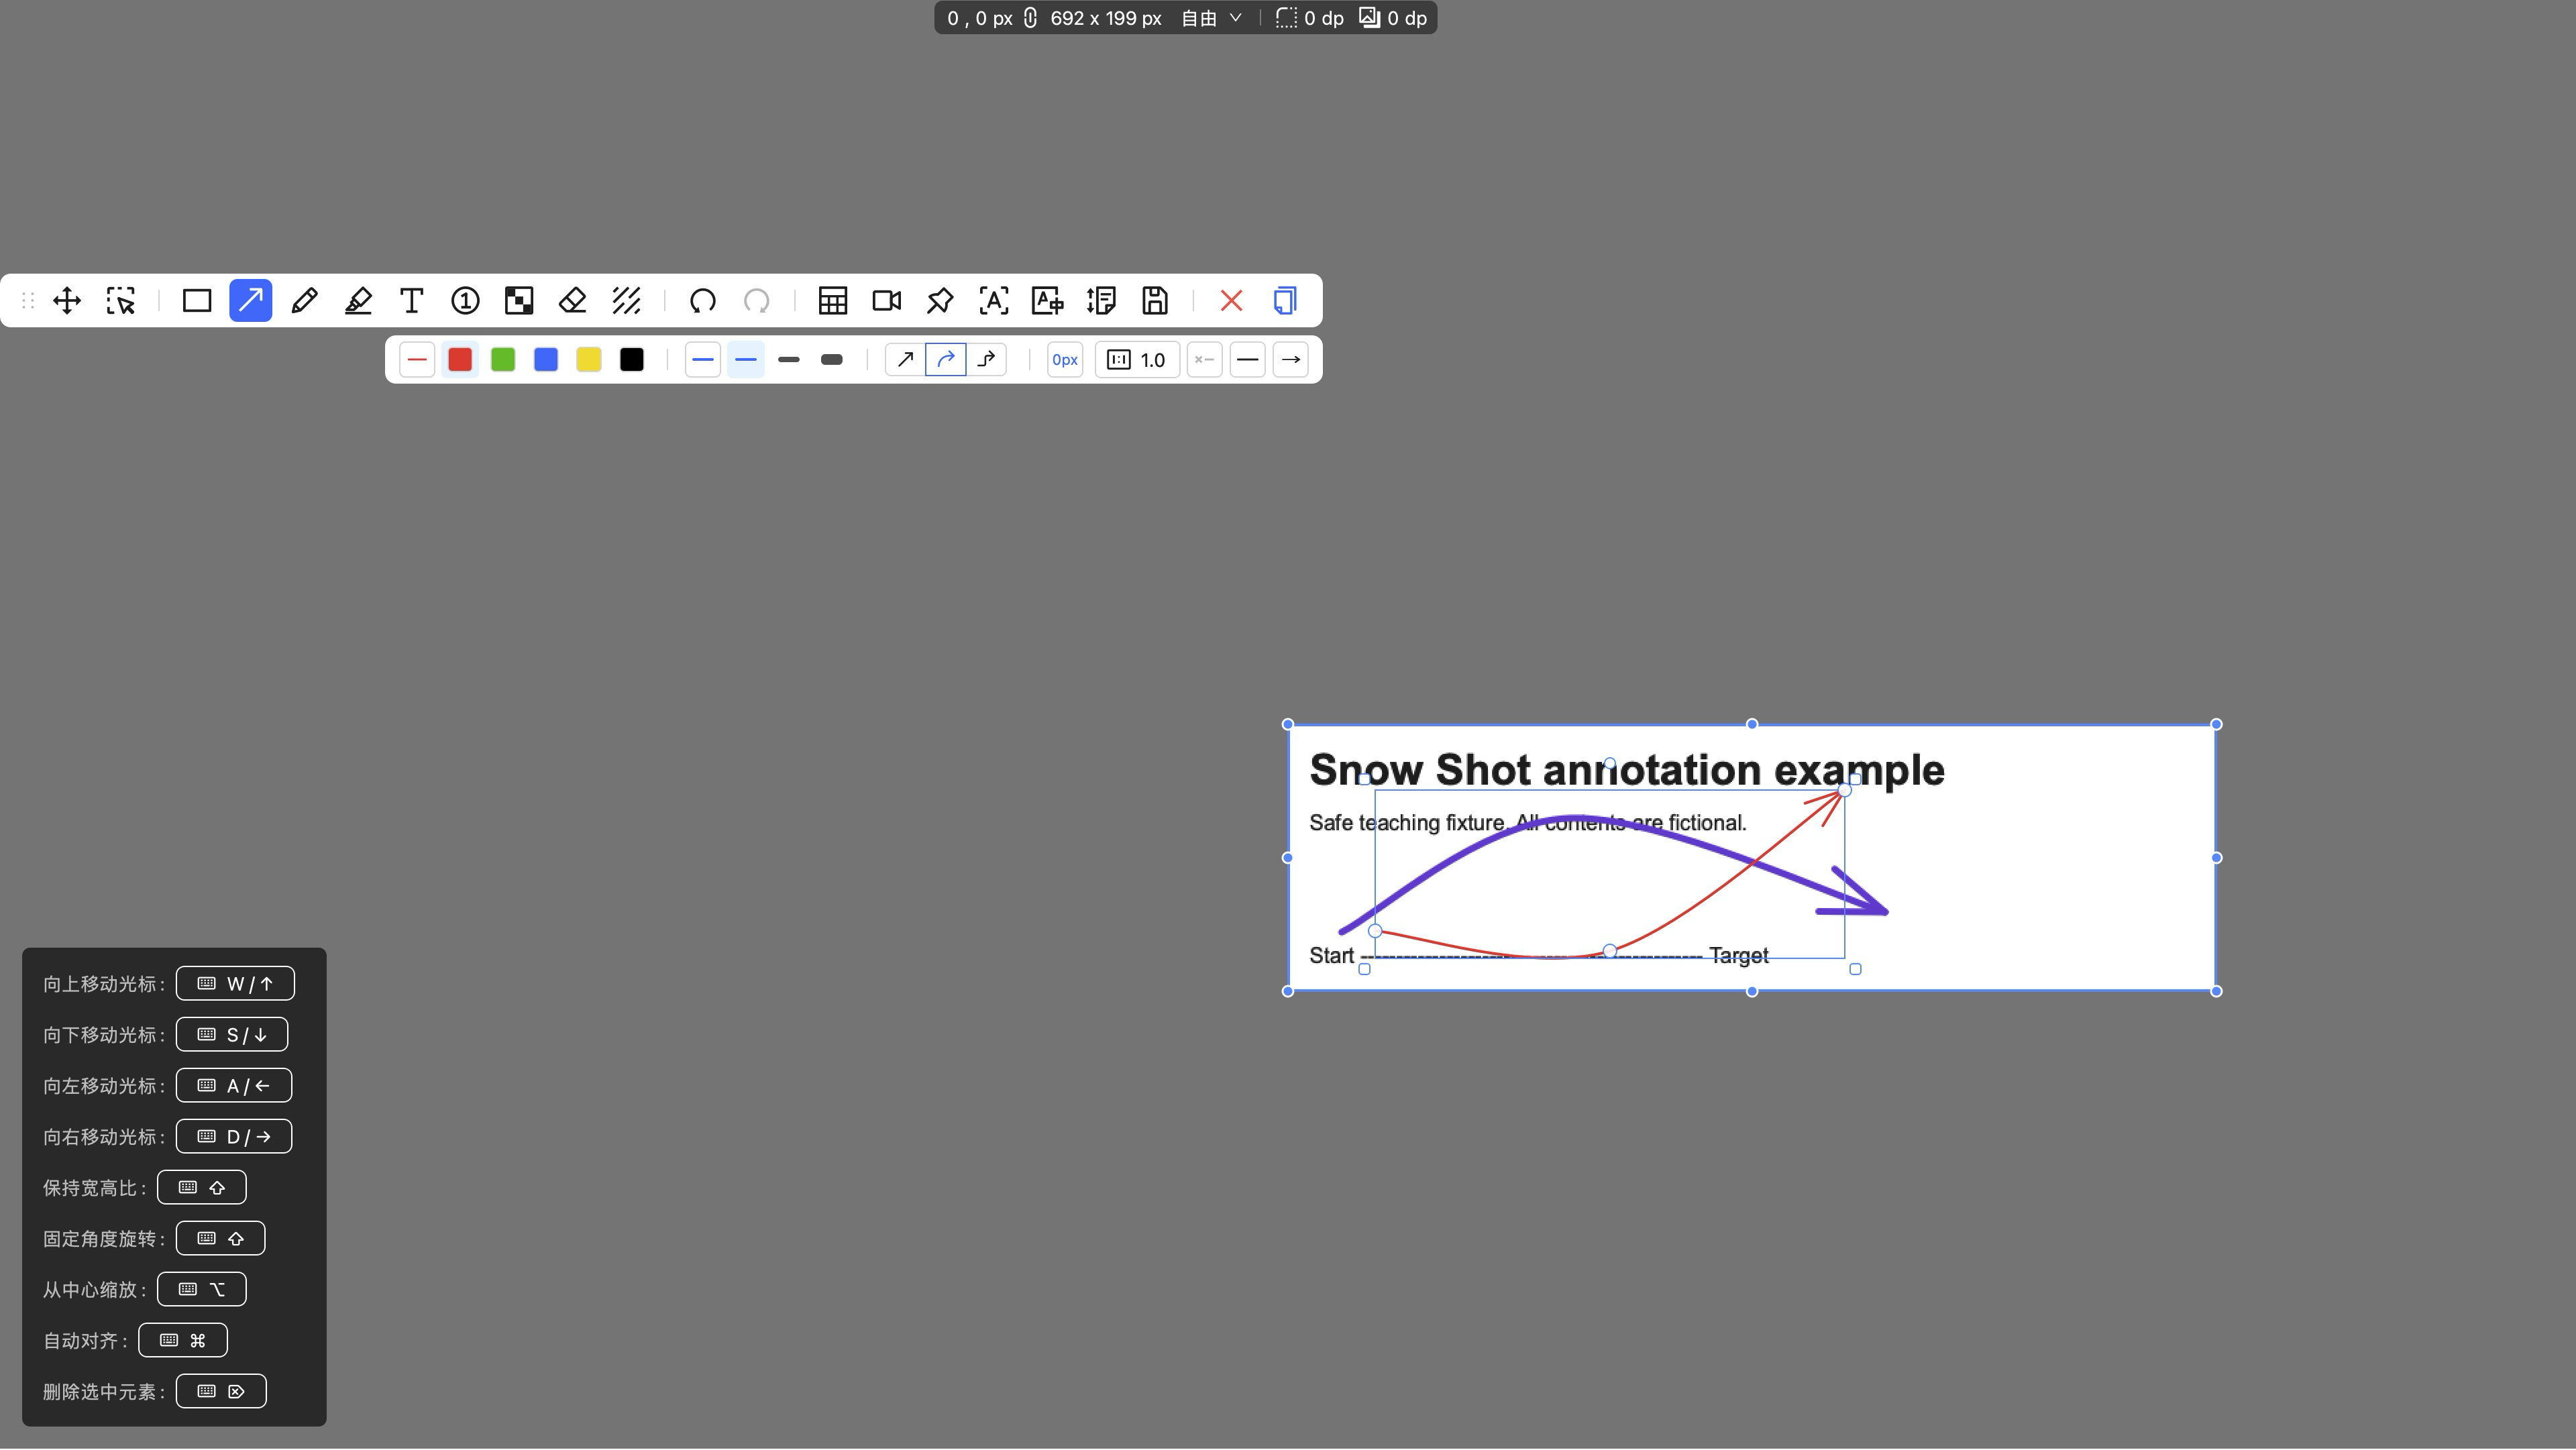
The thin red arrow was created by dragging, then curved by moving its middle control. The thick purple arrow is part of the background image.