
Filters, mosaic and automatic filtering
Filters process local image areas. Mosaic and Gaussian blur commonly obscure detail; grayscale, inversion, emboss and brightness change appearance. Check the screenshot region, then choose Filter in the annotation toolbar.
Apply mosaic to an area
- Expand Filter, choose Rectangle filter and select Mosaic in Filter type.
- Hold the left mouse button at one corner, drag to the opposite corner, inspect the coverage and release.
- Keep Rectangle filter active and click the created region to select it. Adjust Filter intensity and check whether detail remains recognizable. To change blending with the source, switch to Select elements, select the filter again and adjust Opacity in the general selection toolbar.
- Use Select elements and handles to correct its boundaries, leaving no unintended gaps.
- Deselect, enlarge the view to inspect edges and output bounds, then copy or save.
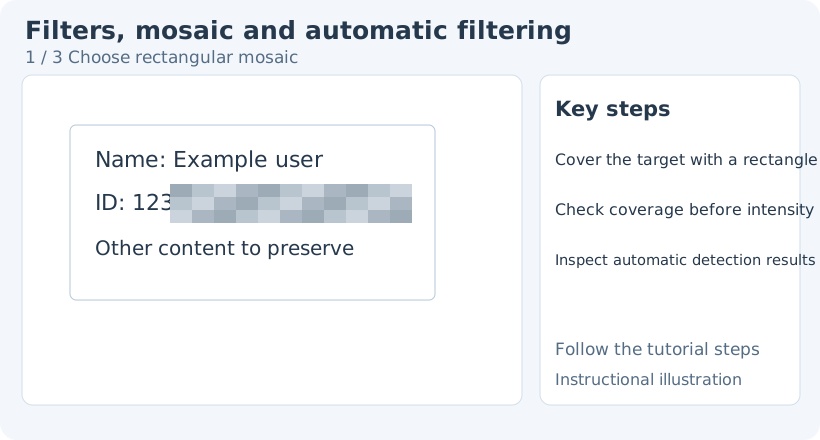
1. Choose rectangular mosaic
To change an existing rectangle or brush filter’s type or intensity, return to its matching tool and select the range: left-click a rectangle, or right-click a brush range while idle by default. Select elements provides general transforms, stacking and opacity. Switching drawing tools clears the previous selection, so select the object again.
Rectangle and brush ranges
Rectangle filter suits regular areas. Brush filter follows the pointer while the mouse button is held and finishes on release. Set brush width first: narrow for small details, wider for larger areas.
Return to the matching Rectangle or Brush filter tool to edit an existing filter. Click rectangle filters with the left button. Brush filter disables left-click quick selection by default: right-click an existing range while idle, or remove it from Tools that forbid quick selection of same-type elements before using left-click selection. Select the object before changing type or intensity. For opacity, switch to Select elements and select the range again. Add a stroke for missed coverage; if too much was covered, undo and redraw with a narrower brush. Use Rectangle filter for precise right-angle boundaries.
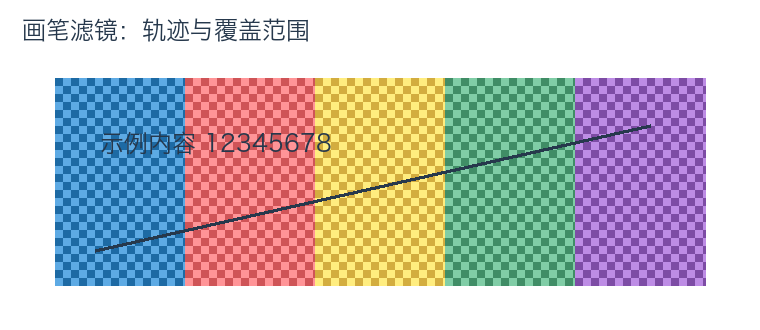
1. Set type and width first — Choose Brush filter, Mosaic and an appropriate width. This example uses width 44 pixels and intensity 80%.
- — Choose Brush filter, Mosaic and an appropriate width. This example uses width 44 pixels and intensity 80%.
- — Hold the left mouse button and move. Only the traced area is affected; this frame shows the first part of the trajectory.
- — Inspect the brush boundary and any exposed characters. Add a stroke or Undo as needed.
The first frame is unfiltered; the next two show how coverage expands along the brush path.
Compare effects
Remove source-image content with Smart erase
- With an image loaded in the editable canvas, choose Filter → Rectangle filter → Filter type → Smart erase. Brush filter also provides it for irregular ranges; Auto filter does not.
- Drag a small range over the source content, then release. The red translucent overlay during dragging previews the range; reconstruction starts after release. You do not need to select source-image text with Select elements.
- Wait until the red overlay is replaced by the reconstructed image, then check removal and edge continuity. Filter intensity is disabled for this type; increasing intensity cannot improve reconstruction.
- If unsuitable, undo and redraw a smaller range with more surrounding background available. Moving or resizing an existing range recomputes the result. Wait for completion before copying or saving.
Inspect complex text, repeated textures and large areas individually. A persistent red overlay is not a completed result. Undo and retry a smaller area, or use manual mosaic or blur coverage.
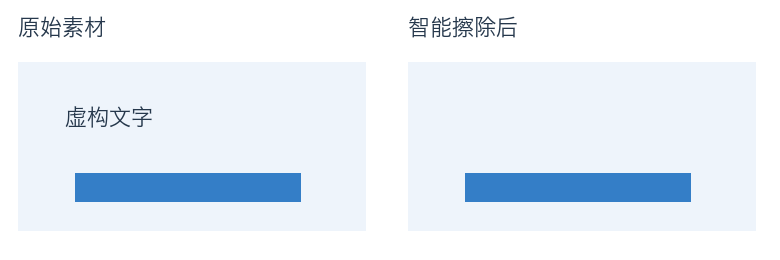
Only the right-hand text is removed; the left text and both blue bars remain. A small area on a simple background is a useful first attempt. Inspect complex textures separately. Enlarge the result.
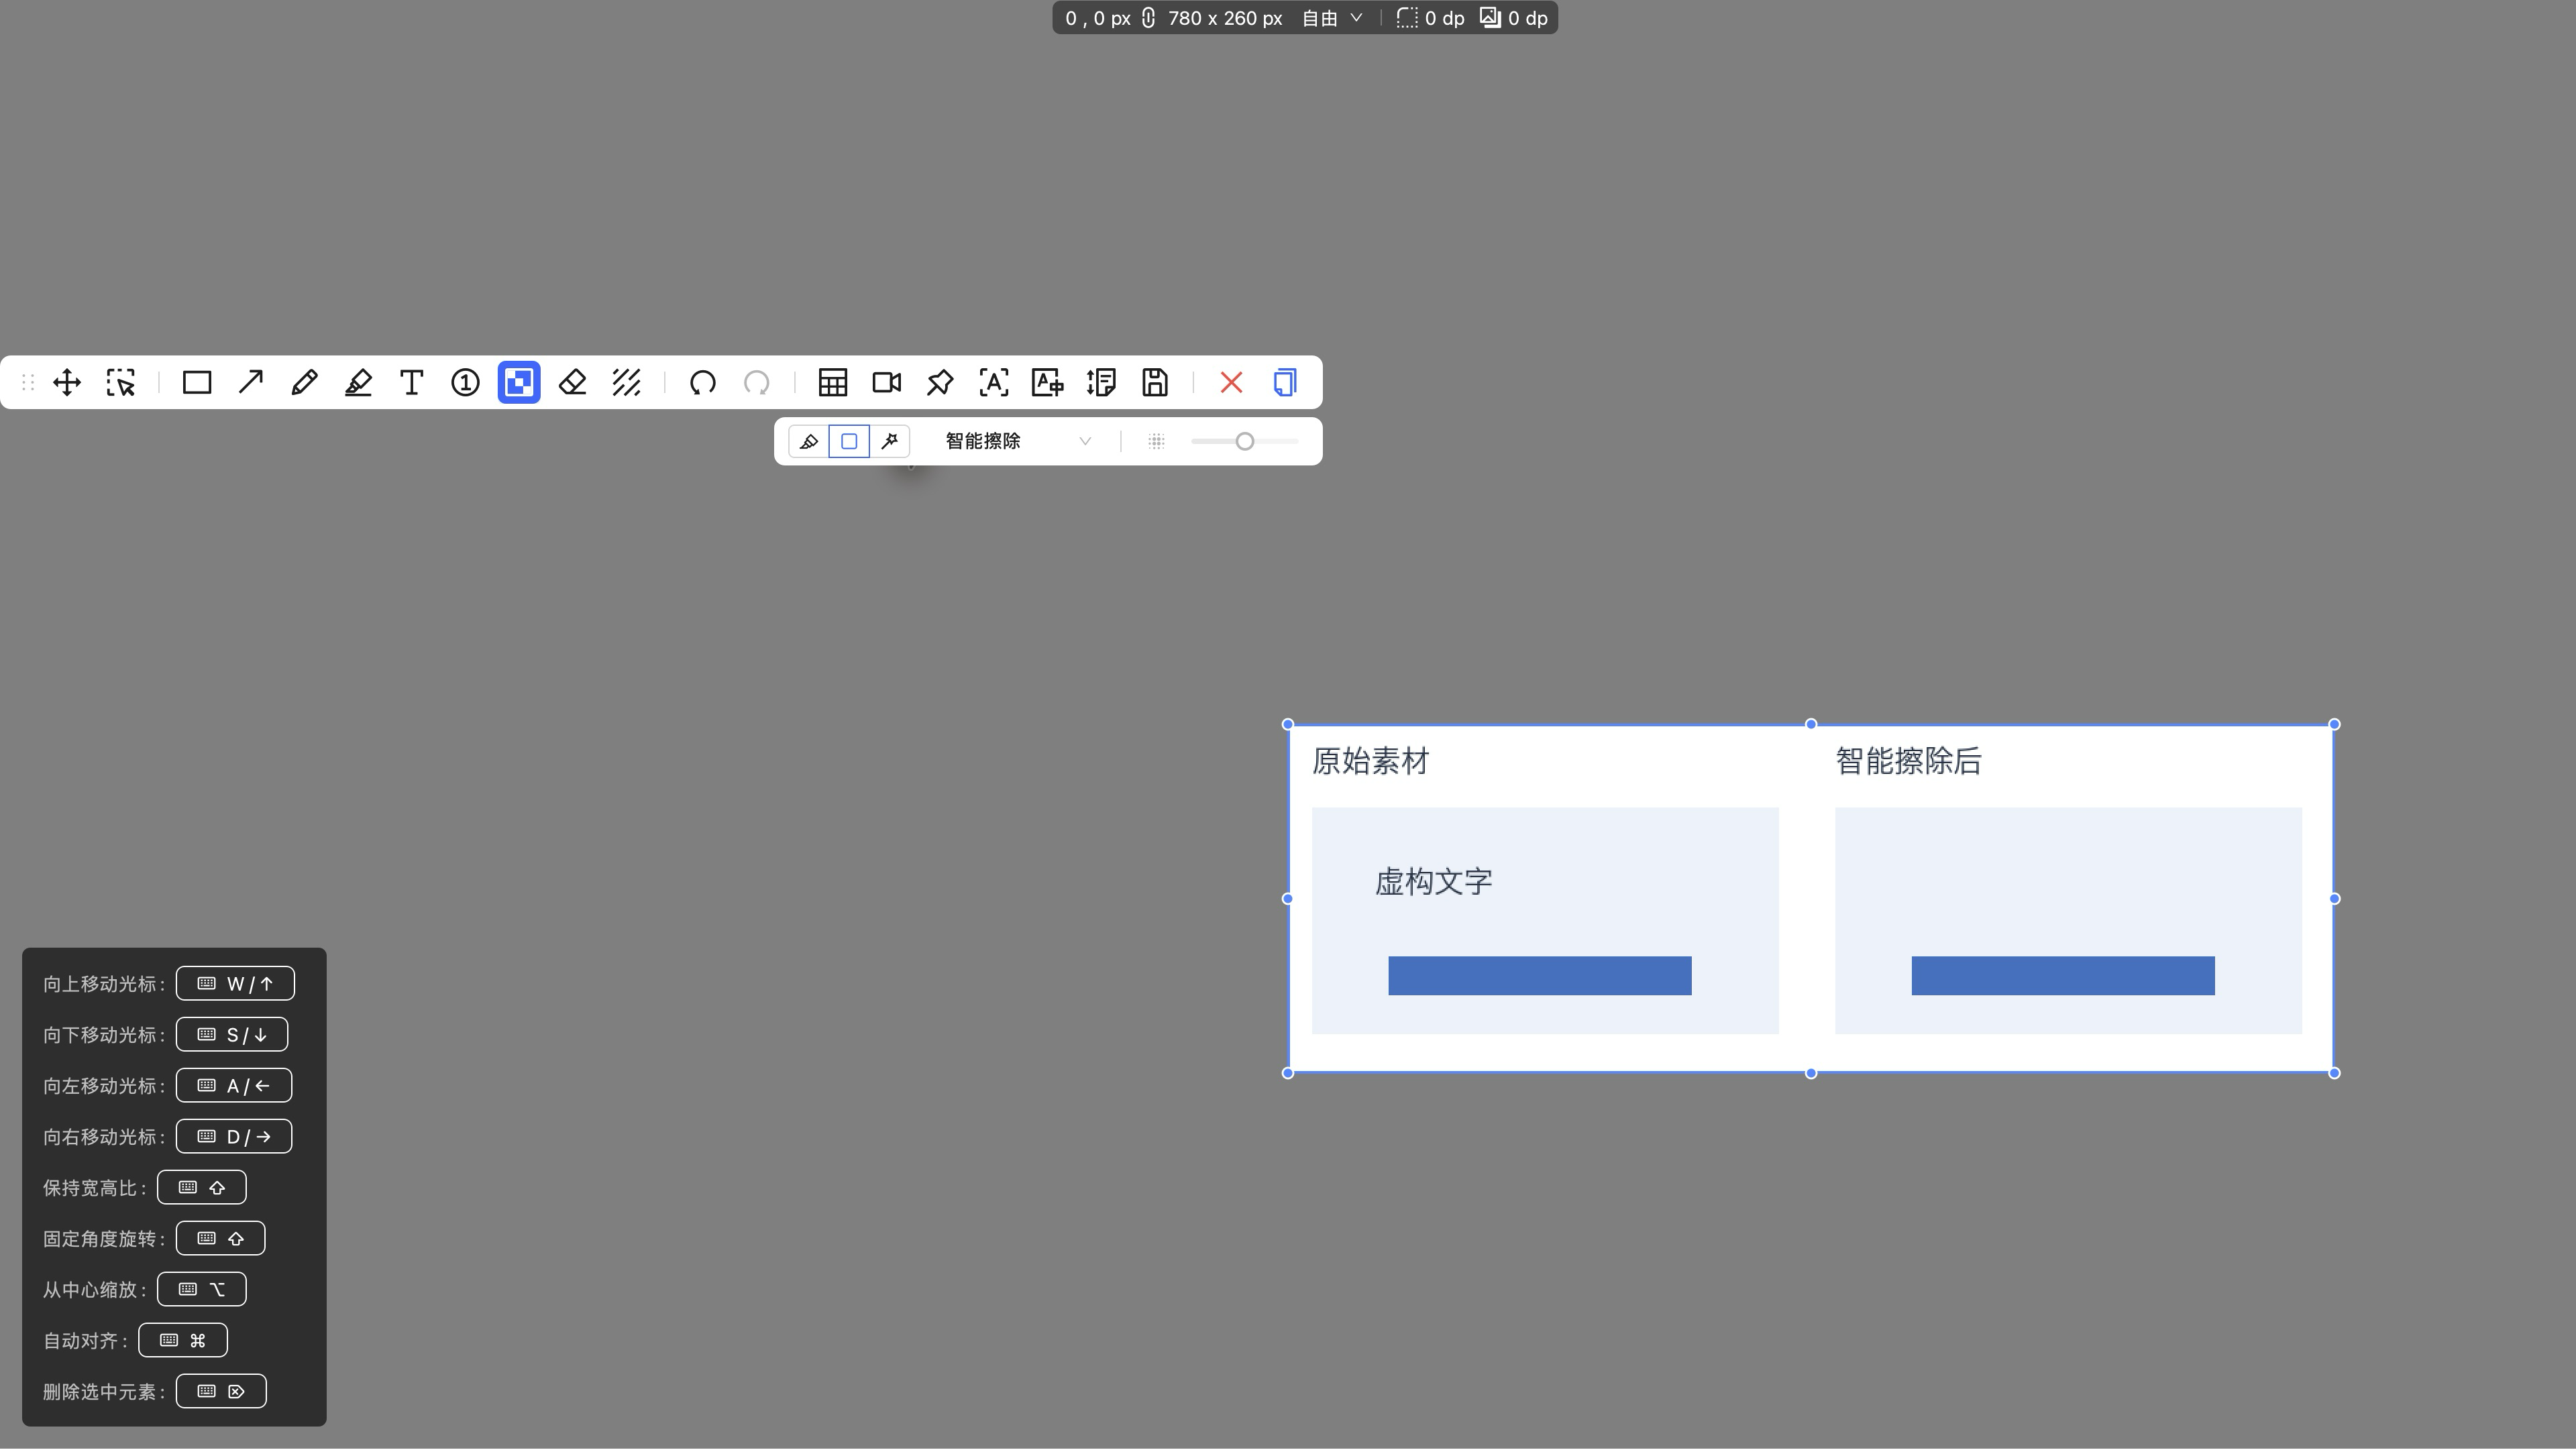
Smart erase is selected and intensity is disabled. The completed image is at lower right. enlarge the original interface image.
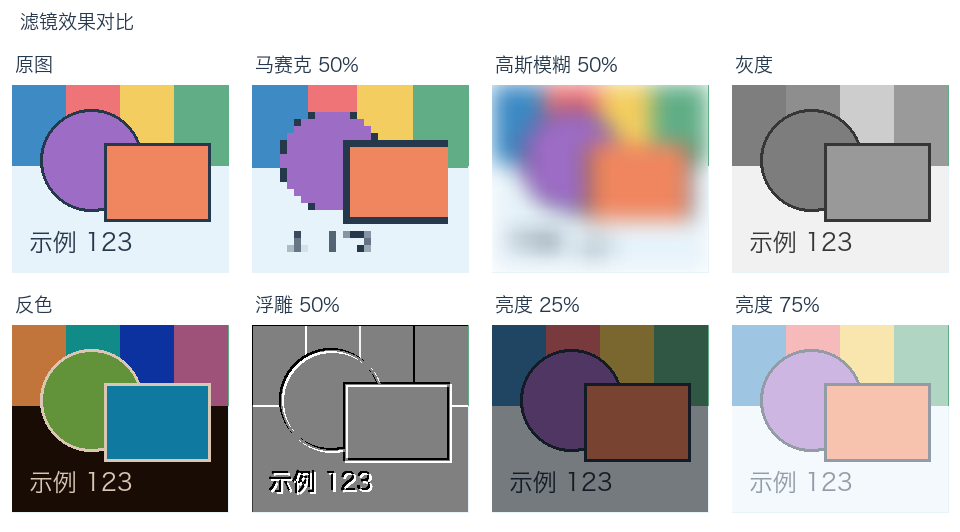
Compare different filters on the same content and bounds. Enlarge the effects.
Intensity behaves differently for different filters
Higher mosaic intensity generally creates larger blocks; stronger Gaussian blur removes more detail. Grayscale and inversion do not change with the intensity slider. Adjust selected-object opacity to blend them with the original.
Brightness is unchanged at 50%, darker below it and lighter above it. Do not interpret 0% as no effect. Emboss intensity changes edge contrast.
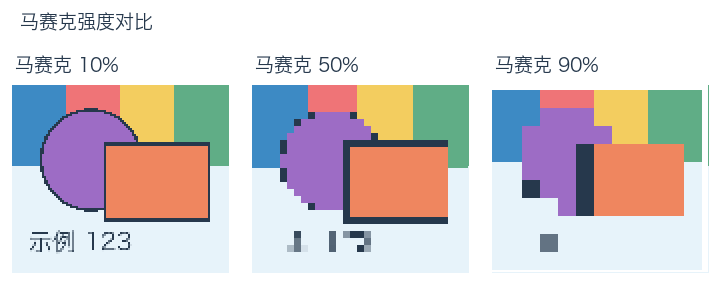
Compare 10%, 50% and 90% mosaic intensity on the same content. Enlarge the intensity comparison.
Detect regions, then fill
Auto filter detects image regions before you choose what to process, useful for handling text, avatars or image blocks in batches.
- With an image loaded, choose Auto filter. Wait for the scanning band to finish. Detected regions flash red briefly; move over content to inspect its range afterward.
- Choose filter type and intensity, then left-click a detected region and release to apply it. Clicking a region that already has the same filter type removes its effect; clicking after choosing a different type replaces it.
- For a whole category, open Fill regions and choose Text, Text in box, Image, Avatar, Icon, Message box or Text block. This applies the current type and intensity to that category. Adjust intensity and fill the same category again to update it.
- Inspect every area afterward. Use Rectangle or Brush filter for missed content; Undo unwanted effects.
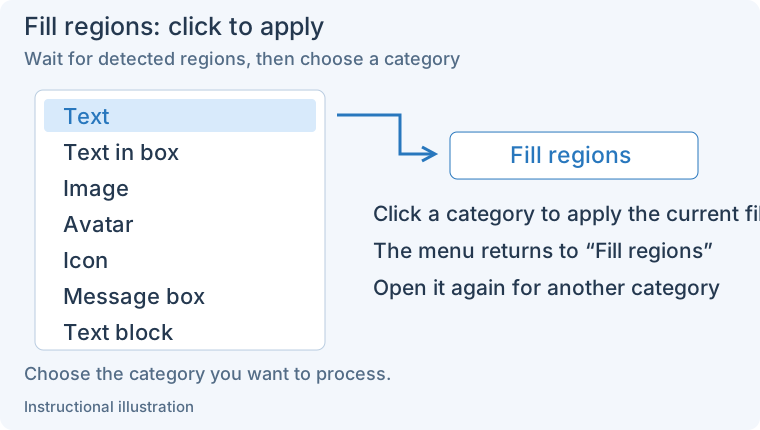
Choose one category to fill it immediately, then reopen the menu for another category. Enlarge the category menu.
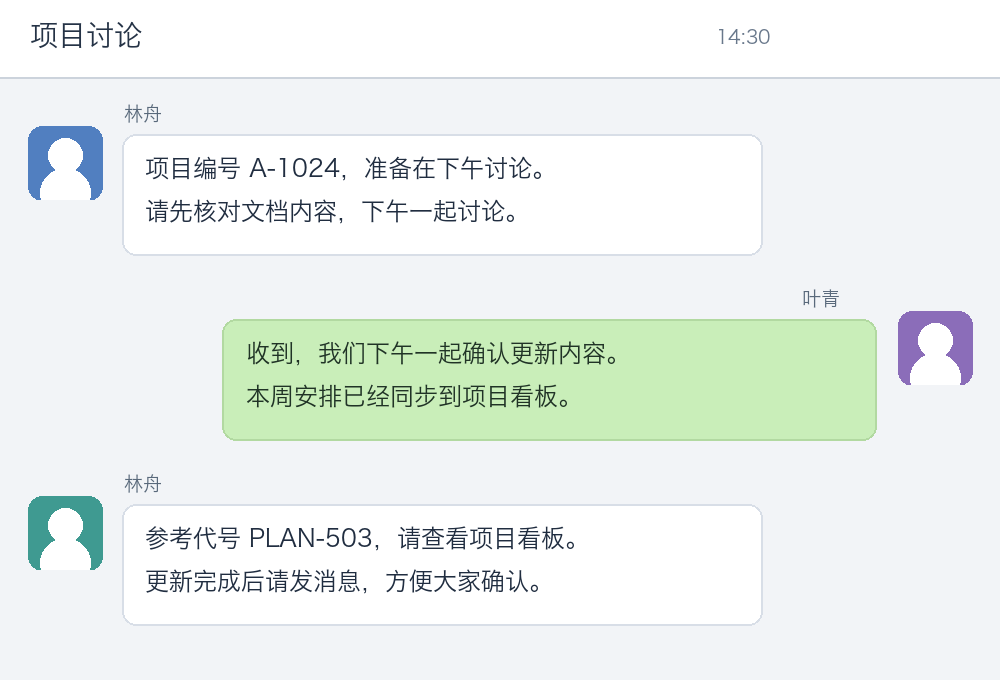
1. Before processing — Locate the text and avatars, then decide what you need to obscure.
- — Locate the text and avatars, then decide what you need to obscure.
- — Text and Text in box are filled with mosaic at 85% intensity.
Enlarge the result and check for readable text or unintentionally obscured avatars and shapes. Correct the coverage with Rectangle or Brush filter.
You can also hold the left button and drag a marquee. Detected regions intersecting it are affected; full containment is unnecessary. Automatic detection can miss sensitive information, so inspect every area. With no available regions, Fill regions is disabled; use manual ranges instead.
Retry detection after failure
If Region identification failed. Try auto filter again appears, confirm the image has loaded, switch to Rectangle filter, then back to Auto filter to start detection again. There is no separate Retry button. If it still fails, use manual ranges rather than only waiting for the category menu.
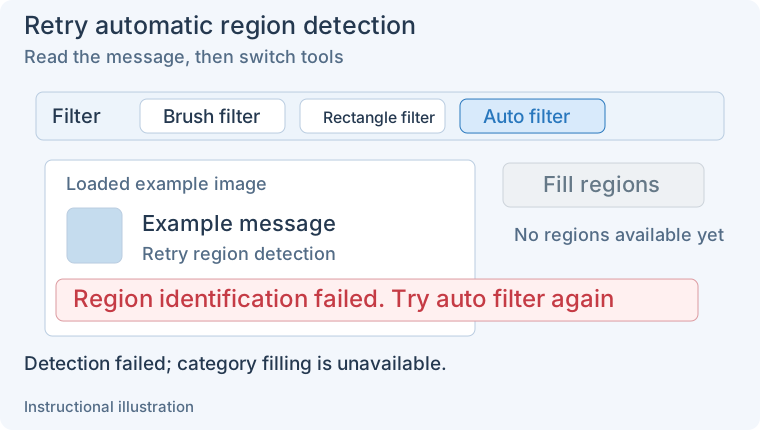
1. Identify the failure message — Read the failure message; category filling is not available yet.
- — Read the failure message; category filling is not available yet.
- — Choose Rectangle filter, then Auto filter. A failed attempt stores no region record, so re-entering starts detection again.
- — Wait while scanning. Fill only actual detected regions after completion; use manual ranges if detection still fails.
A blank image can finish normally with no regions. Retry after an error; use manual ranges when no suitable regions are found.
Inspect and correct the result
Intensity alone cannot fix missed edges. Correct coverage before adjusting the effect. Low opacity reveals the source beneath. For complete solid coverage, use a filled shape and inspect the exported image.
Editable filters can be undone or deleted. Reopening an exported picture gives flattened pixels. Related: Erasers · Shapes · Element editing.