
Copy, save, print, and share
After editing a screenshot or pinned image, copy it into another application, save a separate file, or use system printing and sharing. Check that the current selection or pinned image contains everything you want to output, including completed annotations.
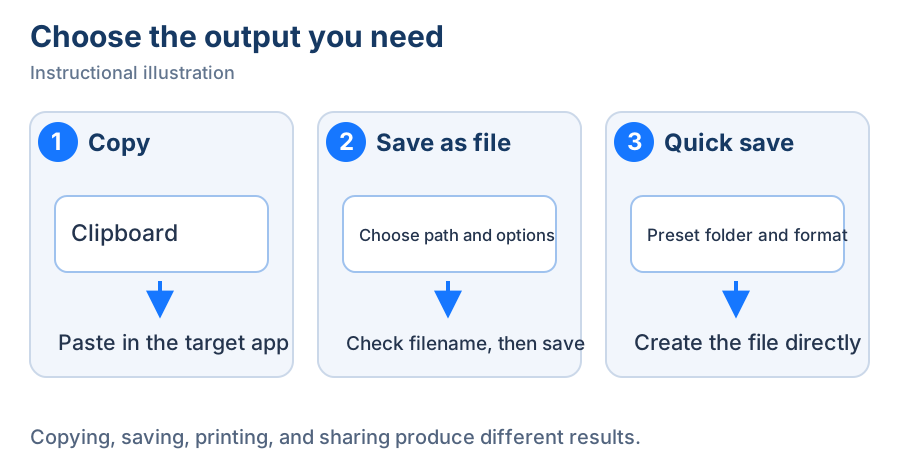
Instructional illustration. ① Paste elsewhere, ② choose this file's destination, ③ save directly using presets.
Copy an image or an image file
- After selecting and annotating a screenshot, click Copy to clipboard on the action toolbar. The capture closes and the image enters the clipboard. Paste into a chat, document, or image editor.
- Use the copy action in a pinned window to copy its current content. The destination application determines whether it accepts an image or file.
- To paste an image file into a file manager as well, enable Copy image file to clipboard under Settings → Export & storage → Image export. Subsequent copies provide both an image and an exported file, using the selected image format. To also keep a file in the image directory, enable the corresponding Auto-save after execution option or use Save as file.
Copy recording provides a recording file; see recording export. Copying recognized text and copying an image also produce different results. Choose the action for the content you need to paste.
Save a file and adjust output dimensions
- First choose either the system dialog or the Snow Shot dialog under Settings → Export & storage → Image export → Save as file dialog. Return to the screenshot or pinned-window action toolbar and click Save as file. The following controls describe the Snow Shot dialog.
- Choose a writable Save path and enter a File name. Directory shortcuts switch locations; add, edit, or remove frequently used paths. Removing a shortcut does not delete the directory.
- Under Image format, choose PNG, JPEG, BMP, WebP, JPEG XL, AVIF, TIFF, or PDF. Start with PNG to preserve screenshot text detail. Check recipient support before choosing formats such as JPEG XL or AVIF.
- In the dimensions area, choose Pixels or Percentage and enter width and height. Enable Lock aspect ratio to avoid stretching. Check the resized text and image proportions in the preview. This changes output dimensions without cropping image content.
- Quality, compression level, and lossless controls are shown or enabled only for supporting formats. Quality affects lossy detail; compression level mainly controls compression effort. It is not a universal image-quality switch for every format.
- Click Save. If a file already exists, read the Replace file confirmation. Cancel and rename to keep the old file, or replace it intentionally. Cancelling does not automatically switch to quick save.
Enable Show save result in image export settings to keep the Snow Shot save window showing the result after saving. The system save dialog has a different interface and different advanced options.
Quick save and automatic saving after actions
Quick save skips the destination prompt and uses the image directory, format, compression level, quality, and automatic filename format under Settings → Export & storage → Image export. Set the directory before first use, make a test, and locate the file in your file manager.
Auto-save after execution creates an additional file for selected actions. You can enable it independently for copying a screenshot, scrolling screenshot, pinned image, current monitor, or foreground window, and for pinning a screenshot. Select only the situations you need and check the preset directory afterwards. Clipboard content and the saved file are separate results.
Manual and automatic saving have separate filename formats. Use the variables described in the interface and inspect a generated result; variable expressions are not literal filenames. Recording directory and naming are configured separately in Video export on the same settings page.
Name files by time, application, or window
Mix ordinary text and variables in the filename field, for example SnowShot_{YYYY-MM-DD_HH-mm-ss}_{AN}. Saving replaces the date/time portion with the actual save time and {AN} with the available application name.
Image and video directories also support time, application, and window variables. Start with a valid absolute directory, then add variable-based subdirectories as needed. Characters unsuitable for paths are handled; an unavailable name may become Unknown. Test the settings and check both the generated filename and directory in your file manager.
Save PDF, print, and use AirDrop
For PDF, set PDF page size to Image size, Portrait A4, or Landscape A4. Save and inspect the layout in a PDF reader. To combine several images into a document, read image stitching first.
Click Print on the action toolbar and wait for the system print interface. Choose the printer and available page options, then submit, or cancel to return. Submission hands the job to the system; the printer and system queue determine when paper is printed. If the native interface is unavailable, an error appears. Save a file and print it from a system application instead.
On macOS, the action toolbar also offers AirDrop. Click it, wait for the system sharing interface, choose a receiving device, and accept on that device. Cancelling returns to the app; opening the sharing interface does not mean a transfer has finished. Windows does not offer this action.
For missing Print or AirDrop buttons, check tool groups and toolbar layout; actions may be stacked or hidden.
Saving problems
Choose another directory if the current one is not writable. Rename or explicitly replace for filename conflicts. Use a supported format if the destination app cannot open the file. For a missing file, distinguish Save as file from Quick save, then check the preset directory. If a copied file cannot be pasted, check the copy-image-file setting and the destination application's clipboard support.
Continue with screenshot history, cloud upload, or storage and backups.