
Full-screen canvas and laser pointer
The full-screen canvas overlays the screen for live explanations. It provides a transparent drawing layer: applications underneath continue running, while annotations belong to Snow Shot.
Start a screen explanation
- Enter Full-screen canvas in the main window’s Search function, select the result, then click the Full-screen canvas (enable/disable click-through) action row. A transparent canvas covers the screen containing the pointer at launch, with an independent floating toolbar. To start on a chosen monitor, assign this action a global shortcut, move the pointer to that monitor, then invoke it.
- Choose a brush, shape, arrow, or text tool and draw on screen. Mouse input initially goes to the canvas for creating and editing marks.
- Use Select elements to move, delete, or change existing annotations. General rules match screenshot annotation.
- Enable Click-through on the toolbar to operate slides, pages, or software underneath.
- Disable click-through when finished operating the source and continue annotating.
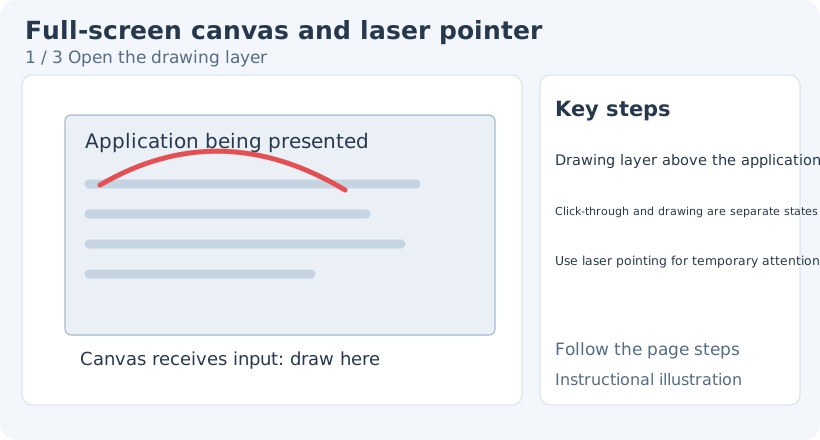
1. Open the drawing layer — Draw annotations on the transparent overlay.
- — Draw annotations on the transparent overlay.
- — Enable click-through before clicking the application below.
- — Use a temporary pointer effect and exit when the explanation is complete.
Click-through state
With click-through off, the pointer draws or selects canvas objects. With it on, the drawing layer does not receive that mouse input and clicks go to the application underneath. The toolbar remains the entry for returning to drawing.
The toolbar may fade while idle in click-through mode and return when pointed at. If annotations suddenly cannot be selected, check click-through first, then confirm Select elements is active.
Invoking Full-screen canvas (enable/disable click-through) again toggles the existing canvas’s input state. It does not open a second canvas or clear annotations. Assign a global shortcut to return to drawing even while the underlying app has focus.
Existing annotations do not understand or track objects in the underlying application. Recheck their positions after scrolling or changing slides; delete outdated marks and draw again as needed.
Zoom and pan the annotation layer
Disable click-through, finish text input and color sampling, and put the pointer over the canvas. These gestures move or scale only Snow Shot’s annotation layer, not the application underneath. Marks previously aligned with screen content can become misaligned.
Follow the same screen content through all four gestures below. The example uses one upward mouse-wheel notch; trackpads and different scroll amounts may produce different distances. Watch A and B stay fixed while the purple ring and arrow change. Zoom and wheel panning take effect immediately; release the modifiers to continue annotating. To adjust back, scroll the other way or drag the middle button in the opposite direction, then check alignment with the underlying content again.
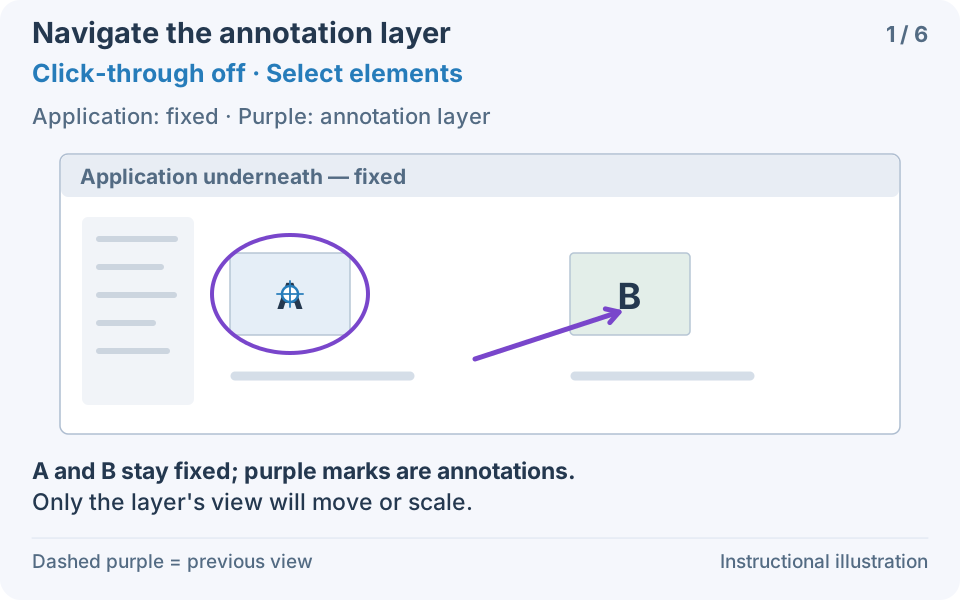
1. Prepare the drawing layer — Disable click-through, finish text editing and color sampling, then choose Select elements. The purple ring and arrow are annotations; A and B belong to the application underneath.
- — Disable click-through, finish text editing and color sampling, then choose Select elements. The purple ring and arrow are annotations; A and B belong to the application underneath.
- — Point at the center of A, hold Ctrl on Windows or Command on macOS, and scroll up. This example changes 100% to about 113%. The annotation point under the pointer stays fixed while the layer scales around it.
- — Release the zoom modifier, hold Shift, and scroll. Here the ring and arrow both move 40 px right; A and B stay fixed.
- — Hold Ctrl+Shift on Windows or Command+Shift on macOS and scroll. Here the whole layer moves 40 px down, with no change to its scale or the application underneath.
- — Hold only the middle mouse button and drag from the dashed mouse position 60 px left and 30 px up. Both annotations follow the pointer.
- — Release the middle button to finish. The layer stays at its new position; no annotation is added and the underlying application remains fixed.
While creating an angle or with an angle object selected, the wheel may adjust that angle. Finish that operation and switch to Select elements before navigating the whole layer.
Use the laser pointer
Toggle Laser pointer on the toolbar to show a pointing effect as the pointer moves. It briefly directs attention without accumulating permanent strokes. Toggle it again to disable.
Use brushes, arrows, or text for persistent explanations, and the laser pointer for temporary attention. If the laser effect is unavailable, turn it off and continue with ordinary annotation.
Tools and limits
The full-screen canvas reuses many drawing and element-editing tools, but does not provide Auto filter or Magnifier. Capture a static image first for those tools.
The canvas covers the current screen for viewing and editing; it is not itself a saved screenshot. Use screenshot capture and saving for a finished image, or Screen recording for continuous demonstration video.
Clear and exit
Marquee-select unwanted marks with Select elements and click Delete selected elements; Undo restores accidental deletion. Click Exit on the toolbar, or press Esc while the canvas has focus and no text input or color sampling is active. During text input, Esc commits and finishes typing first; during color sampling it cancels sampling first. With click-through enabled, the underlying app may have focus, so use the toolbar’s Exit. Exiting discards the annotation layer; capture or record it first if needed.
The mouse keeps operating underlying windows: click-through is enabled; disable it on the toolbar.
Underlying windows cannot be clicked: the canvas is receiving input; enable click-through first.
Related: Annotation basics, Brushes, and Element editing.