
Annotation basics and shared styles
After selecting a screenshot region, use shapes, arrows, brushes and text to annotate the current image. Finish the capture selection first. To work on an existing picture, start with Image editing.
Understand the two toolbars
The main toolbar selects tools and output actions, including shapes, arrows, text, Undo and Copy to clipboard. The style toolbar changes with the current tool and selection, showing colors, widths, fonts and other parameters. Icon positions are customizable: expand the group and hover over an icon to read its name.
- With a screenshot region selected, click Shape. The style toolbar shows shape, stroke width, stroke color and fill controls.
- Drag a rectangle on the canvas and release the left mouse button. The annotation remains editable.
- Keep Shape active and click the rectangle’s border. Once handles appear, change its stroke color in the style toolbar; the existing rectangle changes.
- Click empty space to deselect, then return to Shape. Settings now apply to objects you draw next.
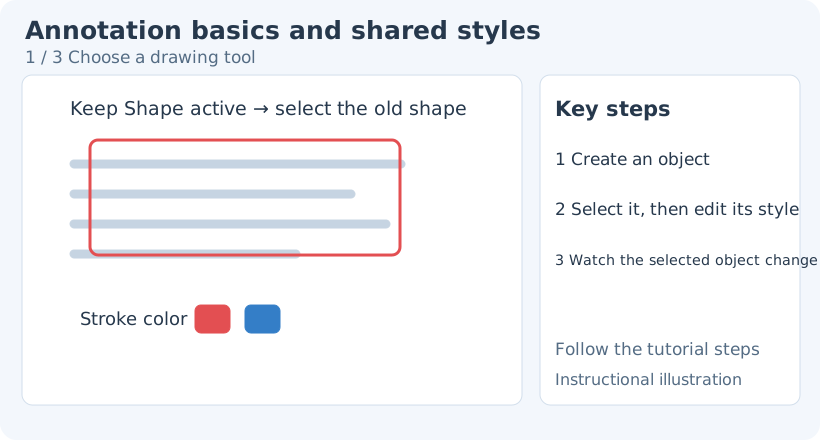
1. Choose a drawing tool
Edit with the matching tool
Select elements provides stacking, alignment, duplication, deletion and opacity. For a tool-specific property such as color, width or arrow type, switch to the matching drawing tool and click the existing object. Switching tools clears the previous selection.
Within the matching tool, selection determines the target. With nothing selected, settings apply to newly created annotations. With objects selected, applicable properties change those objects. Selecting objects with different values may show a “mixed” value.
If changing a color has no visible effect, check that the target has a selection outline. If you accidentally change a whole group, undo, click empty space to clear the selection, then select only the intended object.
Colors, strokes and fills
Available parameters differ by tool: text has font and alignment, filters have intensity, and distance annotations have units. Follow the individual tutorial; shape-fill settings do not apply to every tool.
Drawing and selection preferences
Search Settings for these options to change selection behavior:
- Automatically select newly created elements: select a new object while keeping the current drawing tool.
- Tools excluded from automatic selection: exclude tools from that behavior, useful for drawing several strokes in a row.
- Tools that forbid quick selection of same-type elements: tools in this list do not select an old object with a left click, avoiding accidental selection while drawing. Brush and brush filter are included by default. To edit them by clicking with the same tool, remove the relevant tool from this list first, then return to the canvas.
- Remember last used tool: reuse the last tool for a new screenshot or pinned-image annotation session; when disabled, start with Move. Check the active tool before drawing.
- Keep group main buttons visible: keep the group’s first button visible; otherwise the most recently used member can appear. Expand the group if a tool seems missing.
- Stroke color presets / Fill color presets: customize commonly used swatches, then choose them in the corresponding color panel.
These settings do not turn the general Select elements toolbar into an arrow or text style toolbar. For specific styles, use “switch to the matching tool → select the object again → adjust the property.” See Annotation settings for the complete settings entry points.
Undo, redo and cancel
Click Undo to reverse the last completed edit, or Redo to restore the last undone action. Recover accidental deletion, movement or style changes without taking another screenshot.
During text input, Esc commits the text and ends input. In screenshot annotation mode, the default Esc cancels the whole capture, with a confirmation dialog first if enabled; it does not merely discard the current annotation draft. To discard an unfinished arrow or line while keeping other annotations, switch to Select elements, then return to the drawing tool. In the image editor, Esc can discard an unfinished arrow or line. Use Undo for edits to completed objects.
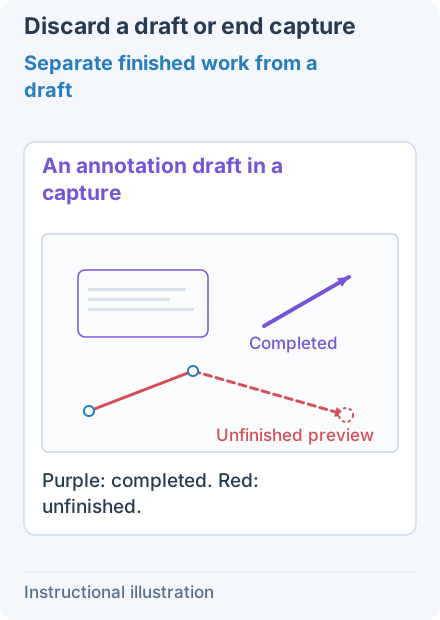
1. Separate finished work from a draft — Complete the purple annotations, then start a red click-by-click path without finishing it. Dashes distinguish the pointer preview in this illustration. The next three frames compare different actions from this same state.
- — Complete the purple annotations, then start a red click-by-click path without finishing it. Dashes distinguish the pointer preview in this illustration. The next three frames compare different actions from this same state.
- — From frame 1, click Select elements. The red draft disappears, the purple annotations remain, and capture stays open. Return to Arrow or Line to draw again.
- — Compare again from the capture draft in frame 1: press the default Esc. If asked, confirm exit. Capture closes instead of leaving you on the canvas with only the draft removed.
- — Create the same path draft in the image editor, with no text input, crop or color picker handling keys. Esc removes the draft while completed annotations remain and the editor stays open.
Check and export
Deselect objects and check edges, small text and covered regions. Copy to clipboard exports the whole result; Save as file lets you choose a path. Copy selected elements in the selection toolbar duplicates annotations within the canvas; it does not send the final screenshot to another app.
Exported pictures combine shapes, text and background pixels. Keep the current editing window open if you need editable objects; reopening the exported image cannot restore each annotation’s control points.
Continue with Shapes, Arrows, Text or Selecting and editing elements.