
Magnifiers and local details
A magnifier displays a small part of an image nearby. It has a source region and an enlarged lens, which can move independently. This preserves context more conveniently than cropping out a separate picture.
Start with a source region
- Choose Magnifier and select Rectangle or another shape.
- Hold the left mouse button over the detail, drag out its source region and release.
- The canvas displays the source outline and enlarged lens. Move the lens to empty space so it does not cover the original detail.
- Adjust Magnification and check that the complete detail is visible.
- Choose a connection that makes the relationship clear, then copy or save.
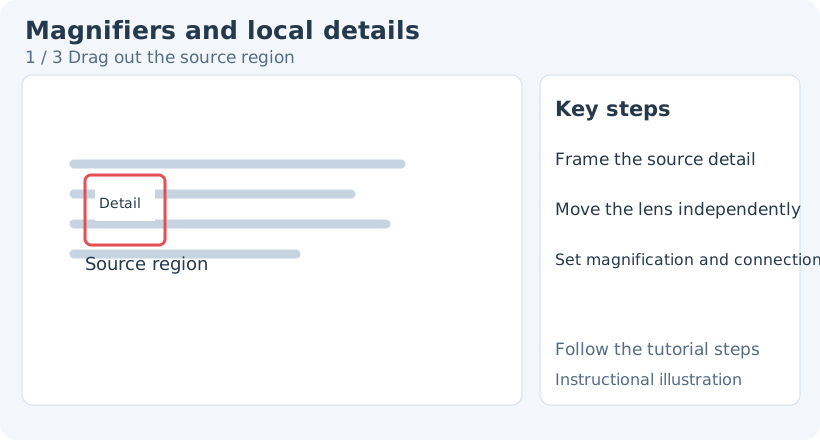
1. Drag out the source region
To change an existing object’s tool-specific style, switch back to Magnifier, then click the object to select it again. Select elements provides general transforms, stacking and opacity. Switching drawing tools clears the previous selection, so select the object again.
Edit source and lens separately
Select the magnifier with Select elements. Moving the source changes the sampled location and lens content. Moving the lens changes where the detail is presented without changing its source. Check the lens and connection after resizing the source.
If the displayed detail changes, you moved the source. If only its display frame moves, you moved the lens. Try a small movement to confirm the target before positioning it finally.
Magnification, shape and border
Scroll the Magnification numeric control to adjust between 1.0 and 10.0. Higher values make pixels more apparent but cannot add missing information; a blurred source may remain blurred.
Shapes include Rectangle, Ellipse and Diamond. Rectangles support rounded corners. Stroke color and width control the frame. Keep Source region outline enabled when it helps locate the boundary. If hidden, use the connection to keep the source understandable.
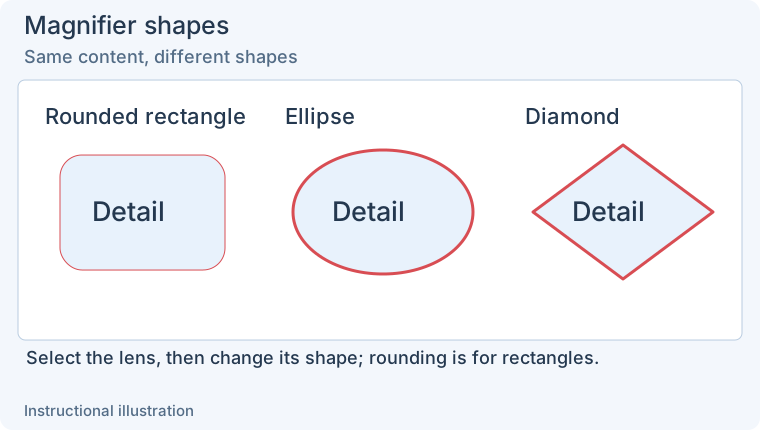
Select the magnifier before changing shape. Rectangle rounding changes its boundary; ellipses and diamonds are separate shapes. Enlarge the comparison.
Three connection modes
Check that a changed connection does not cross other text. Set leader endpoint symbols and scale in their controls. Use simple connections when they already communicate the relationship clearly.
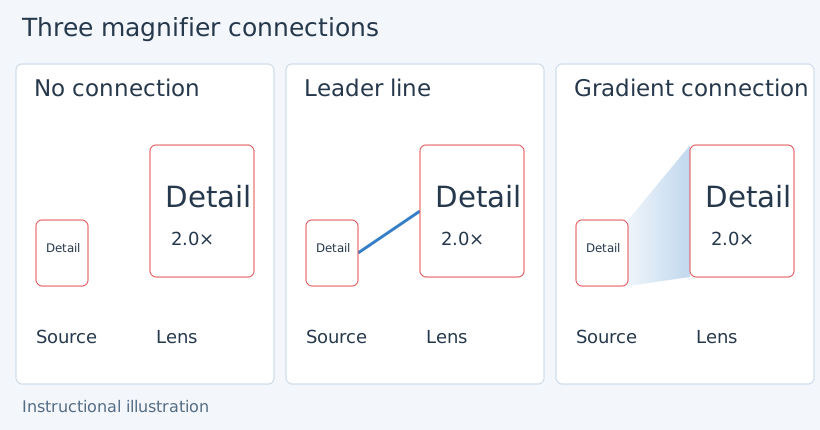
All three examples have the same content; lens width and height are both twice the source dimensions. Only the connection changes. Enlarge the connections.
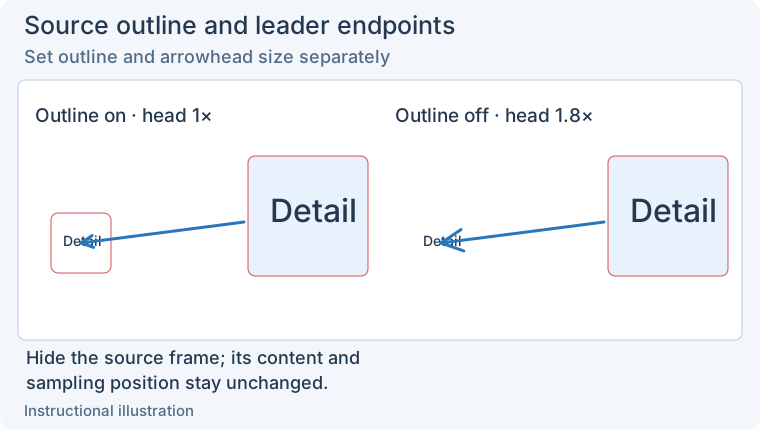
The leader points from the lens edge to the source center. Hiding the source outline only hides its frame; content and sampling position remain. Enlarge the comparison.
Troubleshooting
The wrong detail appears: move the source region, not just the lens, and check the source bounds.
The enlargement looks blurred: source pixels are limited. Lower magnification or capture a clearer original.
Magnifier is missing from the fullscreen canvas: that canvas does not provide this tool. Use screenshot or image-editing mode instead.
Select and delete a magnifier, or Undo accidental changes. Related: Spotlight · Arrows · Image editing.