
Storage, cleanup, configuration backups, and logs
Application data, independently exported images/videos, and configuration backups have different purposes. Check storage health and the source of its usage before migrating, cleaning, or backing it up.
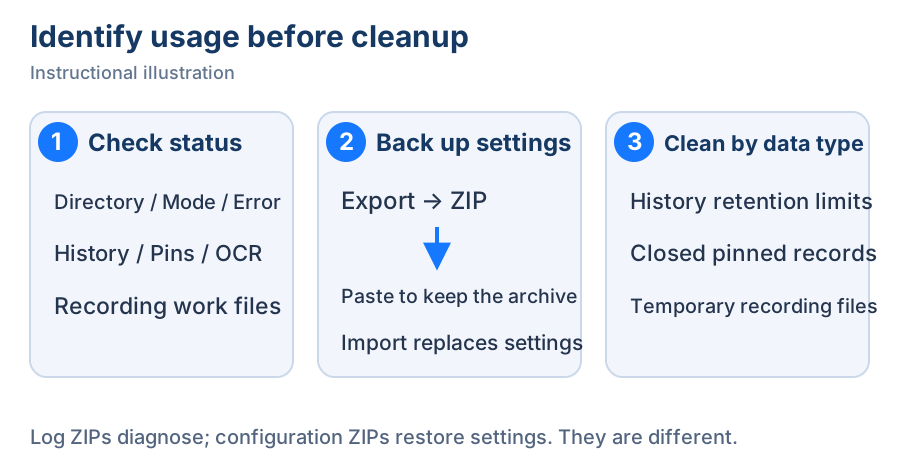
Instructional illustration. ① Check usage and errors, ② back up settings, ③ clean the relevant data type.
Inspect usage and storage location
- Open Settings → Export & storage → Data storage and inspect the data directory, mode, total usage, and latest error.
- Refresh to inspect screenshot history, pinned content, OCR, recording temporary files, and other usage separately. Identify the growing data type before cleaning it.
- Check diagnostics, log location, and log status. Preserve this information when investigating a permission or write error.
Modes can include application data, custom directory, portable, read-only (newer configuration), or unavailable. If configuration comes from a newer version, use a compatible version rather than manually editing the database to bypass protection.
Change the data directory on Windows
- Under Settings → Export & storage → Data storage, find Storage directory and click Choose directory. Enter the target path in the dialog's Storage directory field or browse for a writable location. Canceling the folder chooser keeps the current input.
- Check Migrate existing data, which starts enabled. When enabled, existing data is migrated and verified files are removed from the old directory after switching. When disabled, only settings and open pinned windows are copied; screenshot history and closed-pin history stay in the old directory. Choose according to the data you need; disabling migration is not a complete data move.
- Click OK, then read the target path and data scope in Change storage directory?. Only Proceed starts the switch. Cancel in this confirmation leaves the active directory unchanged; you can adjust the directory or cancel the entire directory-settings window.
- Wait for migration, verification, and switching to finish. Cancel and Close are unavailable during processing. Do not run cleanup or move data manually at the same time. For an error, resolve the directory or access issue shown in the window, then click OK and Proceed again to retry.
- Return to Data storage and check the effective directory, mode, and usage. Read any warning about unfinished work before cleaning up the old directory.
On macOS, this area primarily displays status and does not offer the same Windows migration button. To change only image or video output, edit the save directory under Image export or Video export, rather than migrating all application data.
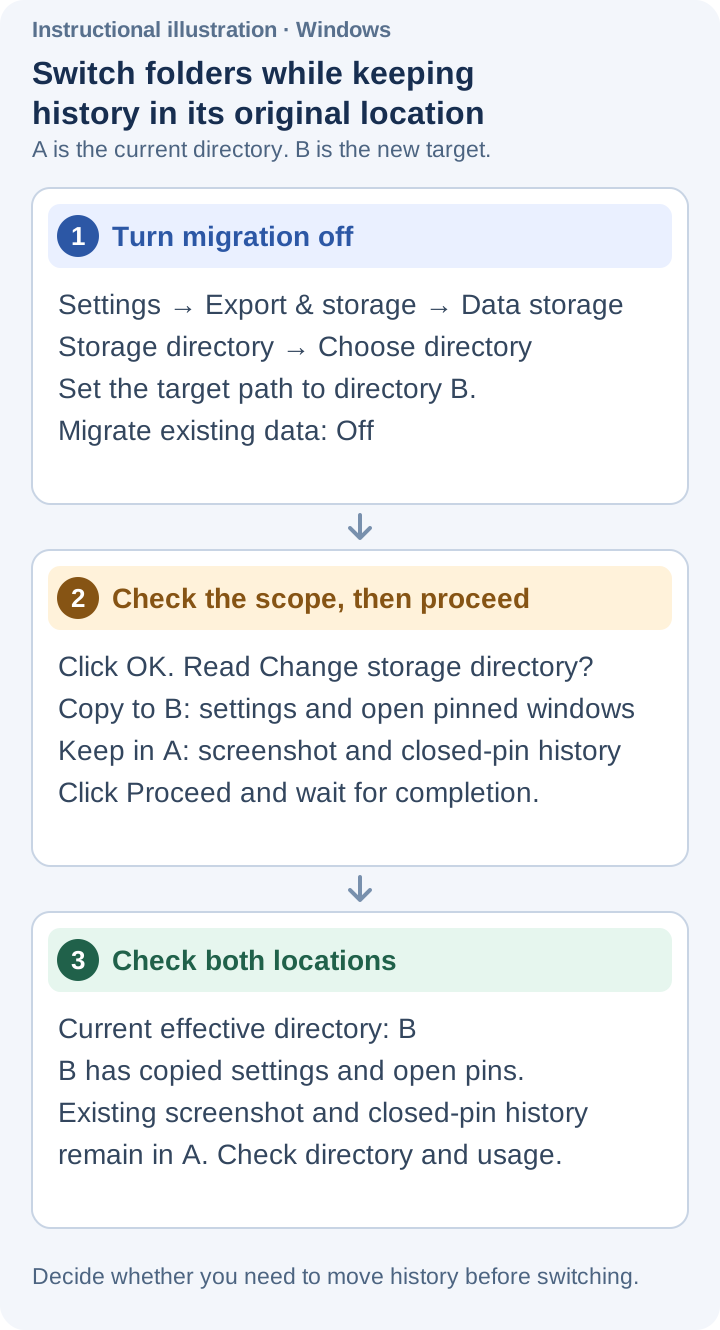
Instructional illustration. With migration off, check what will be copied and where existing history will remain. View full size.
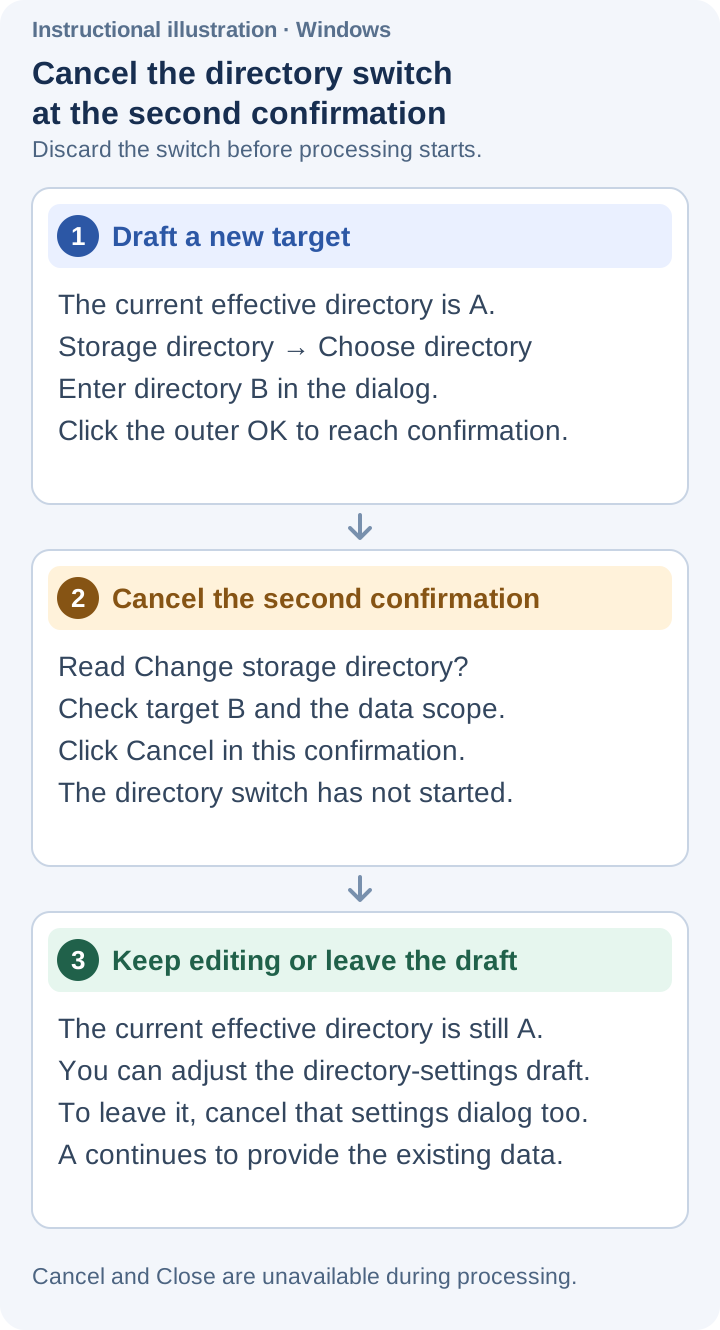
Instructional illustration. Cancel the second confirmation before processing to keep the current directory and return to the draft. View full size.
Export and restore configuration
- In the same data-storage section, click Export under Export configuration. In the dialog, choose whether to include Canvas style configuration when migrating saved annotation styles, then click Export to create the archive. Cancel leaves without exporting.
- After the message confirms export to the clipboard, paste into a file manager and keep the ZIP with a recognizable date or purpose. Clipboard content alone is not a durable backup.
- Back up your current settings before restoring. Click Import under Import configuration and select the earlier ZIP. Canceling the file chooser leaves settings unchanged.
- Read the replacement confirmation: archive values replace current application settings, and some changes require a restart. Click Import to replace them, or Cancel to keep the current configuration.
- After success, check theme, shortcuts, and save directories, and restart if needed. When moving between computers, recheck local paths and device availability.
The configuration archive contains app settings; it is not a backup of every screenshot or video. Preserve important output files separately. A log archive is another ZIP type and must not be imported as configuration.
Choose what to clean
To restore ordinary pins after closing them, first check Settings → Export & storage → Pin to screen management:
- Enable Retain closed windows so subsequently closed windows can be restored from management. Disabling it does not delete existing records; it is different from Clear closed records.
- Enable Keep records permanently to stop automatic cleanup. To use limits, turn it off first, then set Retention period in days, Maximum entries, and Maximum disk usage in MiB. These three limits are disabled while permanent retention is on. Initial limits are 7 days, 100 entries, and 1024 MiB; use the values shown for your existing configuration.
- Choose Low, Medium, or High under Compression level to control compression processing for display images stored with closed pins. The initial choice is Medium. This control does not delete records.
- Changes commit individually; there is no page-wide Save. Save important material to independent files before using cleanup commands below. Permanent retention stops automatic cleanup; manual cleanup still removes records within its confirmed scope. Retained windows remain protected.
Read each confirmation before cleanup, or cancel to return. If an interrupted recording still needs source-data recovery, use recording recovery and export before cleaning. See screenshot history for retention details.
Export logs and diagnose save errors
Click Copy under Export logs to package logs and crash reports into a ZIP on the clipboard. Paste the archive into a file manager, then give it to the person investigating the issue. Logs are diagnostics, separate from screenshot output.
For unwritable storage, check whether the data directory exists, whether disk space is available, and whether system access is allowed. Refresh after fixing it and try a small save. For a settings-save failure, resolve data storage before repeatedly changing options. Changes that have not persisted may be lost at restart.
Related: copying and saving and network and system integration.