
Groups, batch management, and recovery
Group pins by task to display related references together and recover closed content from management. Currently visible windows, selected windows, and history records are different scopes. Check menu counts before batch operations.
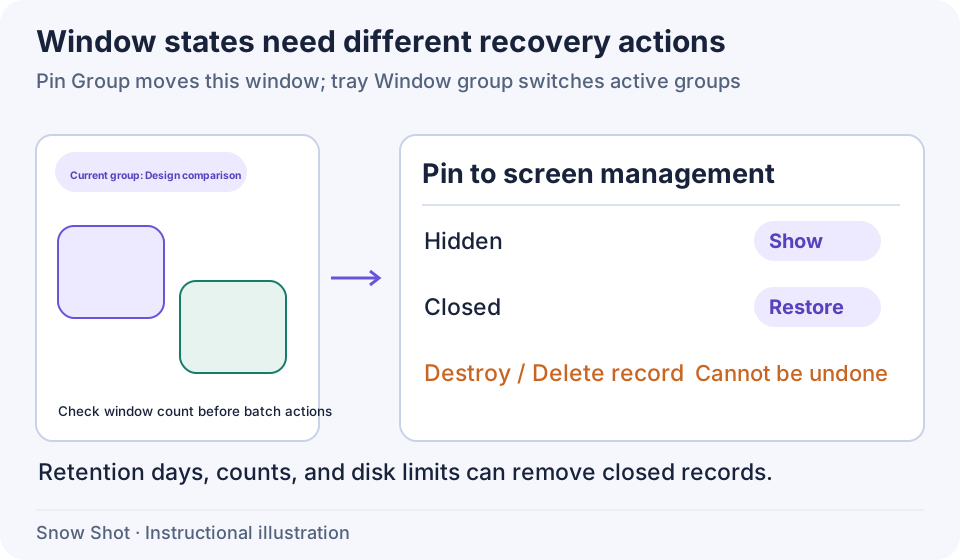
Instructional illustration. Closing may retain a record; destroying or deleting a record removes saved content.
Groups and visibility
Move a window into a group: right-click Group: … and choose an existing group to move the current window there. Choose New group to enter a name and create one. Use task-specific names such as “Error investigation” or “Design comparison.” Enter at most 16 characters in Group name and click Add. Correct blank or duplicate names first. Cancel or closing the dialog abandons creation.
Switch the displayed group: open Window group: … in the system tray and select a group. Snow Shot saves the current group's state and restores applicable windows in the new group. The pin menu moves a window; the tray menu switches the active group. Check the menu title first.
Organize the same group: under Pin to screen management in a pin's context menu, use Show all windows, Hide other windows, Close other windows, or Close all windows. Check which task group is active.
Enable Shake window to hide/show other windows under Settings → Pin to screen, then quickly drag a pin back and forth to hide other windows in its group. When that group has hidden windows, the gesture can show them. Practice with two test pins; large cross-monitor movements are unnecessary.
Read group-deletion confirmations. Deleting a specified group also deletes its pin records, including closed windows. For Delete empty groups, “empty” can mean only closed records remain; those records are permanently removed too. The default group itself remains, but clearing it still removes its contents.
Switch and restore with actions
Use the tray menu to choose a group directly, or assign Switch window group under Global shortcuts. A new configuration has no default binding; choose a combination you can comfortably hold.
- Press the combination. The group preview appears and advances to the next candidate.
- Keep its keys held and trigger the binding again to cycle candidates. Read the selected group name before releasing.
- Release all keys involved in the shortcut to activate the previewed group. Press Esc while the preview remains active to cancel, or click the desired group in the preview to choose directly.
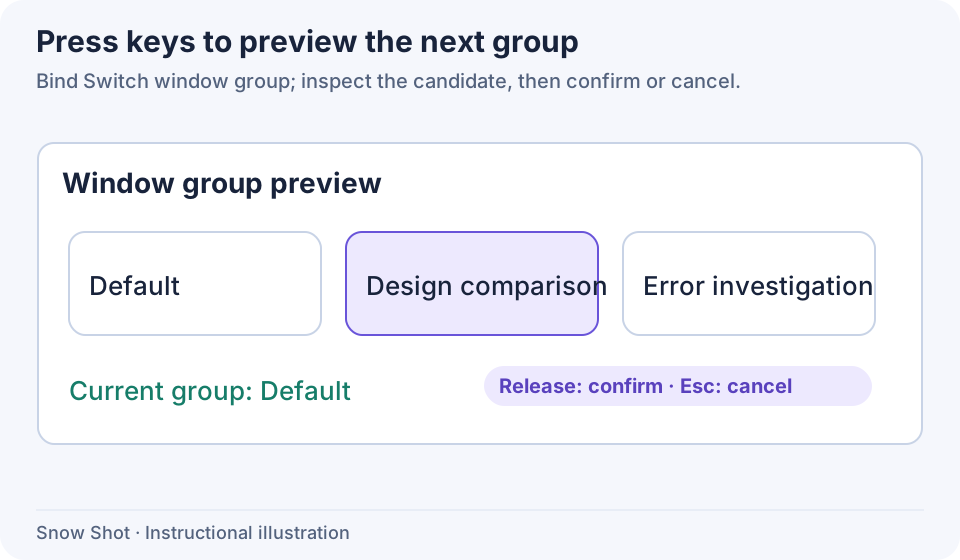
1. Press and preview — Configure the combination first, then press it and identify the selected candidate.
- — Configure the combination first, then press it and identify the selected candidate.
- — Keep keys held and invoke again. Check the preview; Esc cancels.
- — Release all involved keys to show applicable pins in the selected group.
Restore last closed window on the same shortcut page restores the most recently closed ordinary pin in the current group. Defaults are Ctrl+F3 on Windows and Control+Shift+3 on macOS; existing configurations take precedence. If the expected pin is not restored, check the active group and retained records, then search management by date.
Hide/show all windows toggles the current group's visibility. Assign a shortcut and test hiding and showing two practice pins. Unlike closing or destroying, it does not require recreating content from files.
Work with selected pins only
- Show the non-live pins you need in the active group. Leave thumbnail, hide-at-top, and click-through modes. Hold Ctrl (Command on macOS) and briefly click each target to toggle its selection indicator. Do not drag during selection.
- With at least two selected, right-click one of them to open the selected-window menu. Its scope differs from the current-group batch menu below. Check the selected count at the bottom.
- To move them together, unlock first and drag a movable area of a selected pin. Drag an edge to resize together. Release to commit; press Esc during the drag to cancel that adjustment. Click a window's selection indicator to deselect it.
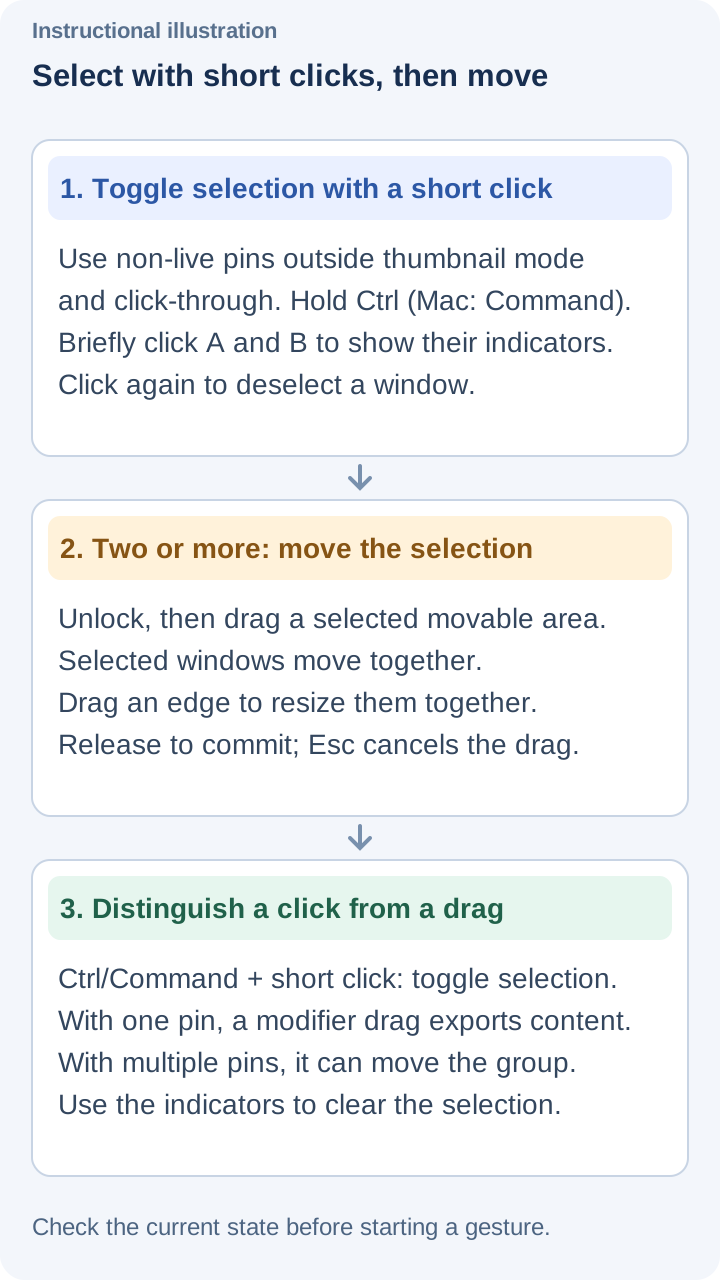
Instructional illustration. Select with short clicks, then choose between moving the group and exporting one pin.
The selected menu's Image stitching, Copy files to clipboard, and Save as file affect selected windows only. Group moves them to an existing group; completing New group puts the selection in the new group. Close other windows retains the selection and closes other windows in the active group. Close or Destroy affects the selection; check its count first.
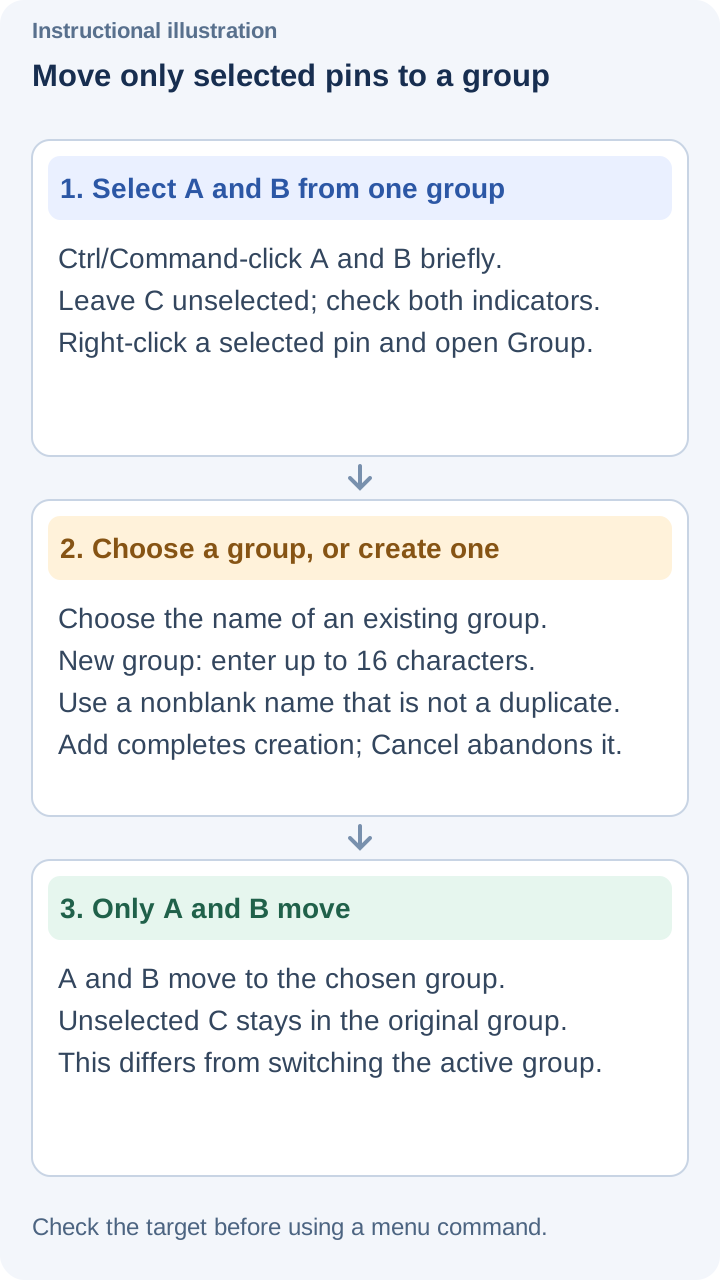
Instructional illustration. Group acts on this selection; creating a group also needs a name and Add.
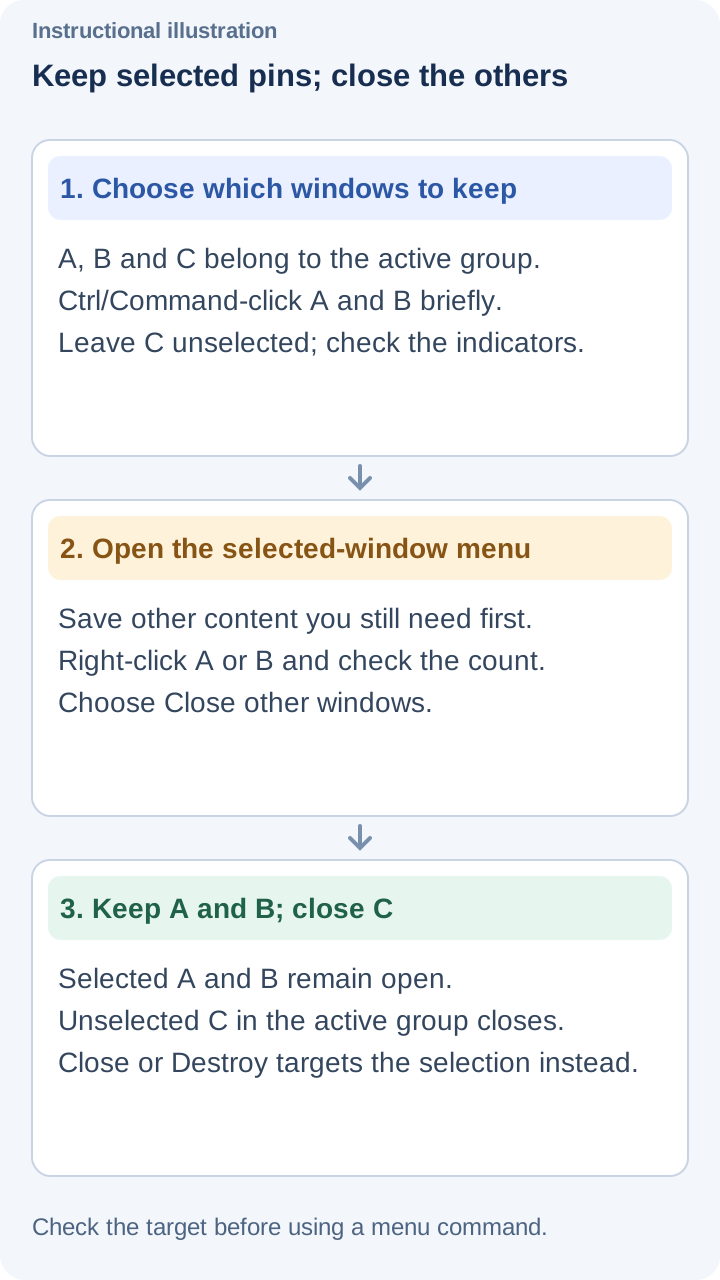
Instructional illustration. Close other windows retains the selection; Close or Destroy acts on the selection itself.
Align and distribute the selection
Open Align position in the selected-window context menu. Alignment needs at least two selected windows and none locked. Distribute horizontally and Distribute vertically need at least three. Alignment moves windows without resizing them.
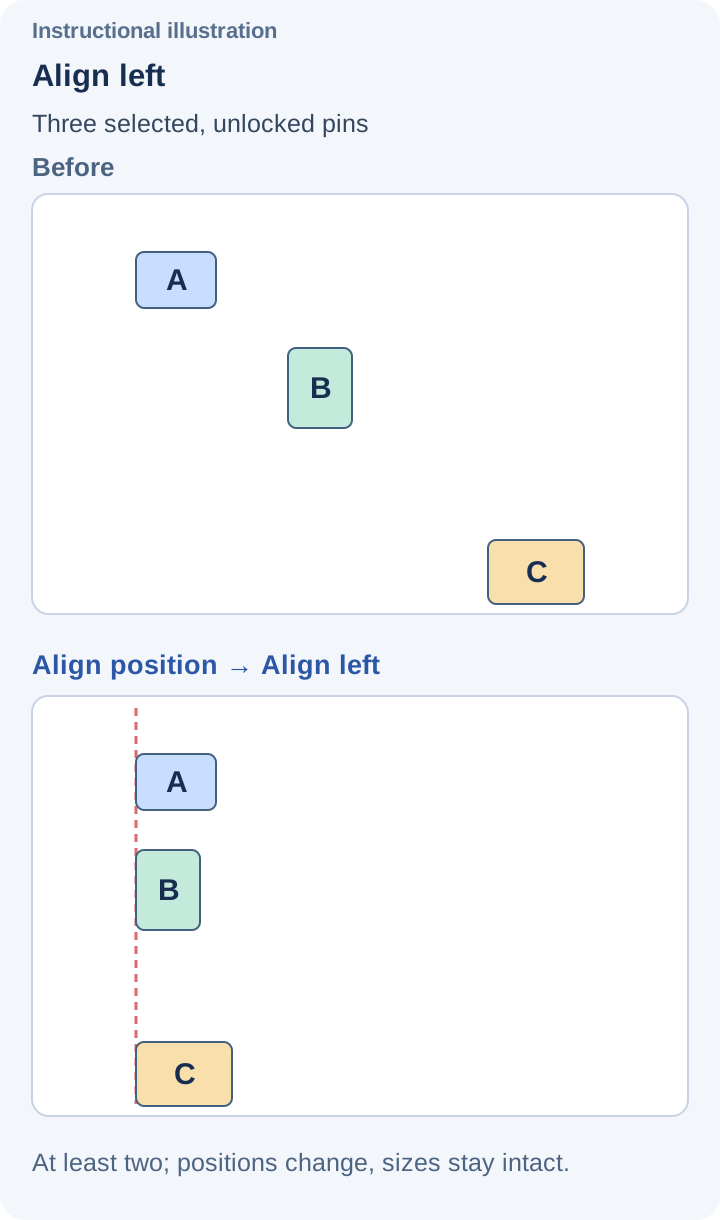
1. Align left — Use the overall selection left edge; every window has the same left edge.
- — Use the overall selection left edge; every window has the same left edge.
- — Each horizontal center matches the overall center; widths stay unchanged.
- — The right edges match; window sizes stay unchanged.
- — Keep horizontal order. With sufficient space, gaps between edges are equal.
- — Use the overall selection top edge to align every top edge.
- — Each vertical center matches the overall center; heights stay unchanged.
- — The bottom edges match; window sizes stay unchanged.
- — Keep vertical order. With sufficient space, gaps between edges are equal.
When you no longer need group actions, deselect the windows with their indicators before opening an ordinary single-window menu.
Batch-process current windows
Right-click Pin to screen management → Batch actions. The menu displays the number of eligible windows.
- Select all selects applicable visible pins so you can move or resize them together. A window's selection indicator can deselect it.
- Image stitching sends currently displayed images into the Image collage workflow.
- Copy files to clipboard produces file-form output for destinations that accept pasted files.
- Save as file asks for an output folder. Wait, then check success and failure counts against the files.
- Enable/disable thumbnail mode, hide at top, or lock mode applies the setting to applicable visible windows.
- Close / Destroy respectively close windows or remove records. Batch-save material you need before either operation and distinguish the commands.
If a pin closes or becomes unreadable during processing, some outputs may succeed and others fail. Check the destination against the completion message and handle failed items individually.
Restore from the management page
- Open Pin to screen management in the main window. Records show source, group, and states such as Closed, Hidden, or Not closed.
- Filter Source by screenshot, screenshot history, clipboard, selected files, and other sources; narrow Date with start and end values. Clear filters and refresh if a record seems absent.
- Click Restore beside a closed record or Show beside a hidden one. Confirm the corresponding desktop pin appears.
- Select all selects only the current page. Check counts before working across pages. Batch Pin to screen requires records from one group; reduce a mixed-group selection first.
- Use Delete to remove records and read the confirmation. It removes saved records and corresponding open windows, unlike merely closing them.
Closing and destruction
Check permanent retention, days, count, and disk limits for pin history under Settings → Export & storage. Closed records are not a substitute for file archives; use Save as file for long-term images. Live windows depend on a running source and do not share every static-pin history recovery guarantee.
Continue with Image pins, Pin transforms, or Live window pins.