
Microphone, system audio, and webcam
The microphone records your voice, system audio records sound played by the computer, and the webcam overlays the presenter on the captured content. Open the recording setup interface before configuring these inputs.
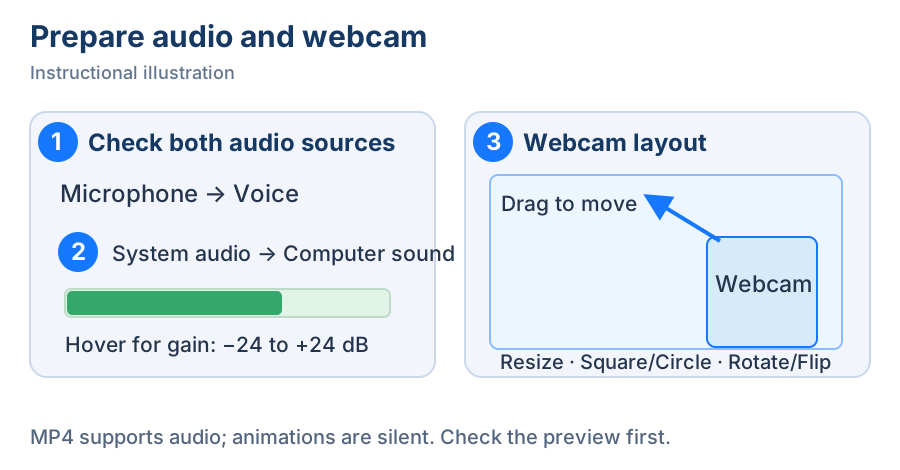
Instructional illustration. ① Microphone, ② system audio, ③ webcam position correspond to the steps below.
Include both sound sources
- In recording Export settings, choose MP4 under Recording format. GIF, APNG, and WebP contain no audio, so the sound buttons are disabled for those formats.
- Before recording, click Record microphone on the toolbar. Its icon shows the enabled state. Hover over the button to open its gain popover, then speak and check the meter inside it to confirm input.
- Click Record system audio, hover over its button to open its gain popover, and play a short sound on the computer. Check this source's meter before starting the actual recording. A fresh configuration enables system audio and disables the microphone; check your own button states.
- Hover over either audio-source button to open its gain popover. Drag its slider to adjust microphone or system-audio gain independently, from −24 to +24 dB. Return the slider to 0 dB to remove the added gain. Raise low audio moderately, or lower it when the meter is too high or shows clipping. Changing one source does not adjust the other.
- Make a short recording, stop it, and play the file. Check your voice, computer audio, and their relative volume before recording the full demonstration.
Enable every required source before starting. A source that was disabled at startup cannot be added during recording; stop and start again to add it. Available controls for sources already enabled can be used during recording. A disabled control does not by itself mean that source is muted.
Keep audio tracks separate
Before recording, enable Record separate audio tracks under Settings → Screen recording → Video & audio to save system audio and microphone input as separate MP4 tracks. This lets a video editor adjust them independently. Most players play one audio track at a time; if you hear only one source, check the player's track selection. For direct sharing with both sources audible together, keep mixed audio.
Position the webcam
- Before starting, open Export settings and click Record webcam. The webcam preview appears inside the recording area after initialization. Resolve any device error first.
- Hold the left button and drag the webcam image away from important actions. Its upper-right handle resizes it: drag up/right to enlarge or down/left to shrink, watching the preview. Release to save the position or size. Press Esc during a drag to restore the layout from before that gesture, then release before trying again.
- Click Settings at the end of Export settings to open Effect settings, then set Webcam size between 50 and 500 px. Use Webcam shape to choose a square or circle. A circle suits a face; a square preserves more of the background.
- Close Effect settings and use the orientation toolbar above the webcam preview; near the screen's top edge, it moves below the preview when there is insufficient room above. Its four buttons are Rotate clockwise, Rotate counterclockwise, Flip horizontally, and Flip vertically, in that order. Hover to confirm each name. Rotation changes by 90° per click; rotate the other way to reverse it, or click the same flip again to restore it. Inspect text and orientation before recording.
- Check position, shape, and orientation before starting. Afterwards, check the output file for any important controls covered by the webcam.
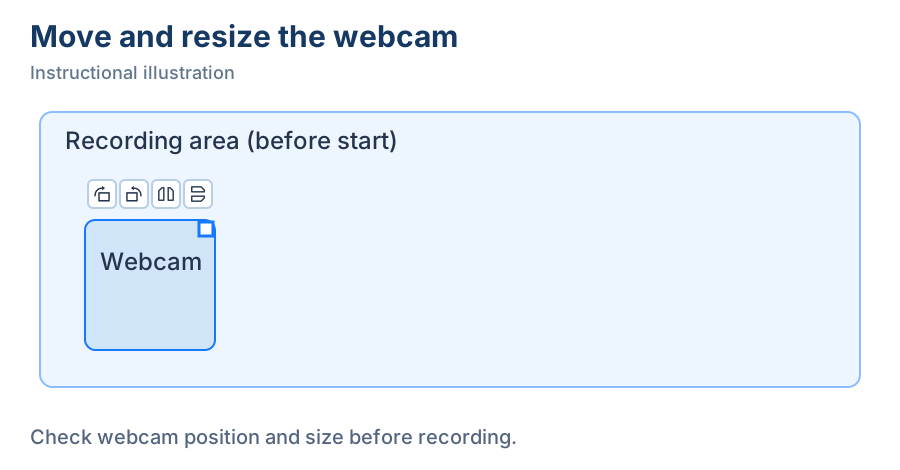
1. Check its starting position — Wait for the webcam preview, then identify important action areas in the frame.
- — Wait for the webcam preview, then identify important action areas in the frame.
- — Move the webcam away from important controls and watch the live preview.
- — Drag the upper-right handle up/right to enlarge, then release to save. Check size and position before recording.
Audio or webcam is unavailable
On macOS, allow microphone, camera, and Screen & System Audio Recording access in system privacy settings, then return to Snow Shot and retry. The app's permissions page helps check related states; camera access is also controlled by system privacy settings. If initialization fails, check that the device is connected and is not exclusively in use by another app, then turn the webcam off and on again.
If the level meter does not move, check the operating system's current input device and volume before raising software gain. For silent playback, check the output format and then separate-track settings. For a silent demonstration, choose an animation and read formats and export settings.