
Text annotations and layout
Text annotations add explanations, name objects and describe steps. Prepare a screenshot or open an image so the editable canvas and annotation toolbar are visible.
Enter and finish text
- Click Text in the main toolbar and choose text color and font size.
- Click where the explanation should appear to open a text-input area.
- Type your text and press Enter for a line break. During input, arrow keys and selection operate on text content. Use Backspace to delete preceding characters; Delete depends on the setting described below.
- Press Esc to commit the text and finish input. You can also use Ctrl + Enter on Windows or Command + Return on macOS. Confirm that the caret has disappeared before switching tools.
- Press V for Select elements, click truly empty canvas to clear the selection, then press and drag the unselected text in one gesture. Selecting the text with a separate click before dragging its letters re-enters text editing.
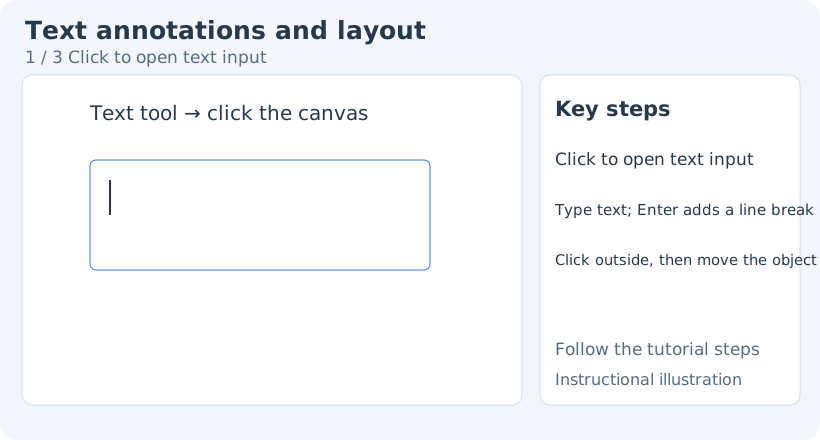
1. Click to open text input
Re-edit the content
With Select elements or Text active, first click the existing text to select it, then click its content to edit. Type after the insertion caret appears. A border without a caret means the object is selected rather than being edited.
Press Esc to commit changes and finish input. Clicking outside the input area can also finish it; another click on empty canvas while Text remains active prepares new text. If an unwanted empty input area appears, press Esc to finish it, then V to select elements.
During input, Backspace removes selected text or the character before the caret. Delete text after the cursor is enabled by default: Delete then removes selected text or the character after the caret. If you disable this setting, Delete removes the entire text object and ends input even while you are typing. Check the setting or use Backspace when you only want to change characters. After leaving input and selecting the whole object, Delete / Backspace removes the text object.
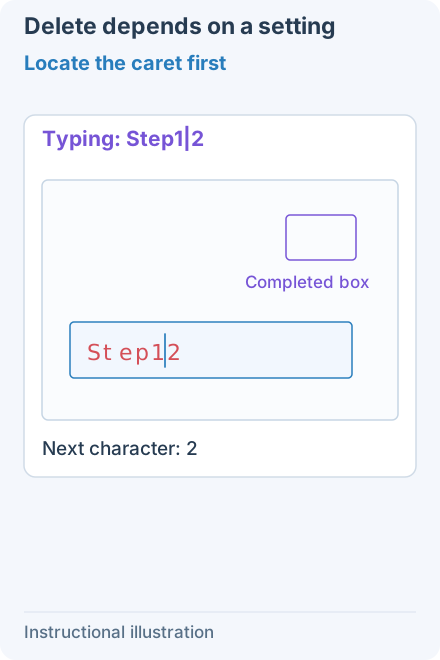
1. Locate the caret first — The existing text Step12 is being edited, with the caret between 1 and 2. Both following frames compare Delete from this state. The purple box helps check that other annotations remain.
- — The existing text Step12 is being edited, with the caret between 1 and 2. Both following frames compare Delete from this state. The purple box helps check that other annotations remain.
- — Keep Delete text after the cursor enabled, as in the default configuration. From frame 1, Delete removes the 2 after the caret and input continues. If text is selected, it removes that selection.
- — Start again from frame 1 with Delete text after the cursor disabled, then press Delete. The whole text object is removed and input ends; other annotations remain. Use Backspace when you only want to delete characters.
Font, size and alignment
For specific text styles, switch to Text and select the target, or enter that text’s editing mode. With no target selected, settings apply to the next text object. Available fonts depend on the current computer and may differ on another device.
Backgrounds, borders and corners
Text fill color adds a background, useful on a complex image; transparent fill preserves the image below. Fill style changes its interior pattern. Text outline width and color add a stroke around the letters, separate from the text-block background.
Background, border and rounded-corner controls depend on the current text style. Enter a short explanation first, then adjust the background and boundaries. If the text is obscured, check foreground color, background color and stacking order rather than only increasing font size.
Move, resize and rotate
To move text, press Esc to finish input, press V, and click empty canvas to deselect. Then press and drag the unselected text directly. If it is already selected, drag the blank margin or edge of its selection frame, avoiding the letters, corner resize handles and rotation handle.
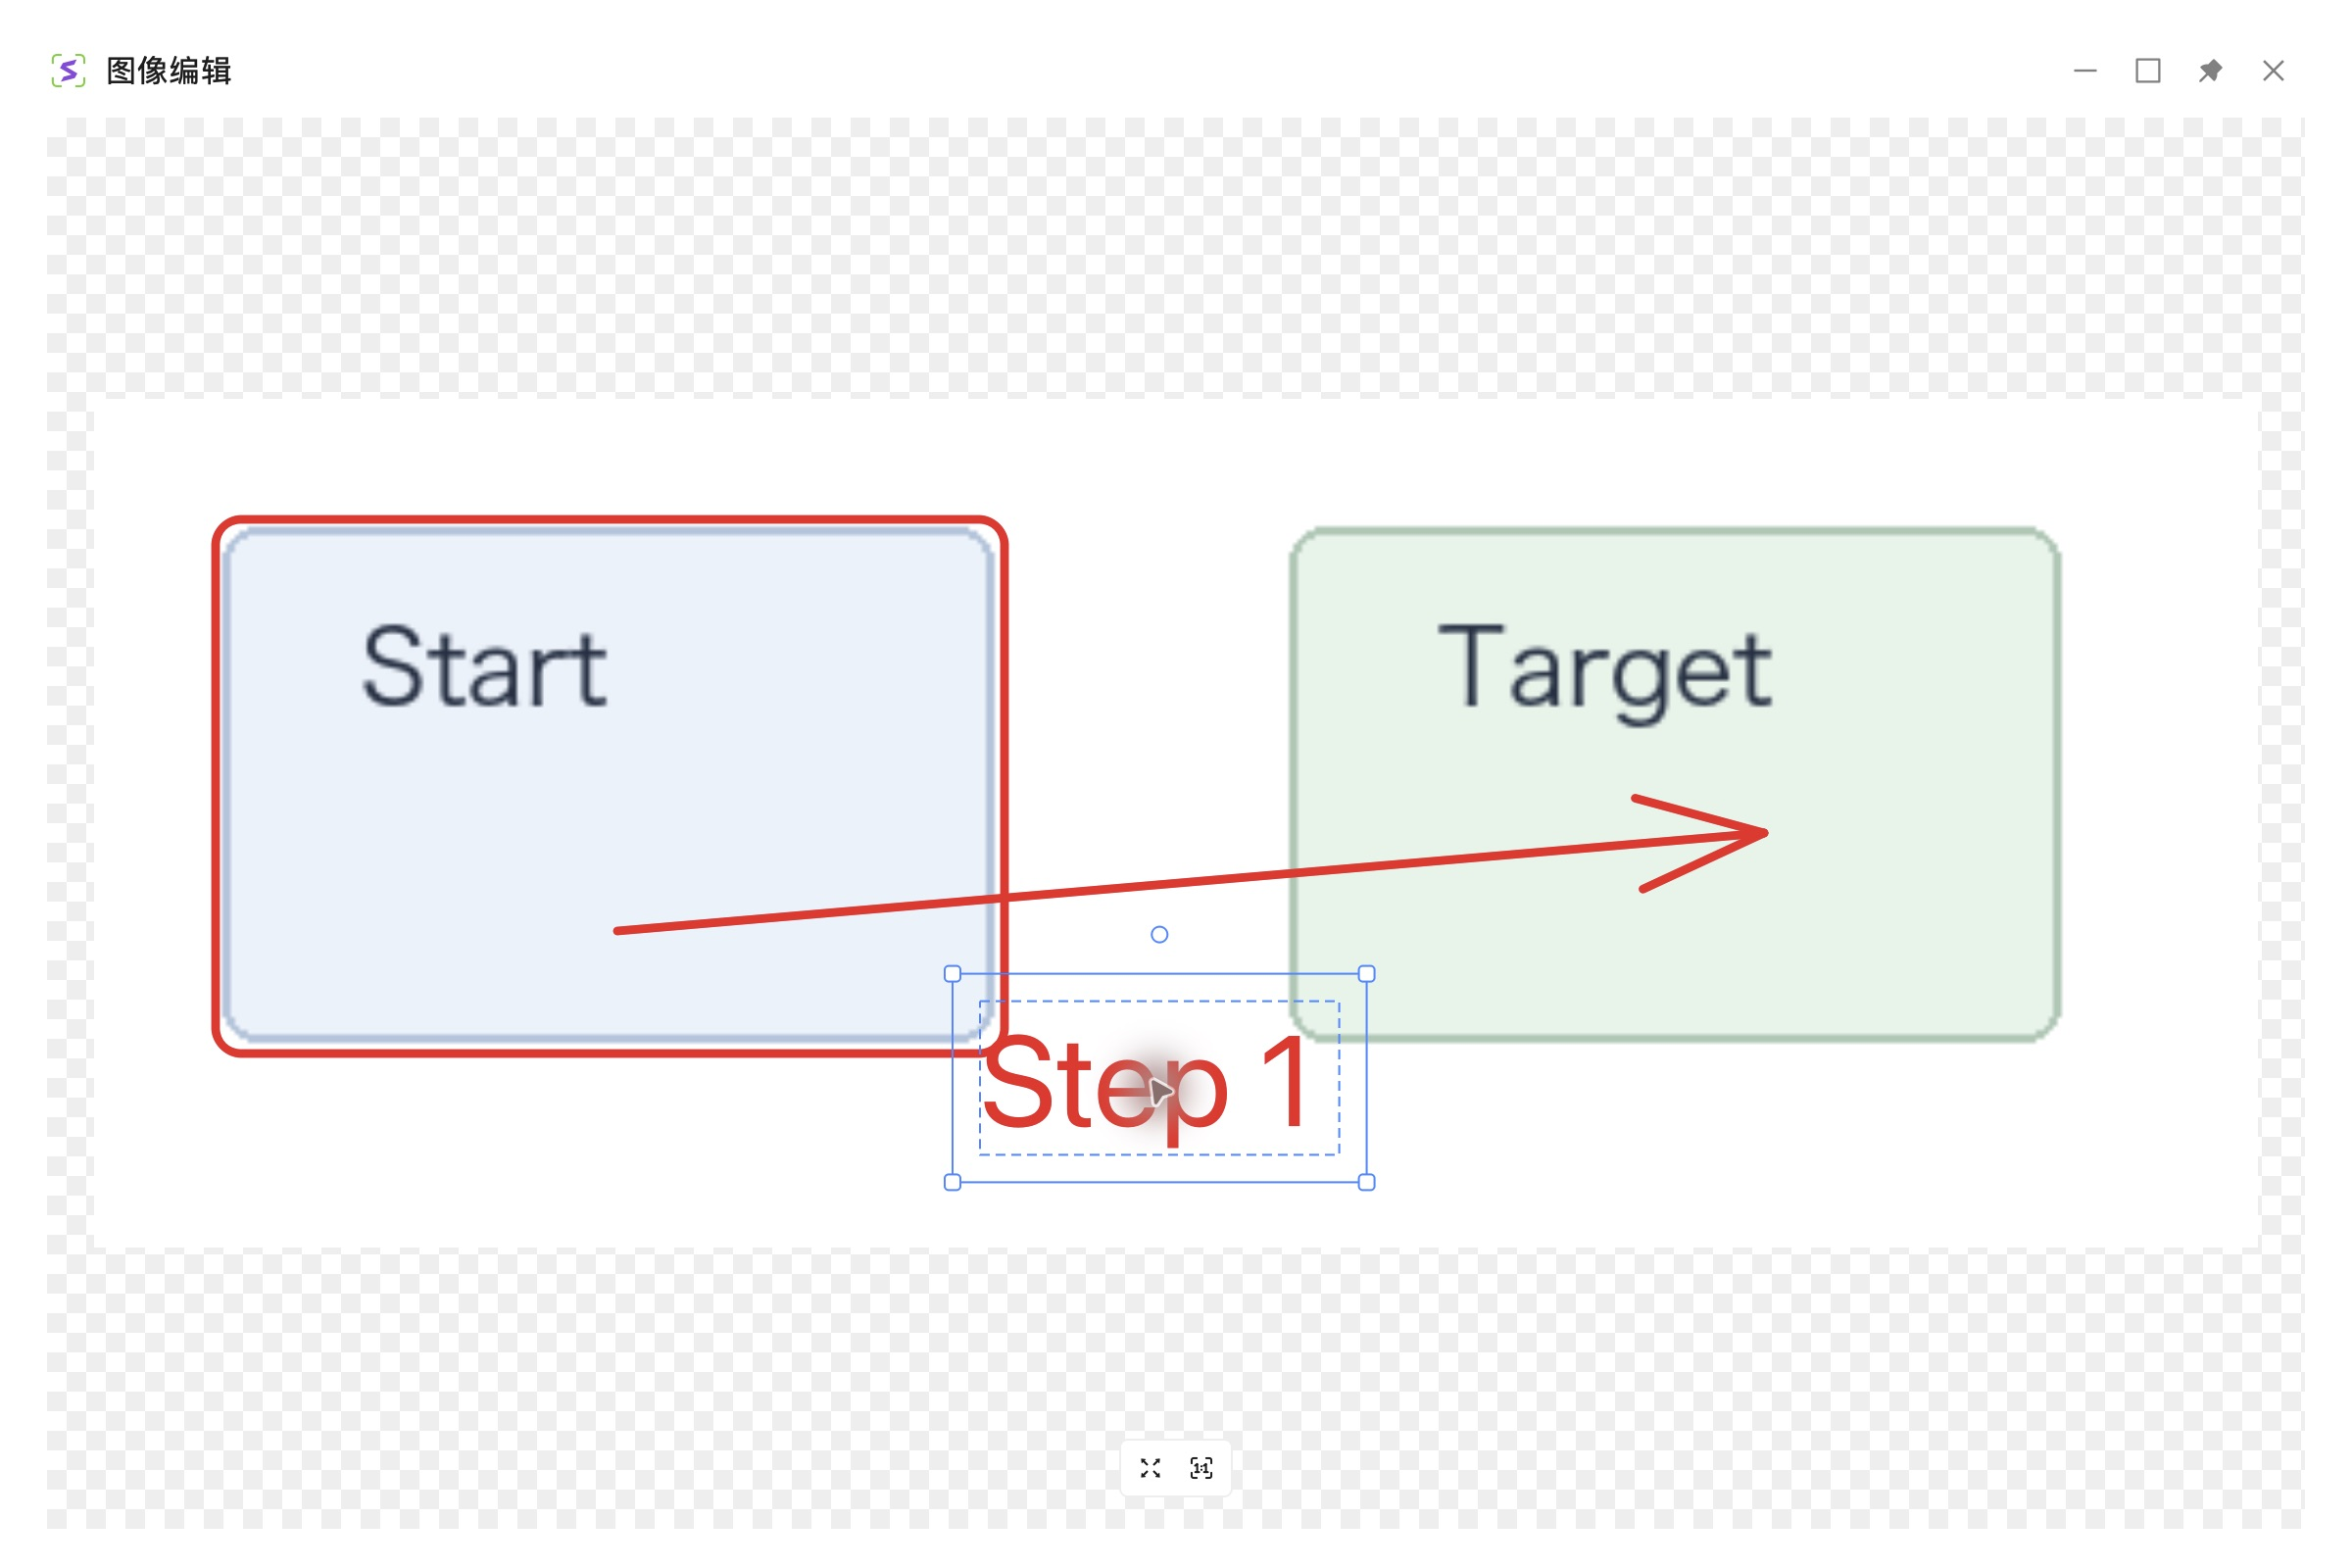
1. Finish input and deselect — Step 1 is still in its original position. Press Esc to finish input, press V, then click empty canvas to deselect.
- — Step 1 is still in its original position. Press Esc to finish input, press V, then click empty canvas to deselect.
- — Press and drag the unselected Step 1 text down and right in one gesture. The whole text object moves while the rectangle and arrow stay in place.
Clicking the contents of selected text re-enters input, where dragging selects characters. To resize or rotate, finish input and use the corresponding bounding-box handles.
The canvas supports text associated with shapes or arrows. When the description should move with its object, move the body after creation and verify that the text follows. Independently placed text can still be moved together using multiselection.
Correct and export
Re-enter editing to fix content; select and delete the object to remove the entire explanation. While the caret is active, Ctrl+Z on Windows or Command+Z on macOS only undoes text edits in the current input session; it does not fall back to completed canvas objects. To undo object movement, creation or deletion, press Esc to finish input, then click Undo in the toolbar; Redo restores it. Copy to clipboard exports the whole composite image, unlike copying selected characters inside the input area.
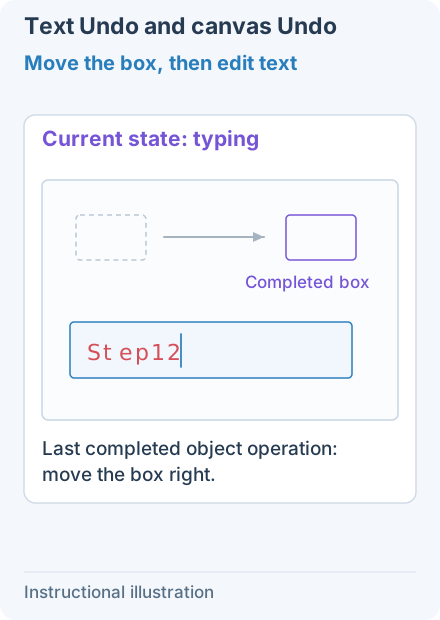
1. Move the box, then edit text — Create Step1 and a box, then move only the box to the right. Edit Step1 and append 2. Step12 is still in the current input session; the gray box only marks its position before the move.
- — Create Step1 and a box, then move only the box to the right. Edit Step1 and append 2. Step12 is still in the current input session; the gray box only marks its position before the move.
- — With the caret active, press Ctrl+Z on Windows or Command+Z on macOS. The appended 2 is undone, returning to Step1 without moving the box. Exhausting text Undo does not switch to undoing the box move.
- — To compare canvas history, type 2 again, then press Esc to commit and finish input. Confirm the caret disappears. This text change is now the most recently completed edit.
- — Click Undo in the toolbar. It first reverts the latest committed text change, from Step12 to Step1. The box remains on the right because its move happened earlier.
- — Click toolbar Undo again to revert the earlier box move. The box returns left while Step1 remains. Redo restores these edits in the opposite order.
Clicking opens another empty input area: the existing text was missed. Leave input, choose Select elements and follow “select → click content.”
Dragging selects characters without moving the text: clicking selected text re-entered input. Press Esc, then V, click empty canvas to deselect, and directly drag the unselected text. Use a corner handle for resizing.
Related: Speech bubbles · Sequence numbers · Element editing.