
Open images and crop rows or columns
Image editing handles existing images and helps clean up scrolling screenshots. It includes familiar annotation tools and can remove whole rows or columns of pixels, joining the remaining sides.
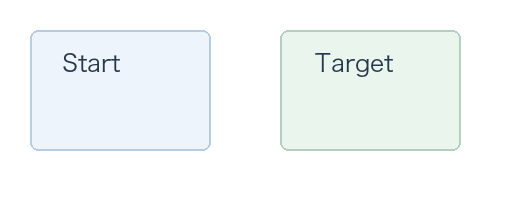
The original image: keep both areas and prepare to explain their relationship.
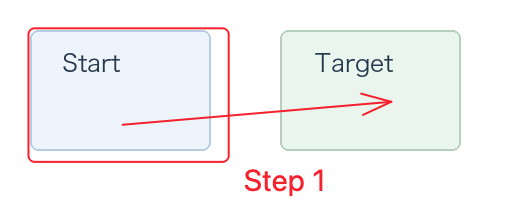
Add an arrow, rectangle, and text, then save a new image or pin the same result beside your work. This comparison shows annotation; the cropping steps later remove whole rows or columns.
Open and inspect an image
- Enter Edit selected images in the main window's Search function and select the matching dropdown result. With the keyboard, use the down arrow to enter results, then Enter to select. The page locates and highlights the action row.
- Click the Edit selected images row's title or empty area to open editing. The shortcut or “Not set” button configures keys; clicking the action needs no assigned shortcut. With no usable selected files, an empty window opens.
- Click Add images, select one image in the file dialog, and open it. Wait for “Loading image…” to finish and confirm the image appears. Canceling the dialog leaves the empty window.
- Find the two zoom controls at the bottom center of the canvas: Fit image to window on the left and View at actual size (100%) on the right. Hover over an icon to confirm its name. Click the right control for pixel details and the left to return to the full-image view. Whether 100% looks larger or smaller depends on the image and viewport sizes. Viewing zoom does not change exported pixel dimensions.
- Choose shapes, arrows, text, or filters from the annotation toolbar. To keep the result on the desktop, use Pin to screen; see Image pins.
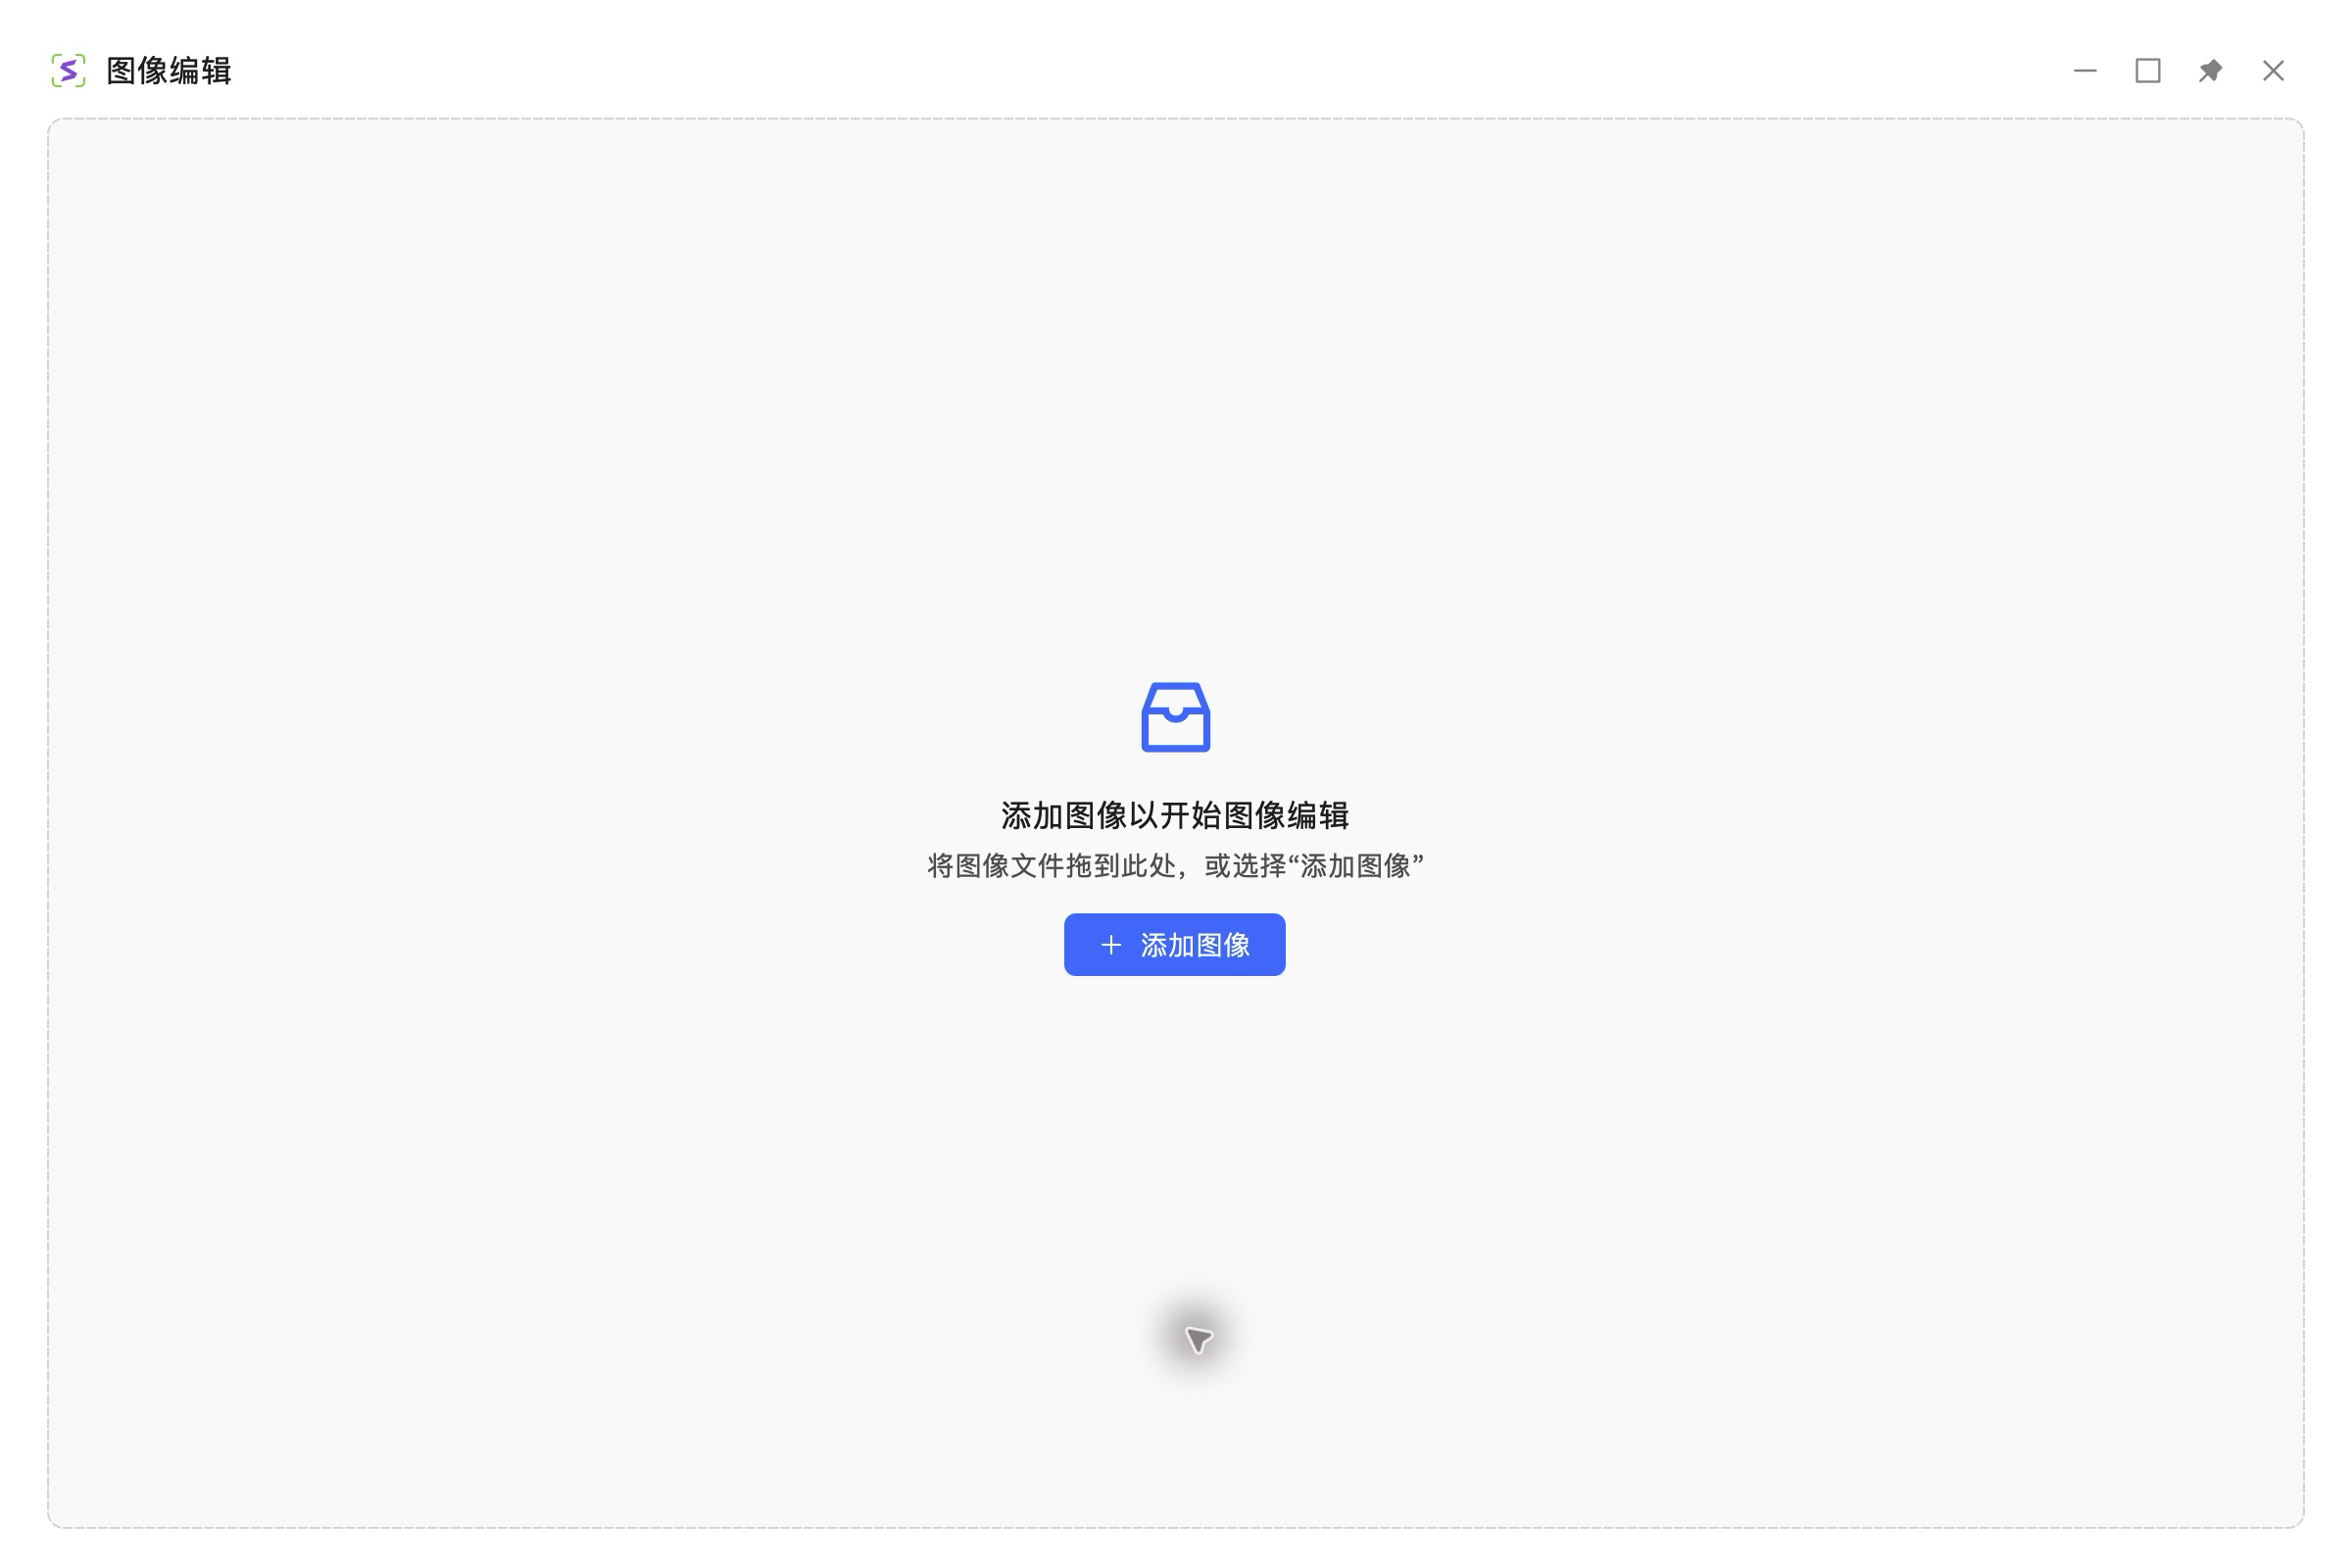
Click Add images in the empty editor to choose a file. The Chinese button reads “添加图像” (Add images). On a phone, open the full-size screenshot to read the button.
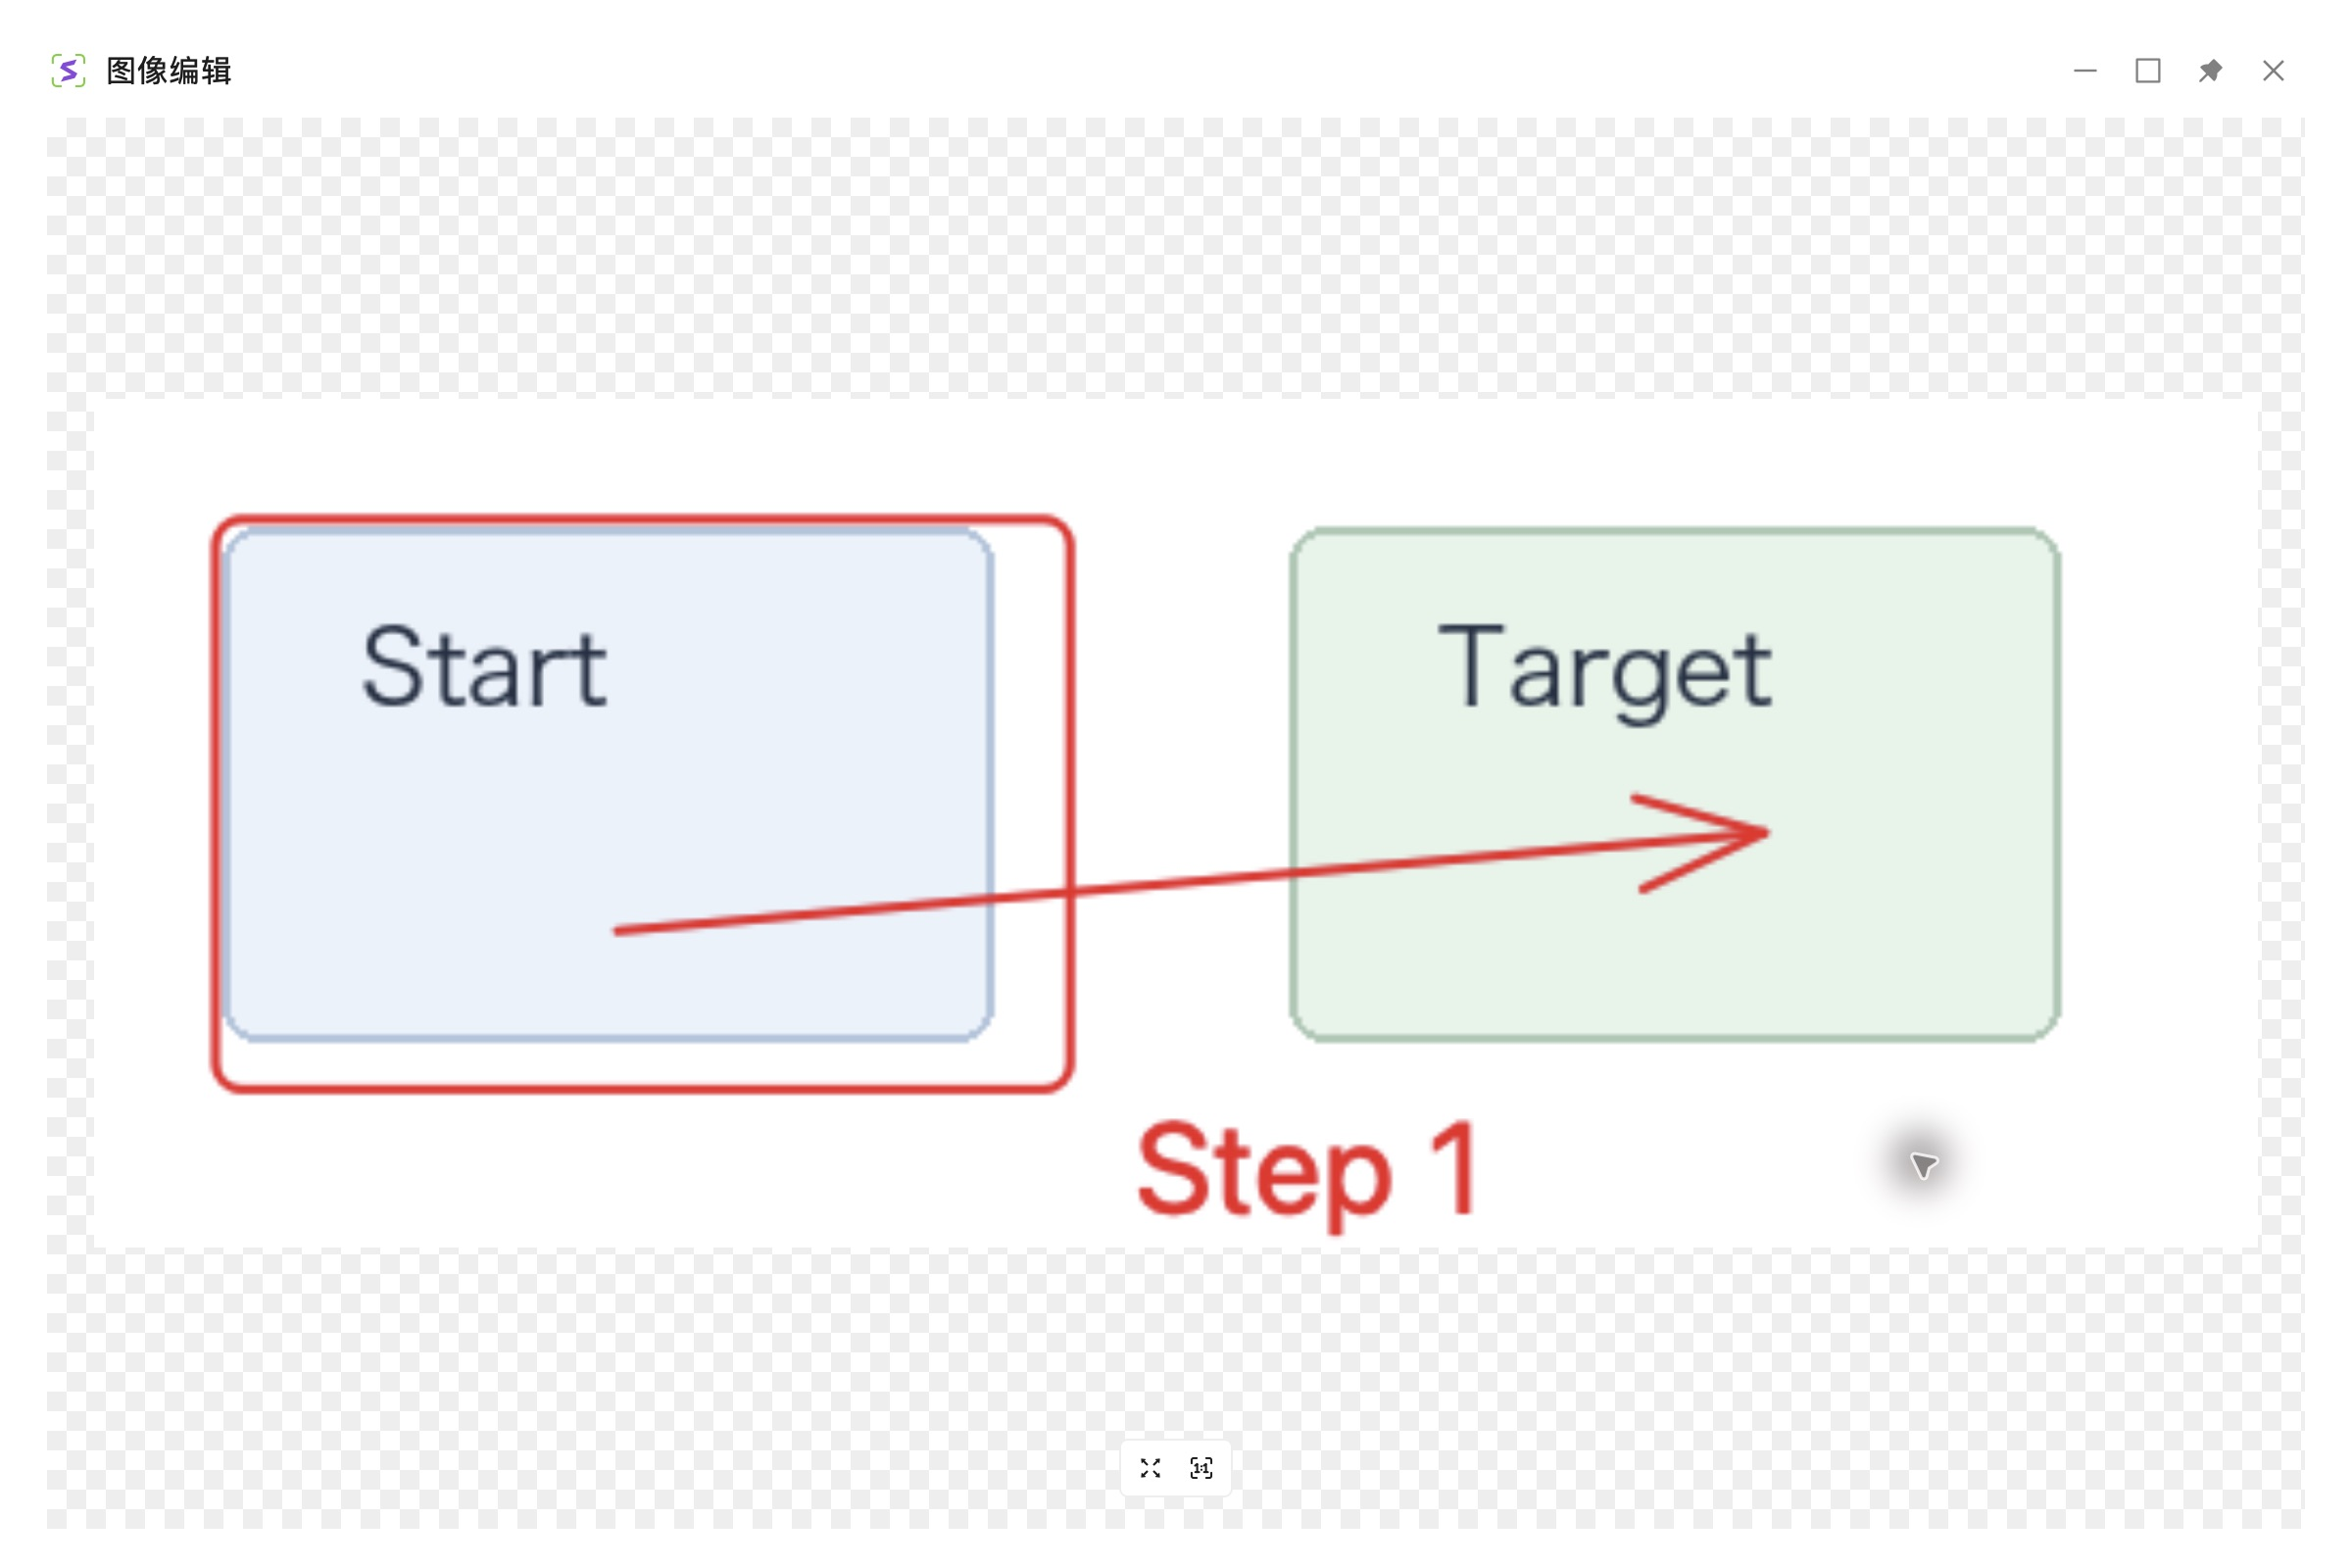
1. Fit the whole image — Click Fit image to window on the left of the bottom-center controls. The image adjusts to the window so you can inspect the whole composition.
- — Click Fit image to window on the left of the bottom-center controls. The image adjusts to the window so you can inspect the whole composition.
- — Click View at actual size (100%) on the right. This 507×199 image looks smaller at 100%; the change depends on image and viewport sizes.
Add explanations, then save or pin
- After loading, choose Arrow, hold the left button near Start, drag toward Target, and release. For a regular outline, choose Rectangle and drag around the content to emphasize.
- Choose Text, click a position on the image, and type
Step 1. Press Esc to finish input, press V for Select elements, click empty canvas to deselect, then drag the unselected text directly to its destination. See Moving text. Select the rectangle and drag its handles to resize it. - Use Save as file, choose a folder, a new filename, and the required format such as PNG, then click Save. Reopen the saved file and check arrow direction, text, and edges. The macOS editor defaults to Command+S for saving; follow Application shortcuts if customized.
- Use Pin to screen to keep the same result on the desktop; the macOS editor defaults to Command+F. The new pin displays the current edited image. Save from the pin as well if you need a file. See Image and clipboard pins.
Drag files or open multiple images
You can also drag image files onto the empty window’s prompt area. Adding multiple images opens each in a separate editing window. Once an image appears, use the cropping steps below to remove unwanted strips.
Start from selected files
Find Edit selected images under Global shortcuts and assign a nonconflicting combination. It has no preset binding; do not use the screenshot shortcut for it. Return to the system file manager, select one or more images, and invoke that combination. Each image opens in its own editing window.
With no selected images, the action opens an empty window where you can add files. On macOS, follow any request to allow Snow Shot to control Finder for reading its selection, then retry. See Shortcut settings for configuration and conflicts.
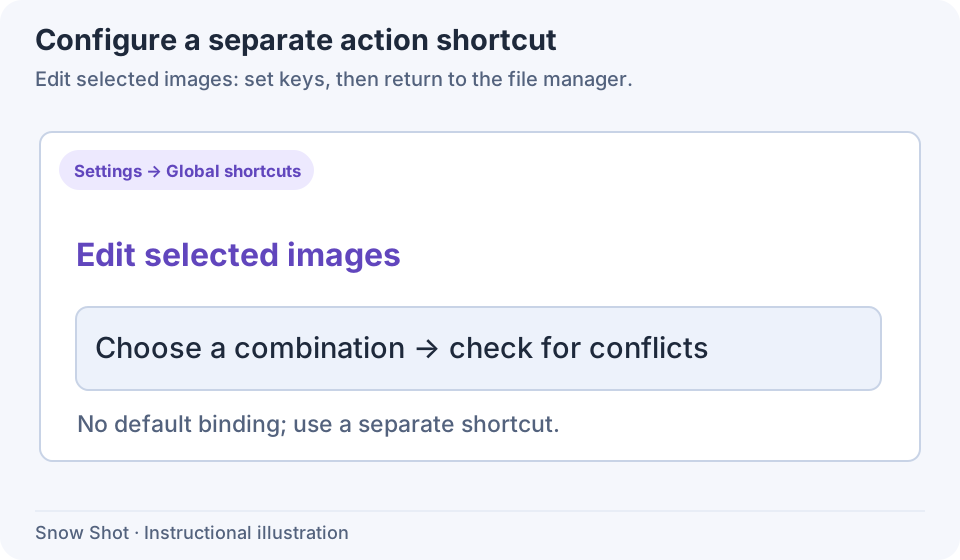
1. Configure the action — There is no default binding; assign a nonconflicting global combination.
- — There is no default binding; assign a nonconflicting global combination.
- — Select images A and B in Finder or File Explorer, keeping the selection and focus when invoking.
- — Stitching uses one session; editing and splitting open a separate window for each image.
Vertical crop: remove a horizontal strip
Vertical crop deletes whole rows along the image’s height. Find it in the image editor’s floating main toolbar, separate from the Fit / 100% controls at the bottom of the canvas. Hover over the icon to confirm Vertical crop. Neither crop tool has a dedicated default shortcut.
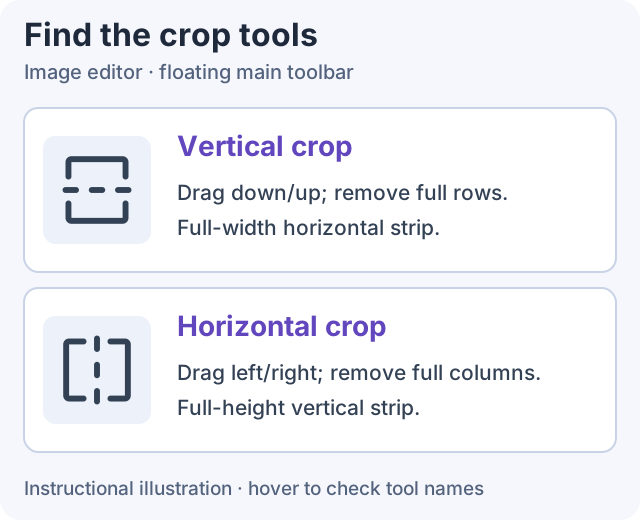
Instructional illustration. Find these adjacent icons in the floating main toolbar, then hover to confirm Vertical crop or Horizontal crop.
- Wait for the image to load, finish any text input, and click Vertical crop. The button becomes active; moving over the image shows a guide.
- Inside the image, hold the left button at the unwanted strip’s upper edge and drag down to its lower edge, or drag upward instead. The red preview spans the full image width. N px between its boundary lines is the number of source-image rows to remove.
- Check the entire strip for content you need, then release the left button to apply. No confirmation click is required. The remaining upper and lower parts join; height decreases by N pixels and width stays unchanged.
- Wait for the canvas and toolbar to become available again, then inspect the join. Use Undo if you removed source content you need.
This deletes a strip rather than retaining the area inside a rectangle. You cannot remove the entire image height, and a zero-height range makes no change. To cancel an unsuitable preview, press Esc while still holding the left button, then release. Vertical crop stays active so you can redraw. Click the active crop button again to exit cropping and return to panning.
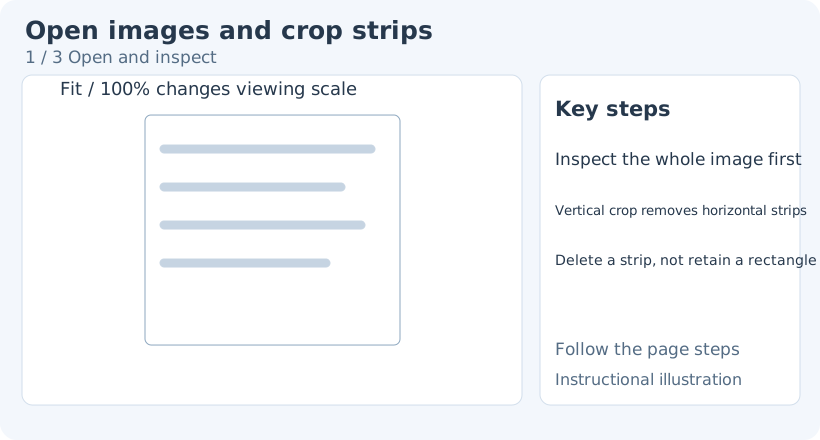
1. Inspect the whole image — Inspect the complete image and locate the horizontal strip to remove.
- — Inspect the complete image and locate the horizontal strip to remove.
- — Drag along the height and check the entire strip for content you need to keep.
- — Release to remove the rows, then inspect the join before saving.
After canceling, release the mouse, then press and drag again to create a new range. The following steps distinguish canceling with Esc from applying by releasing.
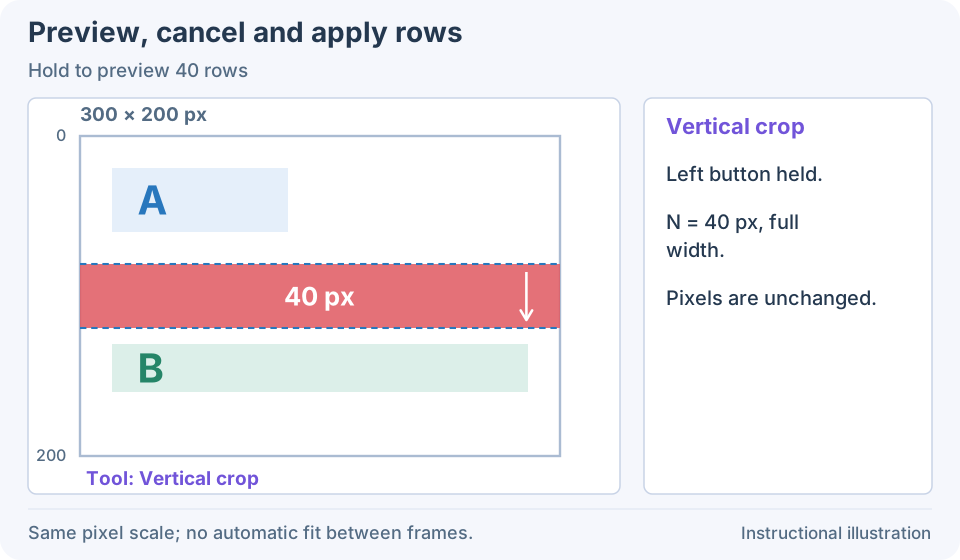
1. Hold to preview 40 rows — Hold the left button to preview the full-width 40 px strip. The image is still 300×200.
- — Hold the left button to preview the full-width 40 px strip. The image is still 300×200.
- — Press Esc, then release the left button. The red range disappears without cropping; Vertical crop stays active.
- — Press the left button again and drag out a new 40 px preview. Canceling did not submit the earlier drag.
- — Release to apply the new drag. Height becomes 160; B shifts up 40 px. The remaining blue line is only a guide.
Horizontal crop: remove a vertical strip
Horizontal crop deletes whole columns along the image’s width, useful for blank columns or unwanted sidebars.
- In the same floating main toolbar, hover to confirm Horizontal crop, then click to activate it.
- Inside the image, hold the left button and drag across the unwanted strip in either direction. The red preview spans the full height. N px is the number of columns to remove. Check the top and bottom of those columns for content you need.
- Release the left button to apply. Wait for processing and inspect the left/right join. Width decreases by N pixels; height stays unchanged.
You cannot remove the entire image width, and a zero-width range makes no change. Press Esc before releasing to cancel the preview while keeping Horizontal crop active. Click the active button again to exit cropping and return to panning.
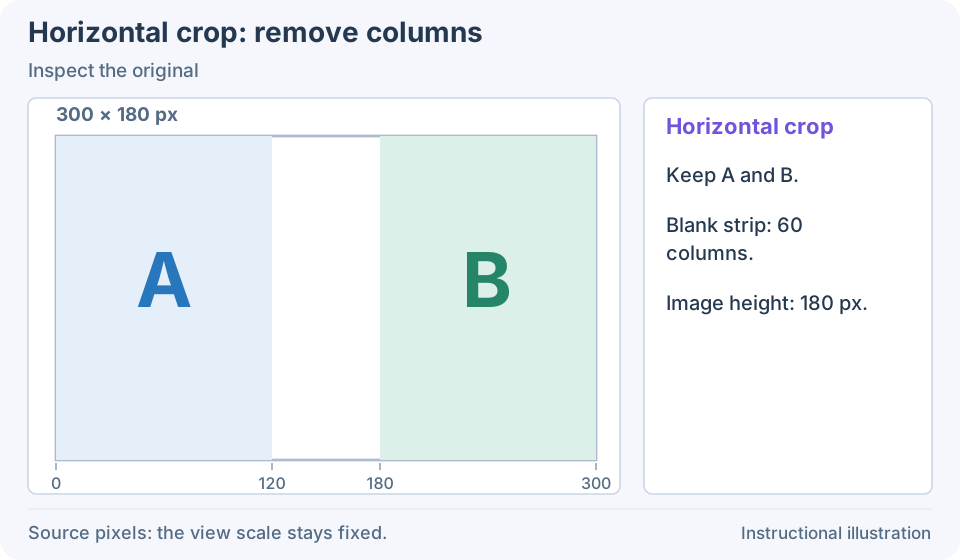
1. Inspect the original — The 300×180 image contains A, a 60 px blank strip, and B.
- — The 300×180 image contains A, a 60 px blank strip, and B.
- — Drag horizontally to preview 60 full-height columns. Release to remove them.
- — The output is 240×180. A and B join at x=120; B shifted left by 60 px.
Undo, output, and further work
Cropping and annotations share an editing history in the order you perform them. On the image canvas, click Undo or use the default Ctrl+Z on Windows / Command+Z on macOS to reverse the most recent edit. Redo defaults to Ctrl+Y on Windows / Command+Y on macOS. Undo immediately after a crop restores its strip and original dimensions; Redo removes it again. If you draw a stroke after cropping, the first Undo removes that stroke and the next restores the crop.
In this example, crop first and then add an orange circle. Watch the most recent edit change first as you undo and redo.
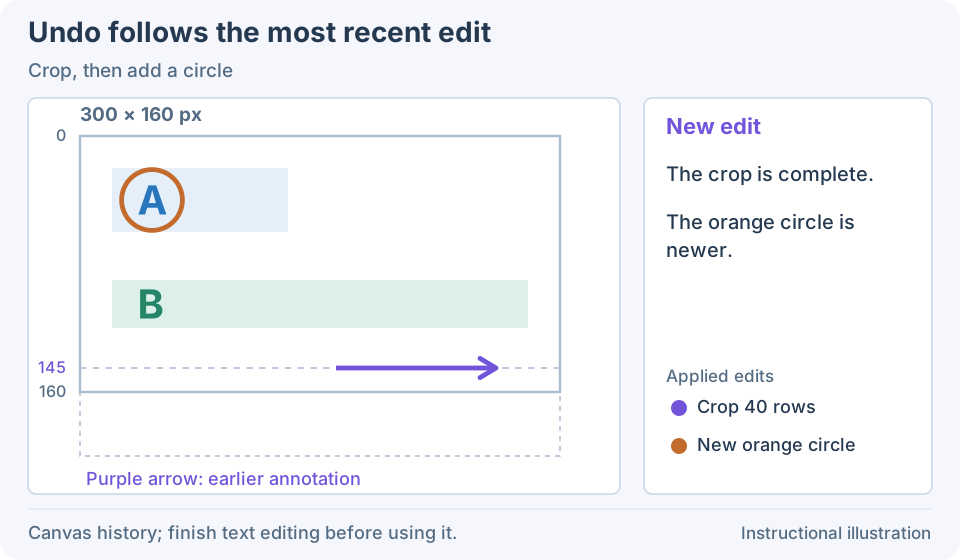
1. Crop, then add a circle — After the 40-row crop, add an orange circle. This circle is now the most recent edit.
- — After the 40-row crop, add an orange circle. This circle is now the most recent edit.
- — Undo removes the orange circle first. The base remains 300×160; the crop has not been undone.
- — Undo again restores the 40 rows and the 300×200 base. The earlier purple arrow remains.
- — Redo first reapplies the 40-row crop. The orange circle is still absent.
- — Redo again restores the orange circle. The image remains 300×160.
During annotation text input, Undo affects the text; press Esc to finish input before using canvas history. Recognition text editing also has its own text history. To undo an image crop, click a crop tool to return to the image canvas first. Wait for the canvas and toolbar to become available after cropping or restoring a strip before editing, undoing again, or exporting.
Crop before adding annotations when possible. Annotations added during this editing session keep their positions when a strip is removed from the underlying image. Check arrow targets and text placement afterward, and move them if needed. When you reopen a saved image, its existing annotations are part of the picture and are cropped with it.
The illustration keeps the same origin and viewing scale. A and B are part of the base image; the purple arrow is an editable annotation added in the current session. Compare their positions as the base image changes.
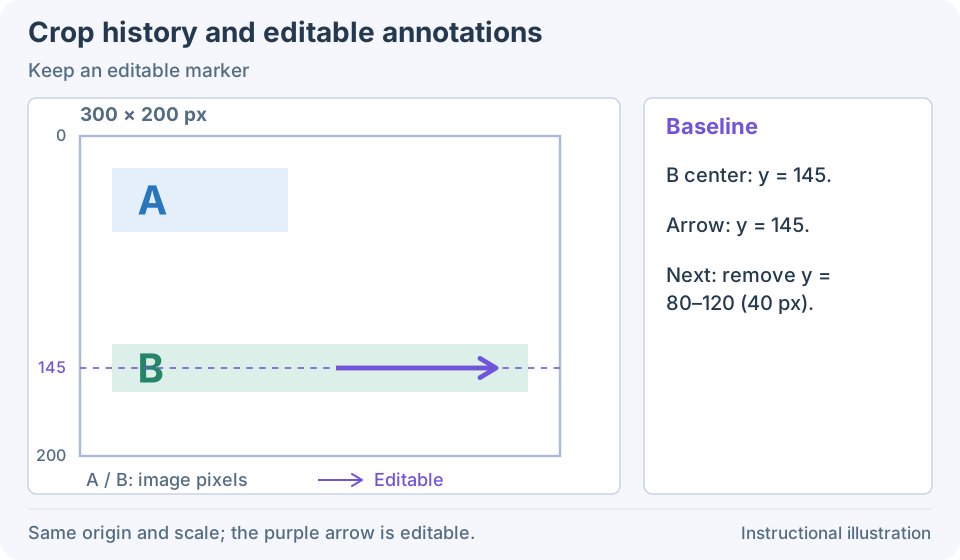
1. Keep an editable marker — The base B and editable purple arrow meet at y=145 in a 300×200 image.
- — The base B and editable purple arrow meet at y=145 in a 300×200 image.
- — Removing 40 rows moves base B to y=105. The arrow remains at y=145; height is 160.
- — With no intervening edit, Undo restores the 300×200 base and B at y=145.
- — Redo restores the 300×160 crop. Base B returns to y=105; the arrow stays at y=145.
Both sides start with the same appearance, but the arrow on the right has been saved into an image and reopened. Remove the same 40 rows and compare editable and saved arrow positions.
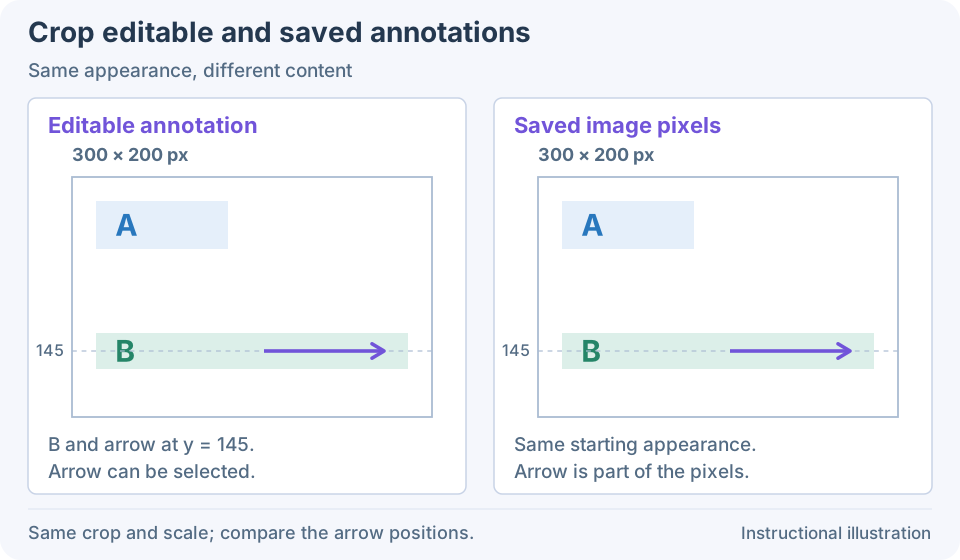
1. Same appearance, different content — The left arrow is editable. The right arrow was saved into image pixels; both start at y=145.
- — The left arrow is editable. The right arrow was saved into image pixels; both start at y=145.
- — After removing 40 rows, both base images move B to y=105. Only the editable arrow stays at y=145.
The toolbar can copy, save, or quick-save the current result and access text, table, barcode, and other recognition tools available in your edition. Recognition processes the current edited image; check crops and annotations first.
After a successful copy, save, quick save, or pin, the editing window stays open so you can continue working; output again after further edits. If a prompt appears when closing, choose Continue editing to return or Discard changes to close. When you need a local file, use Save as file and check that file first. The presence or absence of a closing prompt does not tell you whether a file has been saved.
Windows “Edit with Snow Shot”
The Windows file-integration Edit with Snow Shot action opens new pin windows. Enable annotation mode when opening for editing determines whether these start in annotation mode. With it enabled, draw immediately; otherwise enter annotation mode from the pin first.
This Windows setting does not change cropping in the independent image editor. See Pins and System integration.
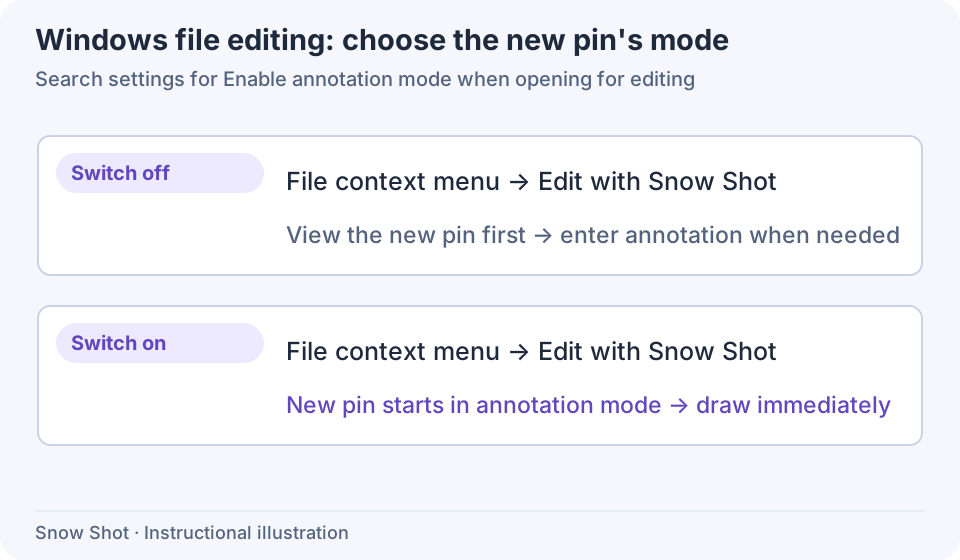
Instructional illustration. The Windows setting chooses image viewing or immediate annotation when opening a file for editing.
Images fail to load or are too large
For loading errors, check that the file is supported and undamaged. Open it in another image application if needed, then add it again. For size or memory errors, close other large-image windows or use a smaller image.
The view shrank but file dimensions did not: viewing zoom changed. Use Vertical or Horizontal crop to remove content, or Image collage to arrange and scale images in a composition.
Related: Scrolling screenshots, Annotation basics, and Image splitting.