
Exact dimensions, ratios and selection appearance
Use numeric selection controls for fixed-size illustrations, aligned captures or repeatedly identical regions. Start a selection with the screenshot shortcut (default F1 on Windows or Control+1 on macOS), then adjust it under Move. These controls change the captured region. For final file dimensions, see output size.
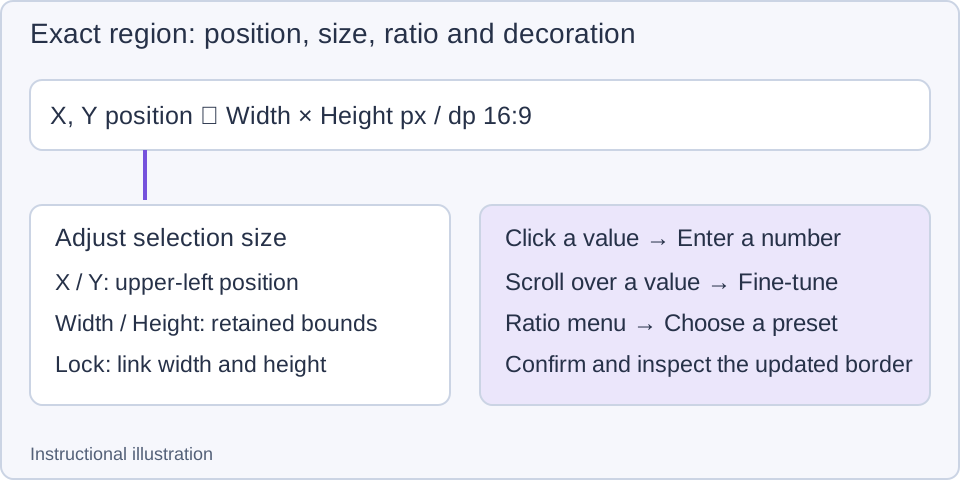
Instructional illustration: position and size values belong to the selection toolbar. The ratio menu and lock button serve separate purposes.
Enter an exact region
- Create a rectangular selection and locate the toolbar showing X, Y, Width × Height. Hover over a value to read its tooltip.
- Click a coordinate or dimension to open Resize selection. Set the upper-left position with X coordinate and Y coordinate, then enter the dimensions.
- To change width and have height follow, enable the ratio lock first. To enter independent dimensions, unlock it before entering both values.
- Click OK. The dialog closes and the selection border updates. Inspect the position and bounds before copying or saving. Cancel discards the coordinate, size and decoration adjustments. Preset additions or deletions that you confirmed separately remain saved.
Scroll over a numeric value to fine-tune that field directly, watching the border change. Values are limited by the available canvas. Coordinates cannot retrieve content outside the captured screen.
Scrolling over the canvas is a separate action. With a single rectangular selection confirmed, keep Move active without dragging and scroll over the canvas to expand or contract all four edges around the center. Reverse scrolling to adjust in the other direction; the pointer need not be near an edge. Expansion stops at the canvas bounds. This equal-edge adjustment can change the aspect ratio even when the ratio lock is enabled. Use an edge drag or numeric input when you need to preserve the ratio.
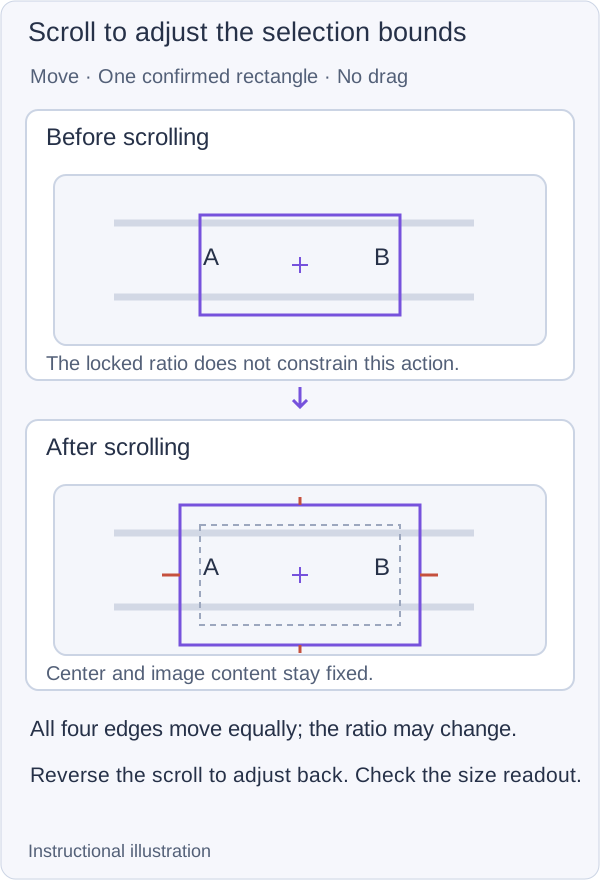
Instructional illustration: this adjusts capture bounds, can change the locked ratio and does not scale the image.
Settings → Screenshots → Interaction → Selection resize mode controls edge-drag behavior. Follow mouse movement adjusts by the pointer's movement; Follow mouse position makes the dragged boundary follow its position. After changing the mode, drag from the same selection edge to compare the behavior. You can still confirm exact dimensions numerically.
Ratio presets and temporary constraints
The Selection aspect ratio menu offers Free, 1:1, 3:2, 4:3, 16:9, 2:3, 3:4 and 9:16. For example, choose 16:9 for a landscape video cover or 1:1 for a square image. Recheck the bounds so the constraint does not crop important content.
Lock selection aspect ratio locks the current ratio; it does not force a standard preset. To resize freely again, unlock it and select Free. Holding the default Shift key while dragging a rectangular selection temporarily makes width and height equal (1:1), rather than preserving an arbitrary previous ratio.
Default Q snaps a rectangular selection to an aspect ratio:
- With the ratio unlocked, hold Q during a selection or edge-resize drag. The rectangle snaps to the nearest standard ratio, and the border and ratio control update together.
- Release Q. The snapped ratio stays locked. Keep watching the region while dragging to avoid losing important content.
- Pressing Q again with the ratio locked unlocks it and restores Free. You can also restore it manually using the lock button and ratio menu.
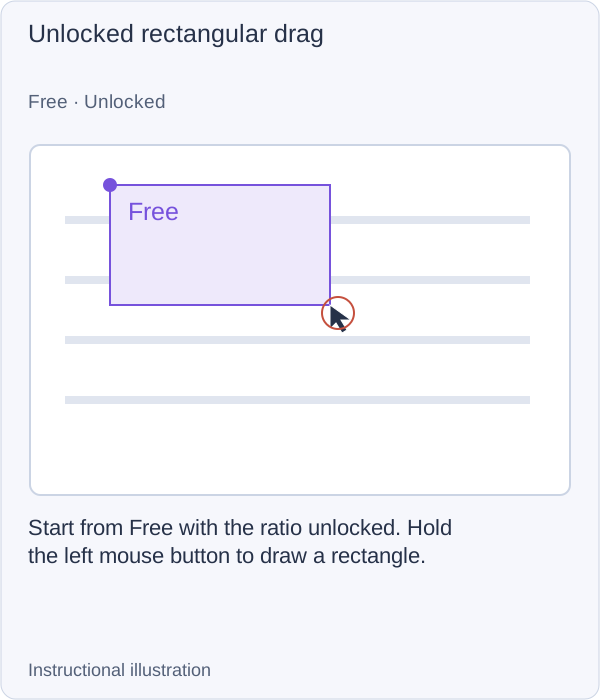
1. Unlocked rectangular drag — Start from Free with the ratio unlocked. Hold the left mouse button to draw a rectangle.
- — Start from Free with the ratio unlocked. Hold the left mouse button to draw a rectangle.
- — Keep the left button held and hold Shift. The current rectangle is constrained to 1:1.
- — Release Shift and move the pointer again. It is a temporary constraint; it does not lock 1:1.
- — In an unlocked rectangular drag, hold Q. This example snaps to 16:9; the nearest preset depends on the raw rectangle.
- — Release Q, then keep dragging. The selected 16:9 ratio stays locked instead of returning to Free.
- — Press Q once more to unlock, then continue dragging. Check Free and the new bounds before releasing the mouse.
Q does not apply to freehand regions or region-combination operations. If you changed the binding, check the ratio snap action under Settings → Application shortcuts.
Reuse the previous selection or save presets
Quick set in the adjustment dialog can load the current region, previous region or saved presets. To reuse a position and size:
- Set the current coordinates, dimensions and decoration correctly.
- Use Add preset, enter a descriptive name and confirm. The preset appears in the list.
- During a later capture, open the same dialog and select that name in Quick set. Check whether the current display layout still suits it, then confirm.
To remove a named preset, open Quick set and hover over its row. Click the delete icon that appears on the right. In Delete preset, check the name: Delete removes it permanently; Cancel keeps it. The current and previous selection entries do not have this delete action.
Adding and deleting presets each has a separate confirmation step. Once confirmed, the change is saved to the preset list, even if you later cancel Resize selection. To reverse it, add or delete the relevant preset again.
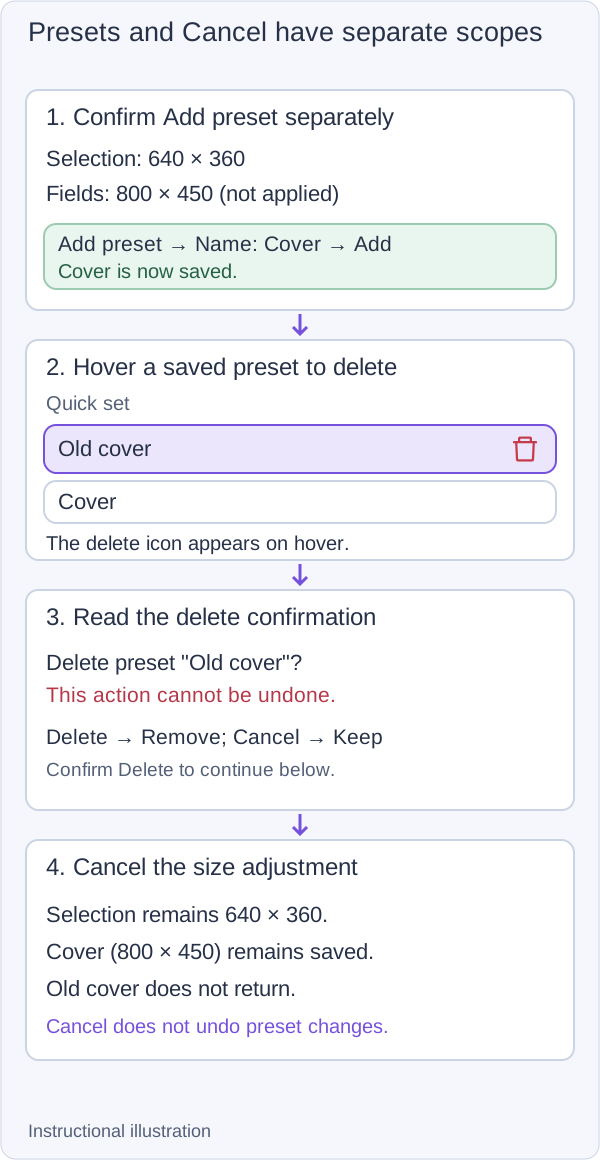
Instructional illustration: canceling an unapplied size adjustment keeps preset changes that were already confirmed.
The selection toolbar's preset menu also includes the previous selection. Display arrangement or scaling changes can constrain an old region to the current canvas. Inspect the actual border rather than relying on its preset name.
Corners, borders, shadows and units
Set Corner radius in the adjustment dialog for rounded rectangular output. Border type switches between Shadow and Border, revealing the corresponding width and color controls. Try a small width first and check that the decoration does not obscure content before saving. Custom irregular regions do not support rectangular corner-radius parameters.
Move also offers Logical pixel selection / Physical pixel selection. On scaled or Retina displays, logical coordinates may differ from image pixels. Decide whether you need an on-screen layout size or final file dimensions before choosing units. The Mac interface can also show points or dp unit hints. Open the saved image and inspect its dimensions rather than judging by visual size alone.
Capture interface colors and guides
Open Settings → Screenshots → Capture interface, make a change, then start another screenshot to inspect it. Selection borders, masks and guides here are interface aids. They are separate from the output image's border and shadow in the adjustment dialog.
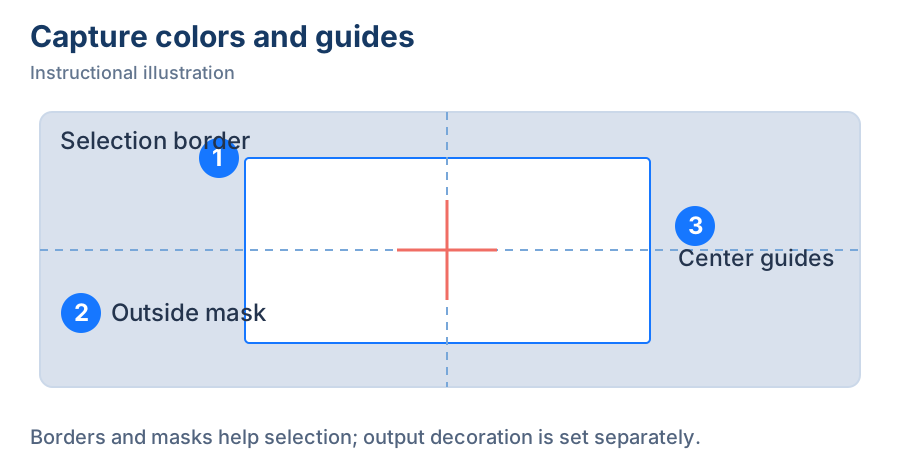
Instructional illustration: ① selection border, ② outside mask, ③ center guides.
Color picker display mode offers Hide when outside selection, Always show and Always hide. If you cannot find the magnified grid, inspect this setting, then read screen color picking.
Values change unexpectedly
If width and height change together, check the ratio lock. If a preset cannot apply, check screen bounds. If corner radius is unavailable, check for a custom region. If a border is hard to see, inspect its width and color. To draw a box around content, use a shape annotation rather than adding a border to the entire output selection.
Continue with multiple regions, irregular selections or copying and saving.