
OCR Not Working? Fix Setup and Text Errors
When Snow Shot OCR stalls during component preparation, misses characters or pastes unwanted line breaks, check resources, input quality and output formatting in that order. Follow these Windows and macOS steps to recognize screen text, correct it against the original and copy the result. Ordinary OCR runs locally; preparing components or changing models can require a connection. Tables, formulas and translation have separate service requirements.
Identify the failed stage
Change one condition per attempt. Replacing the model, source and detection strategy together makes the result hard to explain.
1. Recognize a small, clear region in the screenshot window
- Display the complete passage. Start with a few clear lines rather than an entire long image.
- Capture the text region. New configurations use F1 on Windows and Control+1 on macOS; check Global shortcuts for your actual binding.
- Include complete lines and character edges, excluding unrelated columns and controls. Click Text recognition in the selection toolbar and wait for the result.
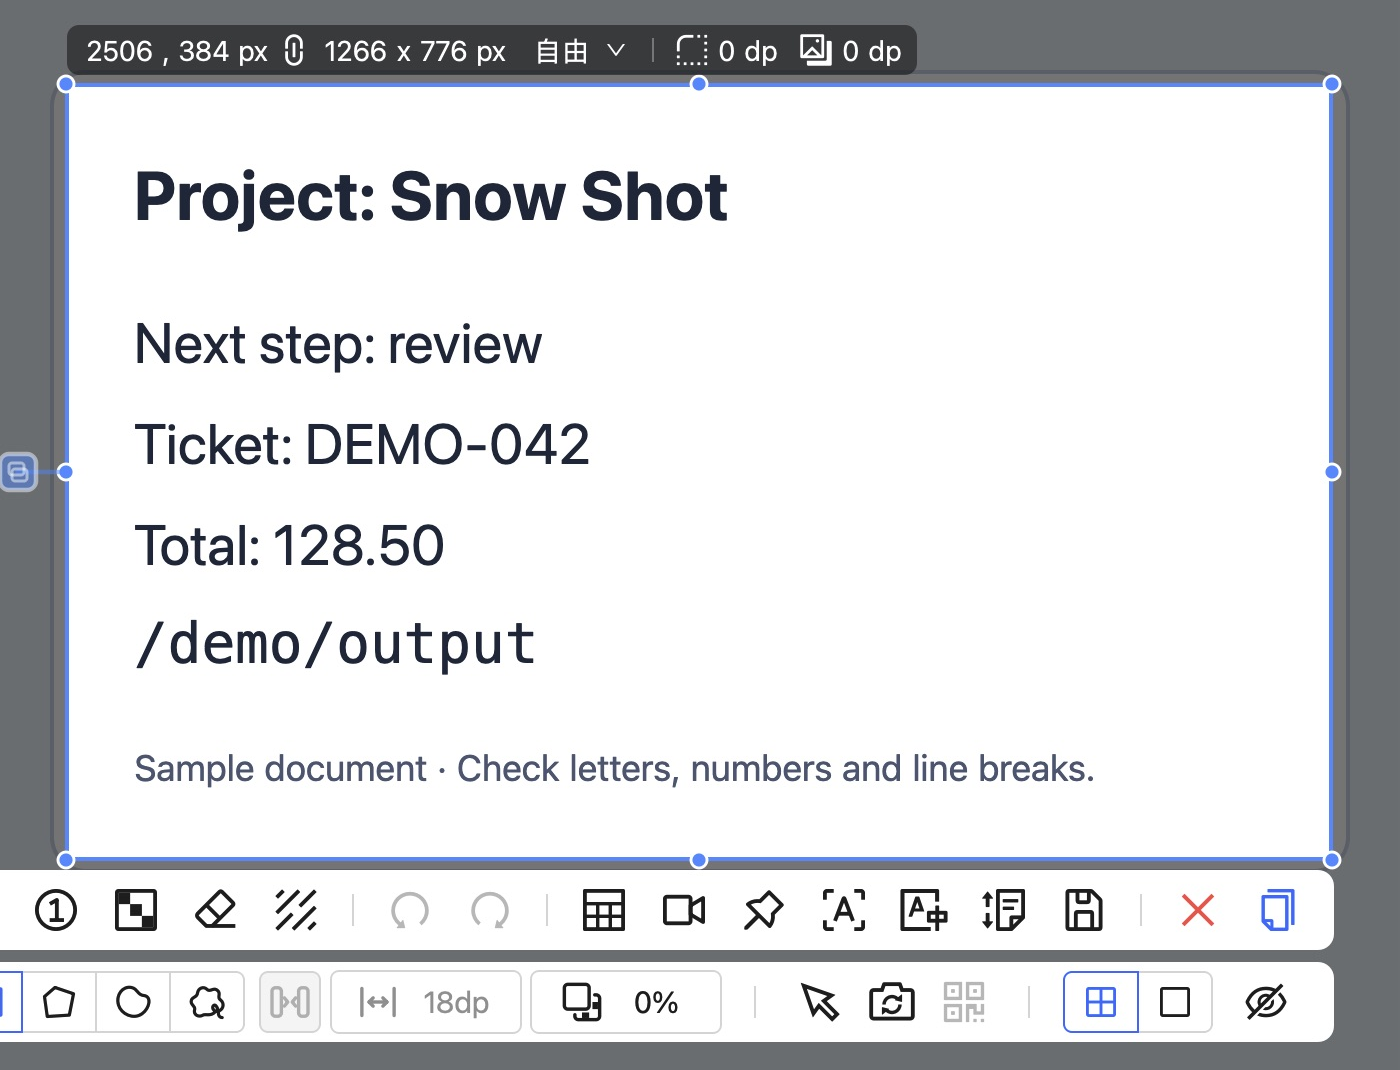
App screenshot. After selecting complete lines, use the Text recognition icon on the right of the toolbar. Hover to confirm its name; it is 文本识别 in the Chinese interface.
If Mini hides OCR from the screenshot toolbar, move Text recognition into the visible tools under Settings → Screenshot → Action toolbar → Screenshot toolbar settings, or start from the main window's Text recognition action. See offline preparation.
2. If preparation stalls, check resources first
Keep a connection available during preparation. After an error, check the proxy under Settings → Network & connections, correct it and enter recognition again. The Windows Full offline installer includes default OCR resources. Online installers and Mini should complete one actual recognition while connected before an offline test. A successful screenshot does not establish OCR readiness.
Open Settings → Text recognition & translation → OCR models & performance. Mini calls the page Text recognition. Small V6 is the default; Extra-small V6 and Medium V6 are alternatives. Compare the same passage, important characters and waiting time after a change. A larger model does not guarantee a particular correction and may require new resources.
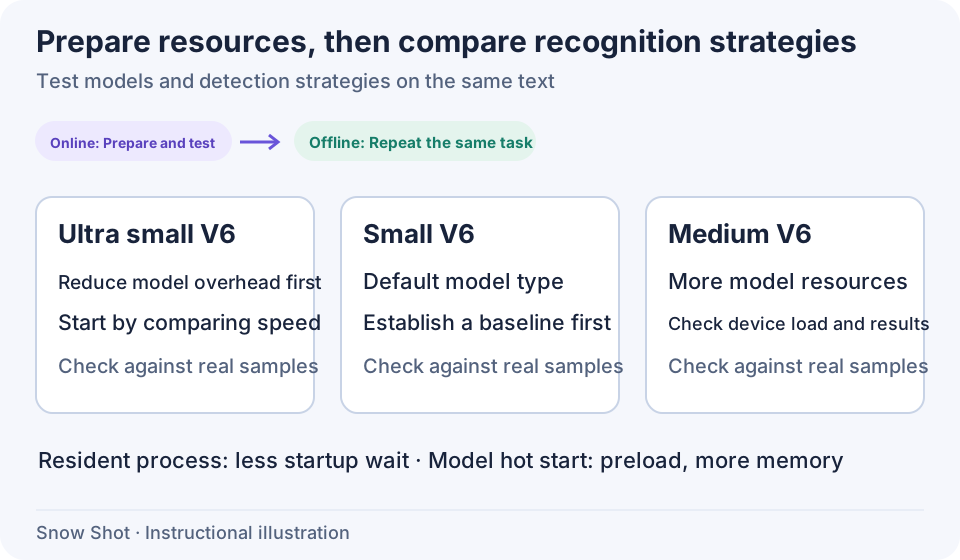
Teaching diagram. Confirm resource readiness before comparing models fairly.
3. Improve the input before adjusting detection
Compare numbers, capitalization, path separators and similar-looking characters with the original. In the example below, check DEMO-042, 128.50 and /demo/output individually. A plausible-looking paragraph is not enough to establish correctness.
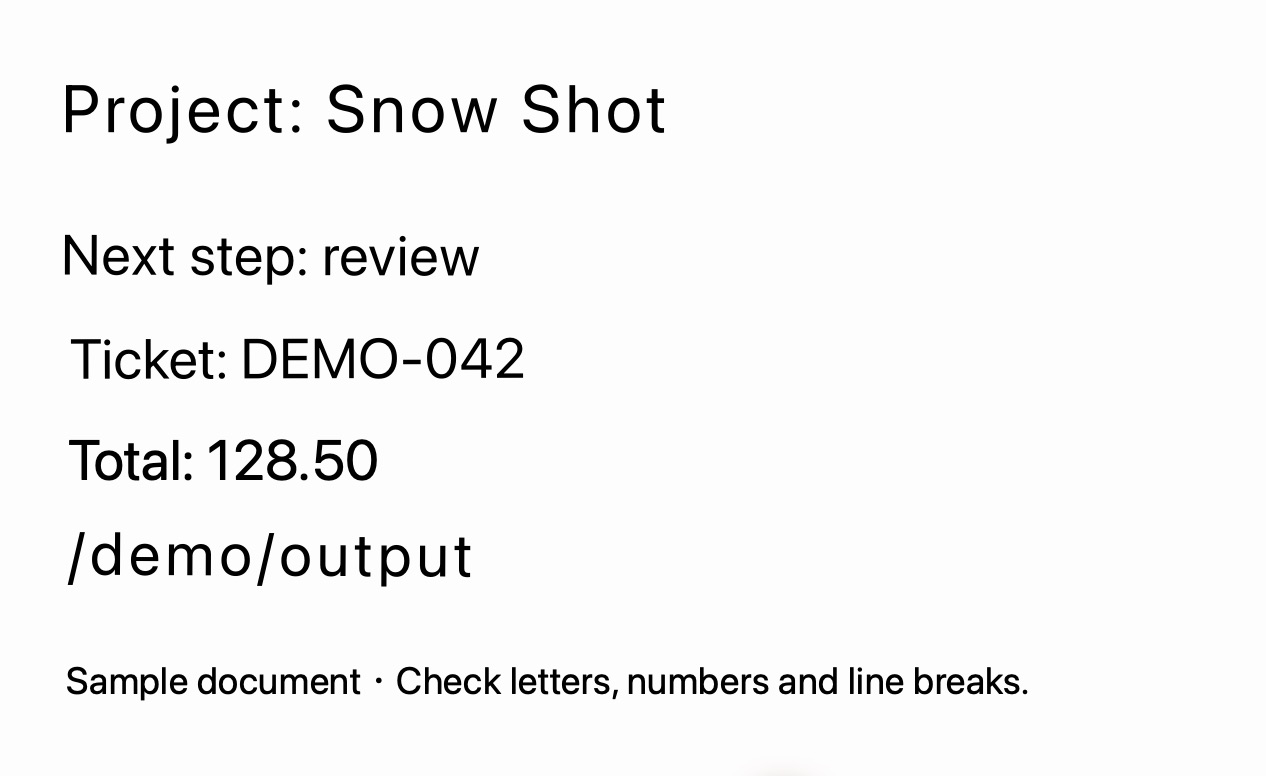
Actual recognition result in the screenshot workflow. Check letter O versus zero, the decimal point and the path separators.
For missing tiny text, enlarge it in the source app and capture complete lines again. If that fails, compare Limit long edge (faster) and Enlarge short edge (more details) under Text detection scaling. Extra detail can increase processing. A warning about a range exceeding 4K calls for a smaller region or separate pieces.
If reading order is wrong, recognize columns separately. For cells and table structure, use table recognition rather than expecting ordinary OCR to reconstruct a table.
4. Correct beside the original, then organize line breaks
Screenshot OCR offers Show original image and Edit in its properties toolbar. Show the original for comparison and enter editing to correct characters. Changes affect the current result. Undo an incorrect edit, or use Reset to discard the current text cleanup and restore recognition output. Capture again to change the source region.
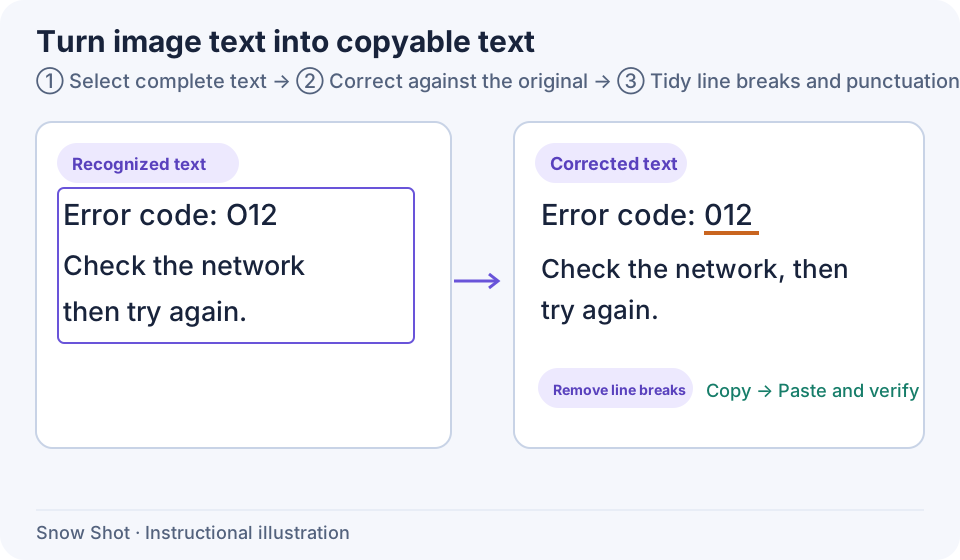
Teaching diagram. Correct content before formatting and copying, so layout changes do not get mistaken for better recognition.
Format and Punctuation organize the output. Start with Preserve line breaks for logs, addresses and lists. Try Remove line breaks or Smart formatting for continuous prose. Be cautious with full-width/half-width conversion in commands and paths. After each change, paste a small portion into the destination to check paragraph boundaries.
5. Check the text in its destination
Select a portion if that is all you need. For the whole result, clear a local selection before using Copy to clipboard. Paste once into a text editor or document and check content type, range and line breaks. For a persistent text file, save as TXT from the text editor and reopen it. An image saved from the capture is not editable text.
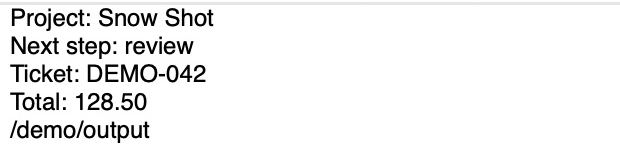
Detail of the actual pasted result. Check the ticket, amount, path and line breaks before saving or using it.
If the capture closes immediately after recognition, inspect Settings → Screenshot → Operation → Auto action after text recognition for a copy-and-finish action. Choose no action or editing mode if you need to inspect the result first, then recognize again. A closed window does not verify clipboard content.
For a report, include installer type, model, complete error, source dimensions, detection settings, a sanitized sample and expected text. For slow recognition, record first and subsequent attempts separately. Resident processes and warm start use extra memory; hardware acceleration depends on the device. Change one option and retest. Text recognition manual · Export logs · Download · Changelog.